GALILEO GALAXY USER GUIDE
27
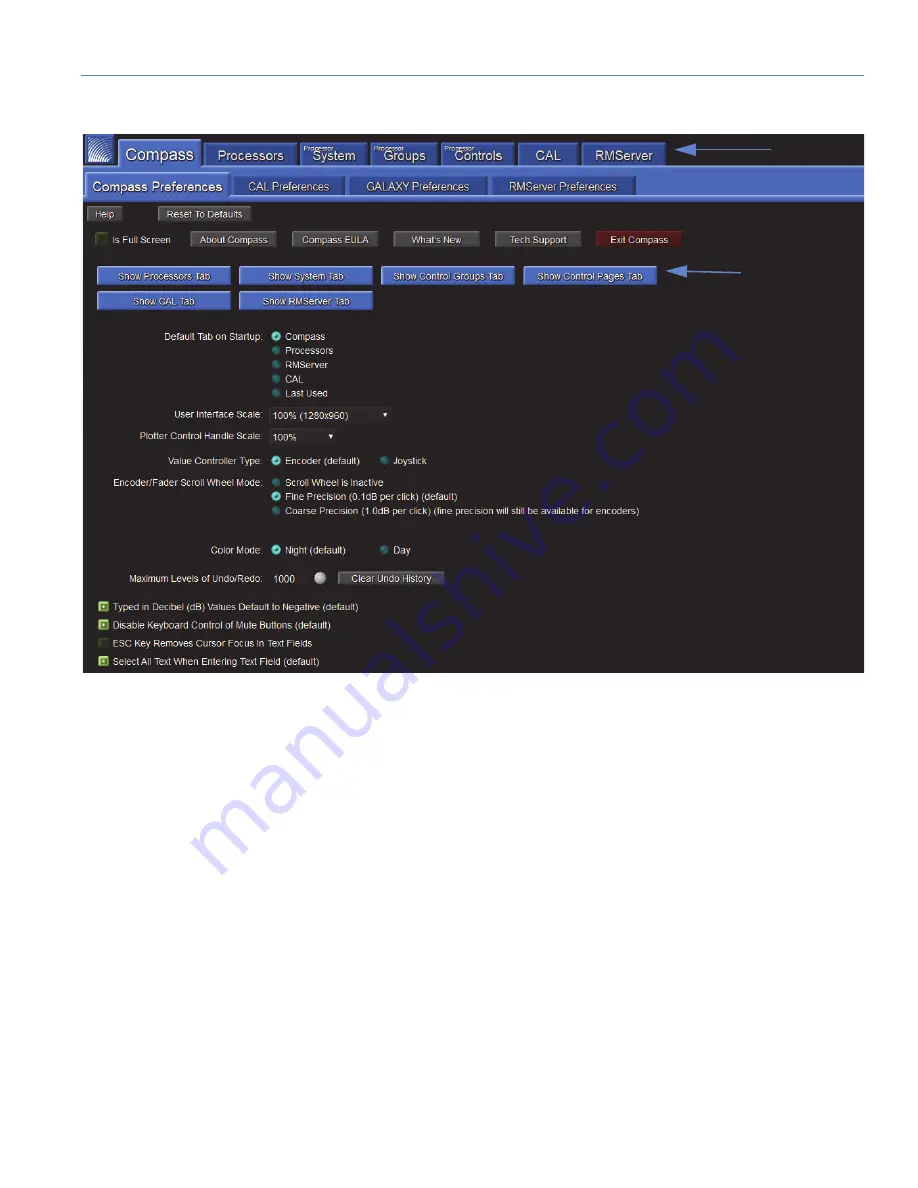
5. Start the Compass application on the computer. The default user interface for Compass is shown in Figure 11.
At this tab interface, the user can set a wide variety of preferences, including which tabs to show along the top of the
Compass interface. Preferences for GALAXY processor may also be set at this level (see “Setting Preferences” on
page 29).
Make sure the “Show Processors Tab” is selected. It will be blue when selected, gray when deselected.
6. Click on the top tab labeled “Processors,” which then displays the Inventory tab (Figure 12). Click the “Find Devices”
button in the upper-left corner to list the available GALAXY processors if they have not already been auto-discovered.
The GALAXY processor connected in Step 2 should automatically be listed. If it is not listed, verify that the switch is
properly configured and all cabling is correct.
7. Click the “Connect” button for each of the processors to establish the Client/Server connection.
Figure 11: Compass Default Landing GUI
Top Tabs
Top Tab Control
Buttons
Summary of Contents for Galileo GALAXY 408
Page 6: ...IMPORTANT SAFETY INSTRUCTIONS vi...
Page 10: ...CONTENTS x...
Page 16: ...CHAPTER 1 INTRODUCTION 16...
Page 50: ...CHAPTER 3 CONTROLLING GALAXY PROCESSORS WITH COMPASS 50...
Page 54: ...CHAPTER 4 GALILEO GALAXY NETWORK PLATFORM SPECIFICATIONS 54...
Page 66: ...APPENDIX C PRODUCT INTEGRATION 66...
Page 76: ...APPENDIX E ATMOSPHERIC CORRECTION 76 Figure 43 Atmospheric Correction Enabled and Displayed...
Page 83: ......


