background image

78

Before executing a DVB station search, you must
make the appropriate search settings.
Depending on the features installed in the TV set
and your personal requirements, you can make
the following settings:
All = search for all stations on the selected satelli-

te.

FTA only = search only for unencrypted (free-to-

air) stations on the selected satellite.

FTA (CI) = search for all FTA

stations and sta-
tions which can be
received with the CI
module. 

The menu item "FTA (CI)" is
available only if a CI module
has been installed and a CA
module is plugged into it.

Making the search settings

• Press the MENU key to open

the TV menu.

• Press the red key 

to open

the menu "Configuration".

• Press the appropriate numeric key (in this exam-

ple 


to select "DVB-S".

• Press the appropriate numeric key (in this exam-

ple 

to select "Search settings".

• Use the 

- +

key to select the desired setting.

• Press the Ok key to confirm the new setting.
• Press the EXIT key to close the TV menu.

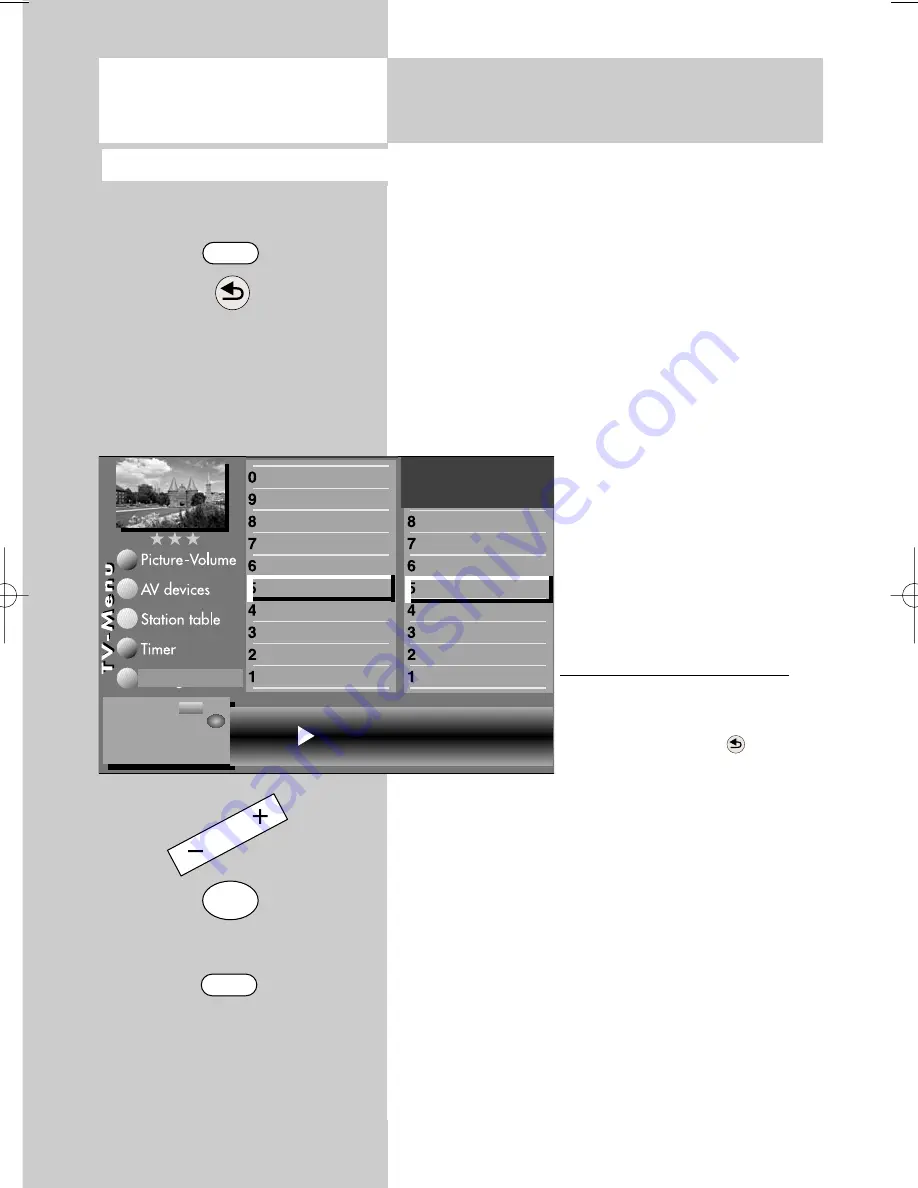
22.5 Setting the stations

Search settings

Calling the menu

MENU

The number of subjects and sections depends

on the selected scope of operation. Depending

on the configuration of the TV set, the various

menu items may be displayed in a different

order and numbered differently.

OK

EXIT

Stations     Free-to-air only

General settings

Manual search

Automatic search

Search settings

Satellit B

Astra 19,2°

DiSEqc system

LNB supply voltage

Function for F2
Function for F1

EURO sockets

DVB-C

DVB-T

DVB-S 

Analog-TV

Country

Language

Operating

Configuration

Change with

Accept value with    .

–   +

OK

Section 22.5 only in the case of corresponding equipment or conversion.

607 47 2026.A1  607 FHDTV-GB  10.10.2007  17:38 Uhr  Seite 78

Summary of Contents for LCD-TV (F)HDTV-set

Page 1: ...H O M E E N T E R TA I N M E N T O p e r a t i n g i n s t r u c t i o n s f o r a l l L C D T V F H D T V s e t s Metz always first class 607 47 2026 A1 07 40 01 LCD TV HDTV i n t e g r i e r t ...

Page 2: ...57 20 2 Collecting EPG Data 59 20 3 Using the EPG 61 Using the EPG Recording a Programme 64 21 Setting the Country and Language 65 22 Setting Stations Setting the reception mode 66 22 1 TV Standard2 for analogue stations 67 Analogue TV 68 Colour standard for analogue stations 69 22 2 DVB T Antenna suply voltage 70 2 Foreword Dear customer thank you for selecting a Metz LCD TV set We have equipped ...

Page 3: ... 1 Removing AV Devices 90 26 Initial Programme Position 91 27 Sound via HiFi Amplifier HiFi output 92 28 Display Configuration 94 29 DVB Radio Mode 95 30 Scope of Operation 96 31 Operation without the Remote Control 98 31 1 Connecting Headphones 98 32 Sound 1 Sound 2 99 33 Cleaning the TV Set 99 34 Connections on the Front 100 34 1 Connections on the Rear of the Set 101 35 Copying between AV Devic...

Page 4: ...ly with the European standard EN 60966 2 4 The antenna cable used for connecting the TV set must have a screening attenuation of at least 75 dB The use of non approved cables will invalidate the operating permission for the TV set For details of how to connect peripheral devices such as video recorders DVD players etc press the INFO key to call the help function select Connecting AV devices with t...

Page 5: ...ing the power cable or the aerial cable can damage the TV set even if it is swit ched off You should therefore discon nect the power cable and aerial cable from their outlets or from the TV set in the case of a thunderstorm The monitor may be opened and repaired only by a qualified person CAUTION HIGH VOLTAGES CAN KILL If repairs should be necessary consult your local dealer Always switch off the ...

Page 6: ...TV set must be switched on with the main power switch before it can be con trolled with the remote control The most important keys for normal use ON Switches the TV set on with program me position 1 or the programmed initial programme position selected or switches it OFF to the standby sta te Numeric keys direct station selection P P Selects the next previous pro gramme position Volume control Set...

Page 7: ...u Open the electronic programme guide EPG Open the Teletext window Mute Freeze frame Back to the previously selected station In the TV menu open the Configuration menu Display the date and time In the TV menu open the Timer window Display the station table In the TV menu open the station table or the station features window Display the sound functions In the TV menu open the AV devices window Disp...

Page 8: ...to switch the TV set to standby mode If you do not intend to use the TV set for a longer period switch it off with the main power switch Adjusting the volume The volume can be adjusted with the key Adjusting the picture and sound settings Call the picture settings with the blue key or the sound settings with the yellow key The setting box with the various functions is then displayed at the bottom ...

Page 9: ...n and manage ment of programme positions The TV set can store the settings for up to 2000 TV stations and 2000 radio stations in so called programme positions You can select any of these programme posi tions with the numeric keys with the oval rocker key P P or from the station table If you use the numeric keys for station selection the first digit you enter is nor mally the thousands digit If les...

Page 10: ... the cursor up key to select the last underlined item Use the cursor down key to select the menu lines and then press the OK key to display the explanation of the selected item You can select any underlined word in the table of contents the index or the explanation of a selec ted item with the cursor Pressing the OK key then displays the explanation for this word You can also scroll forwards and b...

Page 11: ...h the oval cursor control key or with the numeric keys When you press the OK key the current setting for the selected item is shown in the Setting win dow below the card file and can be adjusted with the key You can save the new setting by pressing the OK key which also returns you to the list of sec tions If you do not want to save the new setting press the MENU key to return to the correspon din...

Page 12: ...age After pressing the coloured pre selec tion key you can step through the sub jects sections or pages with the cursor control key or with the numeric keys If you wish to select a specific page enter its page number on the numeric keys If sub pages exist for the selected page the page numbers are displayed in black In the example shown here there are five sub pages You can step through these sub ...

Page 13: ...0 etc in order to select a page you want to see After positioning the cursor on the des ired page number press the OK key to display its contents Setting marks in Teletext 6 As a user of Teletext you will probably want to visit certain pages such as stock market news news pages or the weather forecast regularly In order to find these pages quickly you can set marks to suit your personal requiremen...

Page 14: ... TV set is capable of displaying subtitles When a programme for which subtitles exist starts the TV station displays a box showing the Teletext page on which these can be found Press the TEXT key to open Teletext If this is a TOP Text station the card file is dis played Press the OK key and open any avai lable page Use the numeric keys to enter the number of the page containing the subtitles Split...

Page 15: ...V menu appears on the screen Press the red key The menu Configuration is displayed Use the corresponding numeric key in this example to select the menu item EURO sockets Use the cursor control key to select EURO 1 EURO 2 or EURO 3 Press the OK key and then in the setting win dow use the key to select Programme chan ge on Press the OK key to save the new setting Press the EXIT key to close the TV m...

Page 16: ...witch the TV set to playback mode Select any programme position Press the AV key Use the corresponding numeric key to select the AV device you want to use The TV set now changes from the current pro gramme to the selected playback device Start the replay function on the AV device This AV selection remains active until you switch to any other programme position After watching the film from the AV d...

Page 17: ...ct set tings for Pr Use the corresponding numeric key in the example to select the menu item VCR Use the key to select Opt 1 If this setting does not produce a satisfactory result you can try using Opt 2 Press the OK key to save the new setting Press the EXIT key to close the TV menu Opening the menu The number of subjects and sections depends on the selected scope of operation Depending on the co...

Page 18: ...trol key to select the third line Save as standard values If you wish to save the new setting use the key to select Yes Press the OK key to save the changed setting as a standard value Press the EXIT key to close the TV menu If the standard values do not provide a satisfac tory picture in some programme positions you can make settings for these positions which dif fer from the standard values See ...

Page 19: ... to select the menu item Brightness Use the corresponding numeric keys in this example for the Backlight control to select the desired menu items Use the key to change the settings for Backlight control Press the OK key to save the changed setting as a standard value Press the EXIT key to close the TV menu OK EXIT The number of subjects and sections depends on the selected scope of operation Depen...

Page 20: ...m Brightness The various menu items can be selected with the aid of the numeric keys Use the key to change the settings for Pictu re improvment Press the OK key to save the new settings The picture shows the factory settings Press the EXIT key to close the TV menu Opening the menu MENU OK EXIT The number of subjects and sections depends on the selected scope of operation Depending on the configura...

Page 21: ...numeric keys Use the key to change the settings for Motion compensation Press the OK key to save the new settings The picture shows the factory settings Press the EXIT key to close the TV menu Opening the menu MENU OK EXIT The number of subjects and sections depends on the selected scope of operation Depending on the configuration of the TV set the various menu items may be displayed in a differen...

Page 22: ...menu items Use the cursor control key to select the desired menu items Use the key to change the settings for Bor der colour Press the OK key to save the new settings The picture shows the factory settings Press the EXIT key to close the TV menu Opening the menu MENU OK EXIT The number of subjects and sections depends on the selected scope of operation Depending on the configuration of the TV set ...

Page 23: ...ange the settings for Zoom Panorama Press the OK key to save the new settings The picture shows the factory settings Press the EXIT key to close the TV menu The functions Panorama and Zoom can be combined with each other OK EXIT The number of subjects and sections depends on the selected scope of operation Depending on the configuration of the TV set the various menu items may be displayed in a di...

Page 24: ...ound and the menu item General picture set tings are pre selected Use the cursor control key to select the menu item Pic settings for Pr And press the OK key Use the corresponding numeric keys in this example for noise reduction to select the desired menu items In the setting window use the key to change the setting Press the OK key to save the new setting Press the EXIT key to close the TV menu T...

Page 25: ... see pages 18 and 20 The individual settings made here which differ from the general settings remain saved Press the OK key to save the new settings Press the EXIT key to close the TV menu OK EXIT MENU F2 Picture sharpness gen Noise reduction gen Colour offset 0 VCR off Sound corrections Colour standard3 7 Picture quality Picture correct Enter logo Station contained in EPG CA module5 Signal qualit...

Page 26: ...e Save as standard value If you wish to save the new setting use the key to select Yes Press the OK key to save the new settings as standard values Press the EXIT key to close the TV menu If the standard values do not provide satis factory results for some programme posi tions you can make different individual set tings for these positions See sections 12 1 MENU OK EXIT The number of subjects and ...

Page 27: ...f the SRS WOW function is active the menu items stereo wide and spatial sound are disabled Opening the menu MENU OK EXIT The number of subjects and sections depends on the selected scope of operation Depending on the configuration of the TV set the various menu items may be displayed in a different order and numbered differently 2 Possible only on sets equipped with this function 3 See glossary fo...

Page 28: ... Volume correction In the setting window use the key to change the setting Press the OK key to save the new setting Press the EXIT key to close the TV menu The function Volume correction in the menu General sound settings does not overwrite the function Volume correction in the menu Sound settings for Pr Opening the menu 12 General Sound Settings MENU OK EXIT The number of subjects and sections de...

Page 29: ...ue press the key and select Yes Press the OK key to save the new setting Press the EXIT key to close the TV menu MENU OK EXIT The number of subjects and sections depends on the selected scope of operation Depending on the configuration of the TV set the various menu items may be displayed in a different order and numbered differently 2 Possible only on sets equipped with this function 3 See glossa...

Page 30: ...elect Spatial sound or Base width with key allocated in the example or 0 In the setting window use the key to change the setting Press the OK key to save the changed setting Press the EXIT key to close the TV menu Opening the menu OK EXIT The number of subjects and sections depends on the selected scope of operation Depending on the configuration of the TV set the various menu items may be display...

Page 31: ...e corresponding numeric key in the example to select Sound settings for Pr Press the OK key and then in the setting widow use the key to change the setting Press the OK key to save the new settings Press the EXIT key to close the TV menu Individual sound settings can also be made in the station table MENU OK EXIT OK Volume correction 15 Forced mono7 Tone settings Volume correction Picture Volume C...

Page 32: ...corresponding numeric key in the exam ple to select Sound settings for Pr Use the corresponding numeric key in the example to select Tone settings In the setting window use the key to change the setting Press the OK key to save the new settings Press the EXIT key to close the TV menu Individual sound settings can also be made in the station table MENU OK EXIT The number of subjects and sections de...

Page 33: ... Use the corresponding numeric key in the example to select Sound settings for Pr Use the corresponding numeric key in the example to select Forced mono In the setting window use the key to change the setting Press the OK key to save the new settings Press the EXIT key to close the TV menu Individual sound settings can also be made in the station table Opening the menu MENU OK EXIT Forced mono on ...

Page 34: ...t the new setting will overwrite the general sound settings see pages 26 The individual settings made here which differ from the standard values remain saved Press the OK key to save the new settings Press the EXIT key to close the TV menu MENU F2 OK EXIT The number of subjects and sections depends on the selected scope of operation Depending on the configuration of the TV set the various menu ite...

Page 35: ...le to select the func tion Zoom Panorama Use the cursor control key to select the menu item Automatic zoom Use the key to change the setting Press the OK key to save the new setting Press the EXIT key to close the TV menu Opening the menu MENU OK EXIT The number of subjects and sections depends on the selected scope of operation Depending on the configuration of the TV set the various menu items m...

Page 36: ...ntrol key to select Settings and press the OK key In the setting window use the cursor control key to select the menu item Acti vate and then use the key to set the childlock to Active Use the cursor control key to select Code and enter your personal 4 digit code with the numeric keys Make a note of this code Press the OK key to save the new setting Press the EXIT key to close the TV menu Opening ...

Page 37: ...ssword with the numeric keys Make a note of this code since the child lock can be deactivated only if the correct code is entered Press the OK key to save the settings Press the EXIT key to close the TV menu Switch off the TV set with the key The childlock is not fully activated until the TV set is switched off Deactivating the childlock If the childlock is active a window requesting your personal...

Page 38: ... key to save this setting Press the EXIT key to close the TV menu At the programmed time a window with the reminder is displayed on the screen You can close this window by pressing any key on the remote control If you do not want the reminder to appear every day you must clear the time in the menu by pressing the ll key Opening the menu MENU OK EXIT OK The number of subjects and sections depends o...

Page 39: ...c keys Press the OK key to save the setting Press the EXIT key to close the TV menu At the programmed on time the TV set is switched on from the standby state red LED lights You must confirm this automatic action by pressing any key on the remote control If this is not done the TV set will switch back to the standby state after 10 minutes This ensures that the TV set does not stay on if you are no...

Page 40: ...an then start the internal clock precisely by pressing the OK key when the time you have entered is reached Press the numeric key to select Current date In the setting window enter the date with the numeric keys Press the OK key to save the settings Press the EXIT key to close the TV menu The local time offset is the difference between the local time where the TV set is installed and Greenwich Mea...

Page 41: ... overrun time For VPS recordings the TV set is automatically switched to the programme position from which the recor ding is to be made at a time which is the number of minutes programmed as the VPS lead time before the programmed starting time for the recording By default the TV set switches to this programme position about one hour before the pro grammed start time for a VPS recording Setting th...

Page 42: ...d time to 3 minutes and the overrun time to 10 minutes At the programmed start time minus the pro grammed lead time of three minutes the TV set is either switched on from the standby state red LED lights with the programme position for ITV selec ted whereby the screen remains dark but the programme is sent via the EURO socket to your recorder or switched to the programme position for ITV if it is ...

Page 43: ...nged only if its frame is active red By using the numeric keys or the P P rocker switch it is possible to select a different AV channel slot or an analogue channel from the second receiver If you wish to display the picture from a connected AV device as a picture in picture press the AV key and then use the numeric keys to select the desired AV device If you wish to display the picture from anothe...

Page 44: ...Setting a timer manually for a recording Press the F2 key If you press F2 brie fly the function programmed for F2 see Section 18 Programming the function keys is executed If you hold down F2 for about two seconds all possible selections are dis played If all possible selections are displayed press the corresponding numeric key in the example to open the timer menu If a timer already exists press t...

Page 45: ...I key or overwrite it with the numeric keys Press the cursor control key and use the key to select the recording device connected to the TV set which is to be used for the recording Press the OK key to save the programmed set tings The settings are stored in the timer memory Press the EXIT key to close the TV menu Clearing a timer Press the F2 key Press numeric key to open the timer menu Use the c...

Page 46: ...e displayed Press numeric key to open the timer menu window The timer menu window displays the programme position the date and the EPG data for the current programme or for the next two hours If there is more than one AV device connected to your TV set use the cur sor control key to select the propo sed recording device and use the key to select the desired device Press the OK key to save the sett...

Page 47: ... menu remain active until you switch to a different program me position or switch off the TV set Zoom Picture position After selecting the function Zoom you can adjust the zoom factor with the key In addition you can move the pictu re position 4 up and down on the screen in order for example to keep the station logo or the subtitles visible To change the picture position press and hold the F3 key ...

Page 48: ... zoom the picture The panorama function can be activated and deactivated in the menu item General picture settings of the menu Picture and sound 16 9 Full picture This function serves to display pictures from exter nal devices such as a 16 9 video recorder with the correct aspect ratio 17 Special Functions Picture format Standard 4 3 Panorama 16 9 full picture Panorama 16 9 full picture Zoom Openi...

Page 49: ...unction keys is execu ted Press numeric key to select the function Picture position vertical You can now use the key to move the picture up and down on the screen so that for example the station logo or the subtitles are visible This setting is not saved If you wish to save it as a global setting use the procedure described in Section 11 to set it 17 Special Functions Picture Position F3 Special f...

Page 50: ...function keys Press F2 for approx 3 seconds and the max possi ble selection is displayed Press numeric key and select the Programme language function Select a language with the cursor control key Symbol in grey Other audio options e g dd Dolby digital are available but are not selected Symbol in white One of the audio options has been selected DIGTAL AUDIO DIGTAL AUDIO 17 Special Functions Audio l...

Page 51: ...rs on the screen Use the cursor control keys to select the des ired image folder Press the OK key to open the image folder Use the cursor control keys to select the individual images Press the OK key to open the selected image Using the green key the selected image can be rotated clockwise with the red key it can be rotated counter clockwise Note Images that have already edited on a PC cannot be r...

Page 52: ...ontrol keys to move the red zoom quadrangle in the image in order to determine the image section to be magnified Press the OK key for a magnified display of the selected image section Use the cursor control keys to scroll the magnified image section To return to the full screen press the key repeatedly until the zoom message disappears 52 Opening the menu 17 Special Functions JPEG Photograph Displ...

Page 53: ...ual images display time 3 60 seconds can be adjusted with the key Press the OK key to start the slide show During the slide show the II key has the Pause function Press the II key to resume the slide show When the slide show is finished or stopped with OK or EXIT the photo graph viewer appears again Press EXIT to return to the TV picture Slide Show Photo Viewer Start Stop Pause II Endless Time 3s ...

Page 54: ... key and then use the cursor con trol key to select one of the available functions Press the OK key to assign this function to the selected function key the selected function is marked with X Press the EXIT key to close the TV menu If a function key is pro grammed with a func tion this function can be called by briefly pres sing the function key Pressing and holding the function key displays a lis...

Page 55: ...u In normal TV mode the mute key is used as follows Press it once to reduce the volume by 12 scale divisions Press it again within five seconds to reduce the volume to 00 Pressing the key once again restores the volume to its original level During films for the blind the scenes are descri bed in the dialogue intervals Under Dual chan nel select Audio 2 if you want to receive films for the blind wi...

Page 56: ...e recording switching to Mode 2 could solve this problem Opening the menu MENU OK EXIT OK Data Logic mode 2 Data Logic adjustm CI dialogue via EPG settings Display configuration Operating Sound settings HiFi output2 Init prog position Function for F2 Function for F1 EURO sockets DVB C DVB T DVB S Analog TV Country Language Operating Configuration Change with Accept value with OK F1 ...

Page 57: ...I are similar in principle but their content may differ in the detail offered The function is activated by pressing the button marked EPG NexTView details8 Before NexTView8 details can be received a new programme slot must be created in the menu If the menu does not contain a slot for NexTView8 the following text applies A message will appear for all slots programmed to receive NexTView In this wa...

Page 58: ...e previously confir med setting has been retai ned In countries where NexTView data8 is unavailable the menu setting should read EPG DVB SI as illustrated Not possible with an external receiver Opening the menu MENU OK EPG NextView DVB SI Pr selection in stationtable NextView prog Kabel 1 retain DVB SI selection TV Data Logic adjustm CI dialogue via EPG settings Display configuration Operating Sou...

Page 59: ...be received via DVB T or DVB C 1st receiver and via DVB S 2nd receiver Special notes The TV set s channel table lists all availa ble channels in the programme guide provided you do not make another selec tion in the channel table menu Channels broadcasting on a time shared basis e g arte Kinderkanal must be saved in separate programme slots see 24 If you include all channels in the EPG you won t b...

Page 60: ...ttings from the Configu ration menu and under Prog select in the channel table select Channels 1 50 using the key and save by pres sing OK The collection process will be halted if videotext is opened a recording has been programmed under AV Recording a preset recording is running or will begin in an hour the videotext subtitle function is active If the TV is switched to standby during the collecti...

Page 61: ...grammes starting at or after this time Back to the previous program me of the selected station Show all following programmes of the selected station Forward to the following pro gramme of the selected station blue Select all programmes yellow Programme selection on the basis of the selected user and his interests white User can set interests green Select user father mother teenager child red Make ...

Page 62: ...rests Press the white key Use the cursor control key or the cor responding numeric key to select one of the subjects Use the cursor control key to move to the other side Use the cursor control key or the corresponding numeric keys to select one of the subjects and mark X it by pressing the OK key Up to nine subjects of interest can be mar ked for each user You can delete a mark X by pressing the O...

Page 63: ...bout the programme currently showing provided the respec tive station broadcasts such information Repeatedly press the green key to view additional information about the following programme provided the respective station broadcasts such infor mation This information can also be accessed while a programme is running To hide the information press EXIT Not possible with an external receiver Pr 4 Ste...

Page 64: ...order Insert a cassette Press the red key on the remote control If a normal video recorder is connec ted Switch on the video recorder Insert a cassette Press the red key on the remote control to programme the TV timer see also Direct recording OTR On the AV programme position of the video recorder programme a timer with the data and time of the programme which will be provided by the TV timer Open...

Page 65: ...guage or Country Press the OK key and then use the cursor control key to select the desired language or country Press the OK key to con firm your selection Press the EXIT key to close the TV menu Opening the menu MENU OK The number of subjects and sections depends on the selected scope of operation Depending on the configuration of the TV set the various menu items may be displayed in a different ...

Page 66: ...n For further details please consult your local cable provider or TV dealer or search for DVB C in the Internet DVB S The digital broadcasting tech nology that can be received via a satellite Ask your local TV dealer about it or find out more at www lyngsat de Select the reception mode to match the broadcasting tech nology available in your area Setting the reception mode Press the MENU key to ope...

Page 67: ...e menu item Search set tings is already selected Press the OK key and in the setting window use the key to select the desired TV standard Press the OK key to confirm your selection Press the EXIT key to close the TV menu Opening the menu 22 1 Setting Stations TV Standard 2 for analogue stations MENU The number of subjects and sections depends on the selected scope of operation Depending on the con...

Page 68: ...e menu item Start station search by pressing the OK key The TV set starts to search for available stations A station table with the newly found stations is displayed on the left half of the screen If a sta tion table already existed before the search the newly found stations are automatically appen ded after the last existing station After completion of the search all stations which have been foun...

Page 69: ...column Use the corresponding numeric key in the example to select Colour standard Use the key to select the desired colour stan dard or to step through the available colour standards until the picture is displayed clearly Press the OK key to confirm your selection Press the EXIT key to close the TV menu Opening the menu 22 1 Setting Stations Colour standard for analogue stations MENU F2 EXIT OK Co...

Page 70: ... Configuration menu Use the corresponding numeric key in the exam ple to select the func tion DVB T Press the OK key and in the setting window use the key to select the antenna supply vol tage Press the OK key to save the new settings Press the EXIT key to close the TV menu 22 2 Setting Stations DVB T Antenna suply voltage Opening the menu MENU OK The number of subjects and sections depends on the...

Page 71: ...ier Use the corresponding numeric key in the exam ple to select Search settings In the setting window use the key to select one of the following All search for all stations FTA only search for only unencrypted free to air stations FTA CICAM search for FTA stations and sta tions which can be decoded with a CI module accessory Press the OK key and use the corresponding numeric key in the example to ...

Page 72: ...red station select the menu item Mod parame ter and use the key to change the setting there to Manual You can then enter further data After input of the station data use the cursor control key to select the menu item Station search and press the OK key to confirm your selection The station settings are saved 22 2 Setting Stations Manual DVB T station search Opening the menu MENU The number of subj...

Page 73: ... is now on the line Symbol rate 1 The most common symbol rates are already preset Usually these settings do not need to be modified If the symbol rate settings do not yield the desired result set other sym bol rates and save them by pressing OK Ask your cable operator for details Press the cursor control key to select the menu line Start station search Press the OK key to start the search The TV s...

Page 74: ...ther data of the desired station select the menu items Modulation and Symbol rate and use the key or the numeric keys to change the settings there After input of the station data use the cursor control key to select the menu item Station search and press the OK key to confirm your selection The station settings are saved 22 3 Setting Stations Manual DVB C station search Opening the menu MENU The n...

Page 75: ...e menu Confi guration Press the appropriate numeric key in this exam ple to select DVB S Press the OK key and in the setting window use the key to switch the LNB supply voltage on or off Press the Ok key to confirm the new setting Press the EXIT key to close the TV menu If the TV set is connected to a community antenna the LNB supply voltage must always be set to Off 22 4 Set up of satellite syste...

Page 76: ... the OK key to confirm the selection The cursor is now located in front of DiSEqC system in the set ting window Use the to select Yes or No Press the OK key to confirm the new setting Press the EXIT key to close the TV menu 22 4 Set up of satellite system DiSEqC system i Calling the menu MENU The number of subjects and sections depends on the selected scope of operation Depending on the configurat...

Page 77: ...c station search Use the cursor control key to select Low band or High band The settings depend on the components installed in the satellite antenna For the correct settings please consult the data sheet or the label of the LNB s being used Press the OK key to confirm the new settings Press the EXIT key to close the TV menu Calling the menu 22 4 Set up of satellite system Selecting satellites MENU...

Page 78: ...c key in this exam ple to select DVB S Press the appropriate numeric key in this exam ple to select Search settings Use the key to select the desired setting Press the Ok key to confirm the new setting Press the EXIT key to close the TV menu 22 5 Setting the stations Search settings Calling the menu MENU The number of subjects and sections depends on the selected scope of operation Depending on th...

Page 79: ...ey to select the desired satellite Use the cursor control key to move to the menu line Start station search Press the OK key to start the station search The TV set searches for the specified stations and places them in a station table which is then displayed If desired you can sort or move stations to other positions in the table or delete unwanted stations For details see Section 24 of the operat...

Page 80: ...bol rates and enter the symbol rate with the numeric keys In the setting window use the cursor control key to select the line Start station search and press the OK key to start the search The station is placed in the station table If des ired you can sort or move stations to other posi tions in the table or delete unwanted stations For details see Section 24 of the operating instructions for the T...

Page 81: ... this example to select General settings In the setting window use the key to set Update data to On Press the OK key to confirm the new setting Press the EXIT key to close the TV menu Calling the menu 22 5 Setting the stations Updating the data The number of subjects and sections depends on the selected scope of operation Depending on the configuration of the TV set the various menu items may be d...

Page 82: ...cters with the red key or the complete logo with the II key Set the desired logo by repeatedly pressing the various numeric keys The lowercase letters are displayed after the uppercase letters Press the OK key to save the new logo Press the EXIT key to close the TV menu Opening the menu MENU F2 EXIT OK The number of subjects and sections depends on the selected scope of operation Depending on the ...

Page 83: ...ation is to be inserted If the station s you have selected were pre viously in programme posi tions with lower numbers than the insertion position they are inserted before this position if they previously had higher numbers they are inserted after this posi tion To move the selected station s select the pro gramme position to which the station s is are to be moved Use the key to copy or move the s...

Page 84: ...ect the AV device you wish to register and press the OK key Press numeric key and use the key to select the appropriate signal types OUT IN for this device and press OK to confirm your selection For details of the signal types see page 66 and the operating instructions for the AV device being connected If desired press numeric key enter a diffe rent name for this AV device and press OK Use the cur...

Page 85: ...ata Logic for Video recorder 1 and connect the video recorder to the EURO1 socket Data Logic will function correctly only if the AV 1 socket on the video recorder is con nected to the EURO 1 socket on the TV set Comparable dialogue systems are QLink Panasonic Easy Link Philips Megalogic Grundig SMARTLINK Sony Registering a Data Logic video recorder on the TV set Press the MENU key to open the TV m...

Page 86: ...ion table Press the MENU key to open the TV menu Press the red key to open the menu Confi guration Press numeric key to select Analogue TV Press the OK key and then press numeric key to select Data Logic Press the OK key to trans fer the programme positions from the TV set to the video recorder Opening the menu OK EXIT MENU OK The number of subjects and sections depends on the selected scope of op...

Page 87: ... device whose signal type you wish to change and press the OK key Press numeric key use the cursor control key to select Signal OUT and use the key to change the setting to RGB Press the OK key to confirm your selection Press the EXIT key to close the TV menu Caution This may cause an existing con nection diagram to be modified If so you must reconnect the AV devices accordingly 25 Registering AV ...

Page 88: ...ntrol key to select the AV device whose signal type you wish to change and press the OK key Press numeric key use the cursor control key to select Signal OUT and use the key to change the setting to RGB Press the OK key to confirm your selection Press the EXIT key to close the TV menu Caution This may cause an existing con nection diagram to be modified If so you must reconnect the AV devices acco...

Page 89: ...select the AV device whose signal type you want to change and press OK Press numeric key use the cursor control to select Signal OUT and use the key to set YUV or YUV HD Confirm the setting by pressing OK Exit the TV Menu by pressing EXIT Caution This may cause an existing con nection diagram to be modified If so you must reconnect the AV devices accordingly 25 Registering AV Devices Setting signa...

Page 90: ...A message is dis played asking if you really want to change the connected device Press the OK key again to remove the connected devi ce Press the EXIT key to clo se the TV menu Opening the menu MENU The number of subjects and sections depends on the selected scope of operation Depending on the configuration of the TV set the various menu items may be displayed in a different order and numbered dif...

Page 91: ...OK key and in the setting window use the key to select Yes Press the OK key to save the new setting Press the EXIT key to close the TV menu The AV programme position will now be selected automatically when you switch on the TV set with the main power switch 26 Initial Programme Position Opening the menu MENU OK OK EXIT The number of subjects and sections depends on the selected scope of operation ...

Page 92: ... to open the menu Configura tion Use the cursor control key to select Initial programme position Use the corresponding numeric key in the example to select HiFi output In the setting window use the key to set the desired parameters Press the OK key to save the new settings Press the EXIT key to close the TV menu In normal TV Mode the function Sound via can be activated temporarily by pressing the ...

Page 93: ...ettings In the setting window use the cursor control key to select the menu item Sound via Use the key to select Sound via HiFi Press the OK key to save the new setting Press the EXIT key to close the TV menu In normal TV Mode the function Sound via can be activated temporarily by pressing the yel low key and using the key 27 Sound via HiFi Amplifier HiFi output Opening the menu MENU OK OK EXIT Th...

Page 94: ... window use the key to select the des ired setting Press the OK key to save the new setting Press the EXIT key to close the TV menu MENU Opening the menu The number of subjects and sections depends on the selected scope of operation Depending on the configuration of the TV set the various menu items may be displayed in a different order and numbered differently OK EXIT Data Logic adjustm CI dialog...

Page 95: ...ring a station search see Section 22 and stored in a separate station table at the operating level for radio mode The radio station table can be sorted see Section 24 and the station logos can be changed see Section 23 DVB radio stations are administered in the same basic way as DVB TV stations The functions described in Sections 12 12 1 15 to 17 2 and 18 Special functions Normal speech Timer over...

Page 96: ...formation INFO Playing back films from a video recorder or DVD player by pressing the AV key Selecting Special functions 1 by pressing the F1 key Selecting Special functions 2 by pressing the F2 key Selecting Special functions 3 by pressing the F3 key Selecting connected AV devices by pressing the AV key Calling the standard picture functions by pres sing the blue key Calling the standard sound fu...

Page 97: ...ress the red key to open the menu Confi guration Use the cursor control key to move to the menu line Initial programme position Press the numeric key to select Scope of operation In the setting window use the key to select the desired scope of operation Press the OK key to save the new setting Press the EXIT key to close the TV menu 30 Scope of Operation Opening the menu The number of subjects and...

Page 98: ...nts the function remains preselected for ten seconds Programme selection Press the buttons Volume Press and hold the preselection key F until the bar display for the volume appears on the screen Then press the or button to adjust the volume Contrast Press and hold the preselection key F until the bar display for the contrast appears on the screen Then press the or button to adjust the contrast The...

Page 99: ...refully Take care not to damage it mechanically by shocks impact scratching or scraping Keep sharp pointed and hard objects away from the surface of the screen Keep the surface of the screen clean For cleaning the case and the screen use only a soft dry cloth For removing stub born marks you may moisten the cloth slightly Cleaning and care The surface of the screen may be cleaned only with a soft ...

Page 100: ...r 3 5 mm FBAS Video in e g digital camera or camcorder Audio in R L e g camcorder S VHS or Y C in e g camcorder Talio at the front under the flap 100 Service socket for use by your dealer Linus at the front under the flap Primus at the right side Antenna socket DVB C T analog ...

Page 101: ...d Digital audio OUT can be operated in loop through mode To do this open the menu AV devices and activate x the menu item Activate TV SPDIF input Bildsignal IN DVI D DVI A HDMI connector Signal type DVI YUV Video analog Video digital Video IN YCbCr in YUV in IN OUT Digital Audio SPDIF IN Audio OUT Audio Audio IN DVI D connector HDMI connector Signal type HDMI Video Audio digital EURO sockets for c...

Page 102: ...e AV receiver offers this Can be used in combination with or if this option is available It is always possible to use the TV speakers as the centre speaker if the AV receiver has this output available The advantage of this is that the TV speakers can be used as the centre speaker thus making it unnecessary to set up an external centre spea ker Metz LCD TV HiFi amplifier AV Receiver ...

Page 103: ...V press the yellow key and use the cursor control key to select the menu item Sound via For connection type use the key to select Sound via Hifi The speakers of the LCD TV are muted The sound AC3 or stereo sound is rendered over the speakers of the Hifi set For connection type use the key to select Sound via surround The speakers of the LCD TV are used as the centre box The sound AC3 or stereo sou...

Page 104: ...onding numeric key to select the DVD player playback device Press the F2 key Briefly pressing F2 executes the func tion which is programmed for this function key see Section 18 1 Pro gramming function keys Pressing and holding F2 for about three seconds displays all functions available for this function key Press numeric key to open the timer menu The timer window dis plays the AV programme positi...

Page 105: ...ce is connected directly to the recording device 35 Copying between AV Devices Direct recording 36 Setting the MPEG noise reduction During play back of digital coded films in AV mode the MPEG noise reduction can be adjusted to provide a better picture quality reducing the block shapes caused by digital compression For this in AV mode go to the menu Picture Volume and choose Picture settings pro gr...

Page 106: ... to select the func tion Picture format Use the key to set the picture format setting to Automatic Press the OK key to save the new setting Press the EXIT key to close the TV menu Opening the menu MENU OK EXIT The number of subjects and sections depends on the selected scope of operation Depending on the configuration of the TV set the various menu items may be displayed in a different order and n...

Page 107: ...e The settings for the childlock function are protec ted by a four digit code you can enter any des ired code but you should note it for future use If you have forgotten your code please consult your local dealer Forced mono It may happen that your TV set switches to stereo mode although the programme you are watching is not broadcast with stereo sound This is normal ly due to the local reception ...

Page 108: ...amme positions Spatial sound This function can be used to create an artificial stereo effect for programmes with sound in mono Stereo wide For stereo broadcasts the distance between the speakers can be increased artificially in order to achieve a wider stereo effect SRS WOW WOW is an audio system developed by SRS Labs Inc which provides a unique listening expe rience The sound becomes fuller and t...

Page 109: ...understand as possible The setting Normal is recommended for music programmes VCR The VCR function provides an optimal picture qua lity when playing back recordings from tape devi ces such as camcorders or video recorders Volume correction The various stations broadcast their sound at diffe rent volumes The TV set can automatically com pensate for these differences in the volume This function rema...

Page 110: ...cklight control dyna mic and automatic depending on the parameters set there and as a result lead to power saving Energy consumption per hour Wh Multiply the power consumption in W by 1 hour Stand by 1 7 W Power consumption EN 62087 Music output power to DIN 45324 into 4Ω at 1 kHz sinusoidal power into 8Ω 38 Technical Data Talio 32 HDTV 100 ca 142 W 2 x 20 W 2 x 12 W Talio 37 FHDTV ca 175 W 2 x 20...

Page 111: ...og PC 1360x768p 60Hz Video Scart RGB 720x576i 50 Hz 720x480i 60 Hz Video Scart Y C FBAS Front AV 720x576i 50 Hz PAL SECAM 720x480i 60Hz NTSC Video Component IN 720x576i p 50 Hz 720x480i p 60 Hz 1280x720p 50 60Hz 1920x1080i 50 60Hz Audio HDMI Linear PCM Stereo 32 kHz Linear PCM Stereo 44 1 kHz Linear PCM Stereo 48 kHz Audio S PDIF Linear PCM Stereo 32 kHz Linear PCM Stereo 44 1 kHz Linear PCM Stere...

Page 112: ...nstalled in the TV set and you do not need any additional remote control for it An additional HDTV module is needed if DVB C reception of HDTV channels is required DVB S2 digital retrofit kit 089 NN 236A as 029 NM 1119 but for the reception of digital HDTV satellite stations for TV channels An addi tional HDTV module is needed if DVB S reception in HDTV channels is required You do not need an addi...

Page 113: ... disk recorder 093 NN 1408 for the digital recording and playback of DVB channels including HDTV Also offers the option of postponing the TV schedule timeshift mode Only possible in conjunction with an HDTV modu le EC module 033 NN 1345 encoder module also enables the recording of analogue TV chan nels in conjunction with the hard disk recorder Only possible in conjunction with an HDTV modu le For...

Page 114: ...A module open the lid on the top of the LCD TV and insert the CA module in one of the slots as shown in the pictures Press the CA module down until the unlocking bar is lifted up Close the lid The LCD TV is now ready to decode the respective station 114 Front view Chip Back top view without lid Back view without lid with inserted module Unlocking bar ...

Page 115: ...tead of 000 the receiver can decide that the presence of at least two zeros indicates that the intended informa tion value was 0 and correspondingly that at least two ones indicates the infor mation 1 If two of the numbers in a block are chan ged the receiver can detect that an error has occurred but any attempt to correct this would have the wrong result Example If the information 0 is encoded as...

Page 116: ...g the receiver may have been reflected from objects outside the building objects such as thermally insulated windows coated with metal films reinforced concrete parts of the building persons in the vicinity or the furnishings of the room The signals may also have come from a different transmitter In such cases the reception quality depends not only on the actual signal strength but also on how man...

Page 117: ...d to disable all stations Enter the code you used when programming the childlock The TV set will not switch to a selected programme position A teddy bear is dis played instead The childlock is active and was programmed so that only the stations shown in the list beside the teddy bear may be selec ted Enter the code you used when programming the childlock You have switched off the TV set with the k...

Page 118: ... the TV set The AV device has not been registered in the TV set Open the menu AV devices select the devi ce with the cursor set the signal types OUT IN correctly and press the OK key Make sure that you con nect the AV device as shown in the connection diagram A film in 16 9 format is played back from an AV device but is displayed in 4 3 for mat The picture format for this pro gramme position has n...

Page 119: ... do not result in a satisfactory display of the PC image proceed as follows 1 Before you connect the PC to the LCD TV set the resolution to 1024 x 768 pixels and the refresh rate to 60 Hz For graphics cards with two out puts e g VGA and DVI set the operating mode to clone to display the same image on both outputs 2 Install the latest graphics cards driver Most graphics cards have an ATI or nVidia ...

Page 120: ...u to find optional channels quik kly If you select a portal station via the station table see p 9 a suitcase symbol appears next to the station logo This suitcase can be opened by pressing the white button repeatedly All optional channels inclu ded in this suitcase then appear in the station table Other stations are not shown simultaneously In this way you can switch quickly bet ween the optional ...

Page 121: ...eries contai ning harmful substances Pb the battery contains lead Cd the battery contains cadmium Hg the battery contains mercury Li the battery contains lithium Battery disposal Errors excepted Subject to changes Your Metz product was developed and manufactured with high quality materials and components which can be recycled and or re used This symbol indicates that electrical and electronic equi...

Page 122: ...8 Direct recording OTR 46 Double font size 13 DVD player connecting 84 DVD player removing 90 Electronic Programme Guide EPG 57 EURO sockets 15 101 Equalizer 29 External devices playback 15 External devices connecting 84 100 Font size double 13 Forced mono 33 Freeze frame 7 Glossary 107 Headphones 98 100 HDMI DVI 88 Help 10 HiFi output 92 Info Information 10 Initial programme position 91 Interests...

Page 123: ...82 Station search automatic 71 73 79 Station search manual 72 74 80 Station selection 9 Station table 15 Stations moving copying sorting deleting 83 Summer time see time settings 40 Switching off 8 Switching on 8 Switching voltage devices with 15 Switching voltage devices without 16 Thunderstorms 5 Timer control 39 Timer setting manually 40 TV menu 11 TV standard 63 VCR function 17 Video recorder ...

Page 124: ...nce in the areas of electronics and plastics technology to form the basis of the excellent reputation of the Metz Werke that has been built up throughout the world over a period of many decades Metz offers quality made in Germany Consumer electronics mecablitz flash units plastics technology and industrial electronics Service Centre Training Centre Administration and development Storage Dispatch M...

Reviews: