10
2 L1 71 en
5.7
Assembling the valve
Replace damaged parts with new ones.
Set the disc and the shaft together beforehand. In
case the pin holes have been damaged during
removal of the old pins the holes can be drilled to a
larger pin size. File off any burrs from the shafts.
The bearing material of the standard construction valves is
PTFE-impregnated stainless steel net.
The bearings for the high temperature valves (H-construc-
tion) are cobalt alloy bushings which are mounted into the
body together with the shafts.
Mount the bearings into the body (see Fig. 17).
H-construction:
Mount the bearing into the shaft. Spray a
thin layer of dry lubricating fluid, e.g. Molykote 321R or
equivalent, into the inside surface of the bushing and the
shaft bearing groove. Press the bushing with a tightening
ring into the shaft bearing groove and fit the shaft with the
bearings carefully into the body through the tightening
ring (see Fig. 18).
Place the disc horizontally on a surface so that the flat side
of the disc lays against the surface. Lift the body around the
disc so that the shaft bores are aligned with the bores in the
disc. Protect the disc (see Fig. 16).
Press the shafts into the disc drillings. Align the pin holes.
The shaft (11) position against the disc must be according
to Fig. 13.
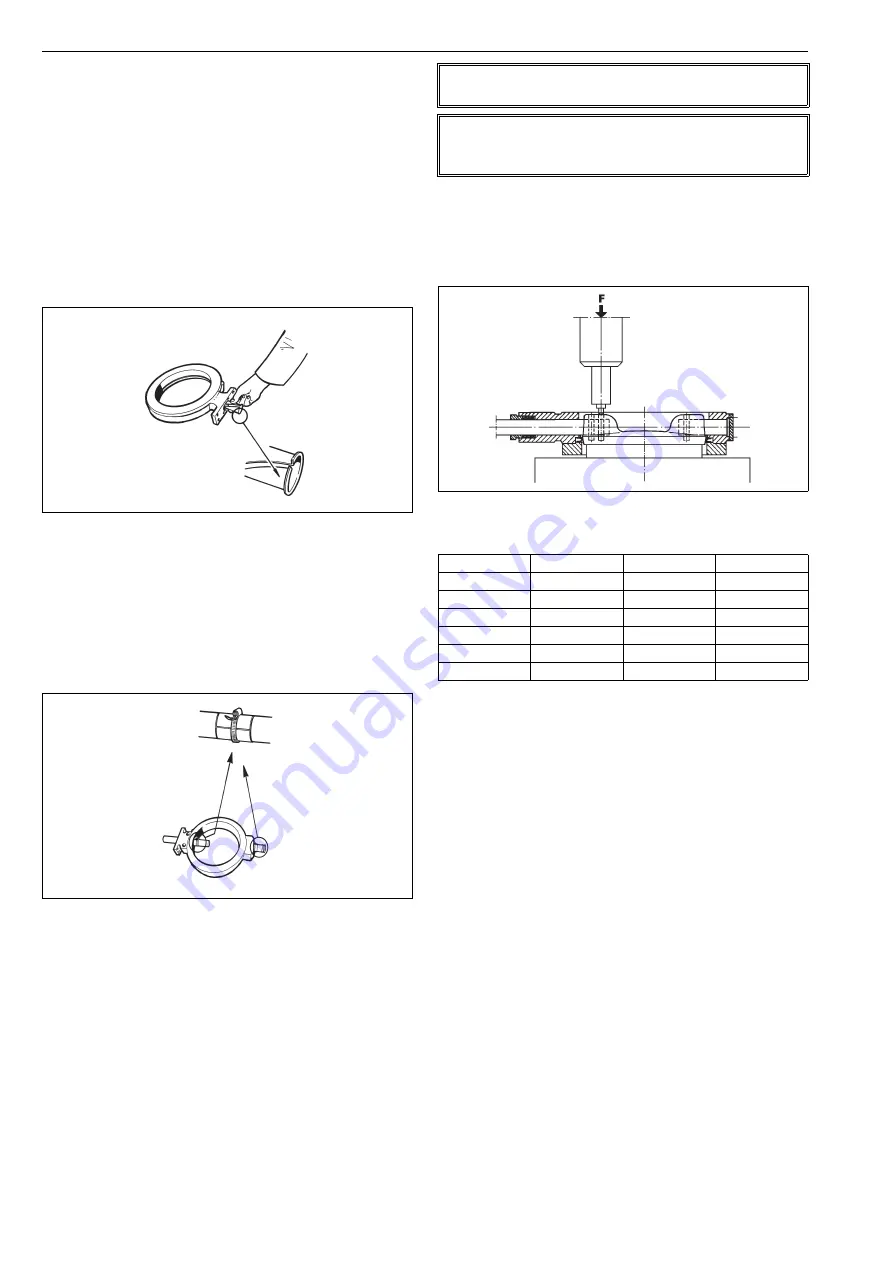
Support the disc well in a horizontal position during
mounting of the pins. Push the new pins into the
holes and press them in a press to final form (see Fig.
19). Use a smaller tool than the pin diameter. See
Table 6 for force needed.
Install the gasket (18) and the blind flange (10).
Screws of the blind flange must be tightened evenly.
An unevenly tightened flange will damage the seat.
Install the seat ring. See details in Section 5.5.
Install the body seal (19) and the clamp ring (2). See
details in Section 5.5.
Install the gland packing (see Section 5.3).
Check the contact line between the seat ring and the
disc (see Fig. 13).
Fig. 17.
Mounting the standard bearings
Fig. 18.
Mounting the H-construction bearings
NOTE:
Use only pins supplied by the manufacturer!
NOTE:
The pins must be pressed with enough force to deform
them so that the connection will be free from backlash.
Fig. 19.
Pressing the pins
Table 6.
Pressing the pins, forces
Pin diameter, mm
Force, kN
Pin diameter, mm
Force, kN
5
45
20
500
6
60
25
780
8
80
30
1125
10
125
35
1500
12
180
40
2000
15
280
50
3150


