2.11.2005
Rev. 1.5
Installation
32
•
Protect the combi-kettle from sparks produced by welding, grinding and abrasive
cutting wheels. These can later cause rust spots on the stainless steel surface of the
appliance.
5.1.4
Unpacking the appliance
The combi-kettle should be transported in its own package as close as possible to the in-
stallation place before final unpacking. Do not remove the protective foils until after in-
stallation, just before the first use of the kettle.
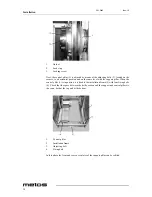
After removing from the transport pallet, the combi-kettle is not stable until it has been
bolted down to the installation frame. It is strictly forbidden to operate or tilt the kettle
before it has been fixed to the floor according to the installation instructions. When the
combi-kettle is removed from its transport pallet, it must be supported to prevent it from
falling before it is fixed to the floor. If the kettle falls down, this may cause injury to peo-
ple or damage to property.
5.1.5
Disposal of the package
In connection with unpacking, all packing material must be sorted and disposed of in ac-
cordance with local recycling regulations.
5.2
Installation
Check before installation from the installation drawing that there is enough space behind
the kettle for tilting and servicing. Also check the location of the floor drain.
The Proveno combi-kettle is designed for installation in a place with a floor drain in front
of the kettle. The arrangement with a pouring channel and floor drain behind the kettle is
not suitable for use with the combi-kettle
The combi-kettle can be installed in two different ways:
•
On a subsurface installation frame, the frame cast into the floor
•
On a surface installation frame, the frame fixed to the floor surface
Fixing the kettle directly to the floor without frames is forbidden.
Either subsurface frames or surface frames must be in position before the installation of
the combi-kettle is started.
Summary of Contents for PROVENO S 100
Page 2: ......
Page 4: ...2 11 2005 Rev 1 5...
Page 7: ...2 11 2005 Rev...
Page 8: ...2 11 2005 Rev...
Page 62: ...Connection diagram S00123 B3...
Page 63: ...Installation drawing L00115 B3...
Page 64: ...Text part ChillPlus L00114 A4...
Page 65: ...Steam supply recommendations 000030 A4...
Page 68: ......


