


COPYRIGHT © 2008 MERIT ENTERTAINMENT
PM0590-15 MEGATOUCH ION 2009 EDITION 4
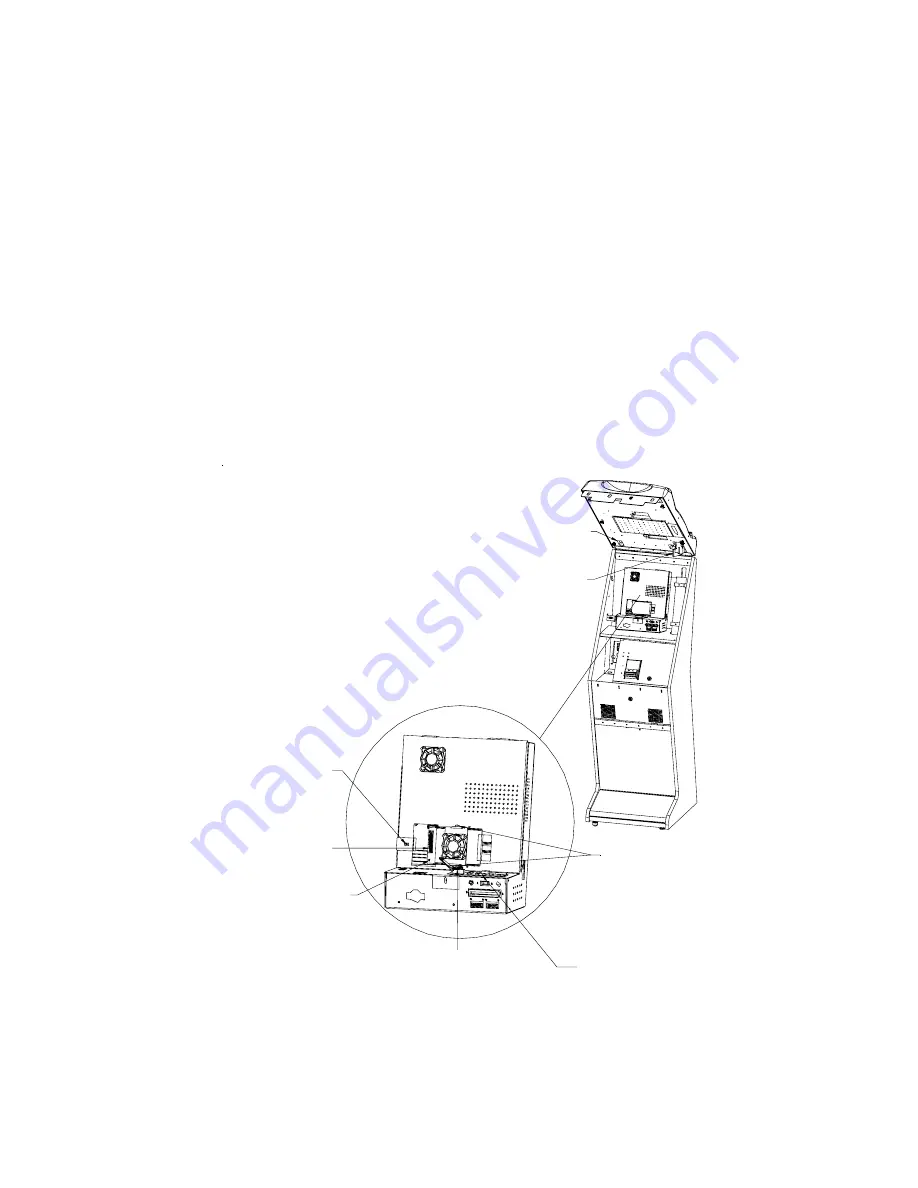
SCREW
SECURING
HARD DRIVE
SUPPORT
BRACKET
HARD DRIVE
ADAPTER
NUTS
SECURING
CPU FAN
TO HARD
DRIVE
MOUNTING
BRACKET
SECURITY KEY
OSD BOARD
HOLE IN WOOD BEZEL
LEADING TO PLAYER
KEY SOCKET
COIN MECH
SCREW SECURING
HARD DRIVE
ASSEMBLY TO
ELECTRONICS BOX
FIGURE 2 - FUSION GAME WITH DETAIL VIEW OF ELECTRONICS BOX
sign holder, and replace the sign. Re-
place the 6 nuts and washers to re-
secure the plastic sign holder.
16. Replace the plastic bezel on top of
the wood bezel, making sure that the
wire coming from the player key
socket drops through the hole in the
wood bezel (see Figure 2).
17. Lift the plastic bezel just enough to
reconnect the joystick harness wire
and slide it back into place under the
plastic mounting clip on the wood be-
zel.
18. Reattach the 2 fast-on connectors
to the coin mech, and reattach the 2-
pin wire coming from the player key
socket (see FIgure 2). Resecure the
6 thumbnuts securing the bezel. If
you are
not
installing a security key,
skip to step 21.
19. Locate the security key (the button-
shaped disc with the handle) on the
OSD board (see Figure 2).
20. Remove the existing security key from
the OSD board by sliding it out of
place, and replace it with the sup-
plied security key.
21. Close and lock the bezel.
22. Plug in and turn on the game. The game
will reboot twice to configure the hard-
ware. When prompted, perform a touch-
screen calibration.
23. If you are connected to TournaMAXX or
TournaCHAMP, you must re-enter the dial-
in settings after completing the software
upgrade. After entering the settings, make
the initial call into the server, and then
perform two
Updates From Server
.
Refer to the MegaNet manual for infor-
mation on how to perform these func-
tions.


