background image

COPYRIGHT © 2004 MERIT INDUSTRIES, INC.

4                                                       MEGATOUCH FORCE FUSION MONITOR REPLACEMENT                                 PM0450-03

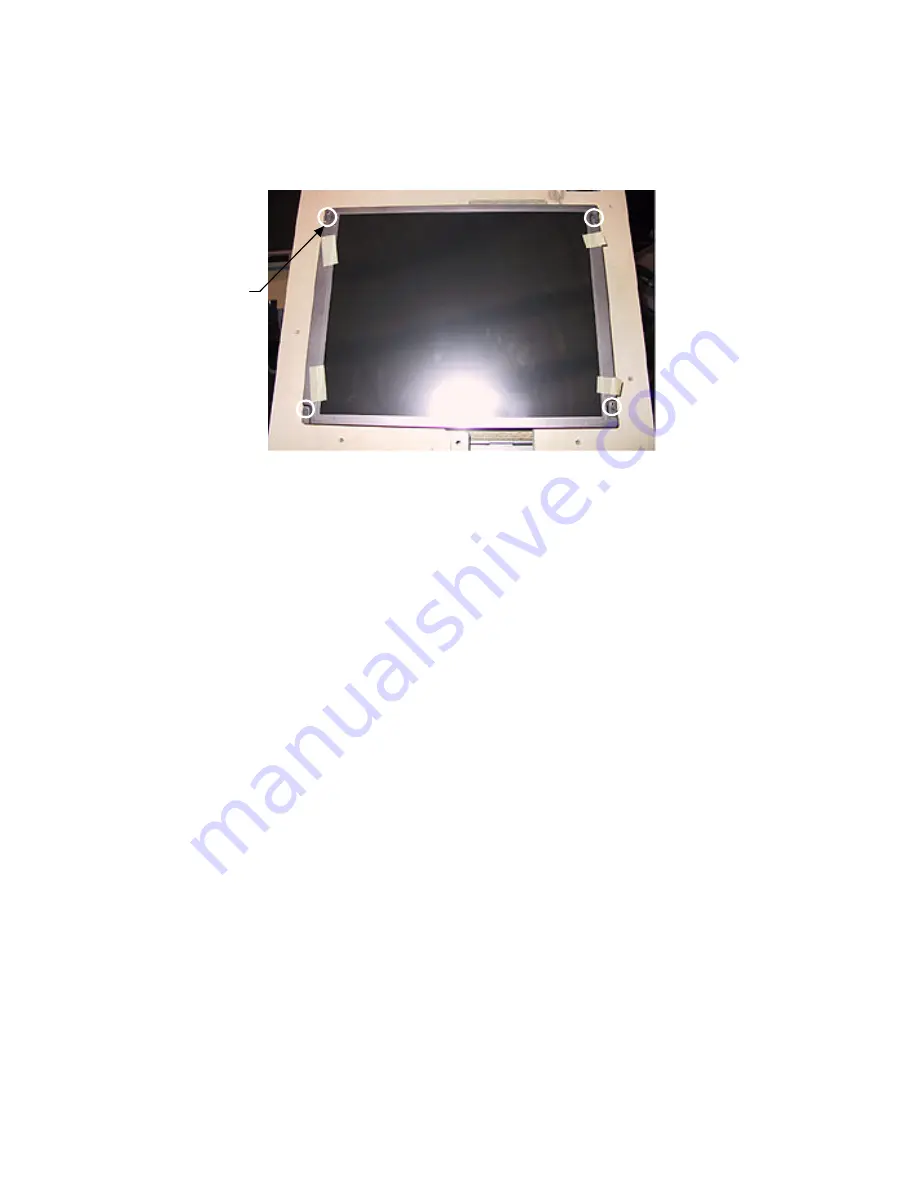
SCREWS

FASTENING

MONITOR
TO GAME

(4 PLACES)

FIGURE 4 - FUSION WITH ELECTRONICS BOX - MONITOR (WITH BEZEL REMOVED)

Fusion without
Electronics Box

Removing the Monitor

1.

Turn off the game and unplug it from

its power source.

2.

Unlock and open the bezel.

3.

Disconnect the VGA monitor connector

and ground screw, the monitor control

board connector, and the monitor

power connector and also remove the

cables from the 2 clamps attached to

the monitor.  See Figure 5.

4.

If you will not be reusing the existing

touchscreen, remove the screws

fastening the touchscreen controller to

the game and disconnect the cable

from the back of the controller.  Then

locate and disconnect the Molex

connector (orange and gray wires)

running from the touchscreen controller

cable to the main power harness.  After

disconnecting the ground screw, pull

the cables out of the clamps.  See

Figures 6 and 7.

If you will be reusing the existing

touchscreen, disconnect the touch-

screen controller cable from the LCD

panel (see Figure 6).

5.

Remove the 10 screws securing the

plastic bezel to the wooden frame (see

Figure 5) and carefully remove the

bezel from the game.  Be careful not

to damage the bezel with the coin cup

during removal.

NOTE: Keep track of all hardware
removed in the monitor replacement
process.

6.

Place the bezel assembly upside-

down on a flat surface and remove

the 10 screws fastening the LCD

monitor to the bezel (remember which

2 screws also fasten cable clamps),

then remove the monitor from the

bezel.  See Figure 8.

NOTE: Be sure the glass is not
scratched when setting the monitor
aside.

Summary of Contents for Megatouch FORCE Fusion

Page 1: ...merit industries inc PM0450 03 Megatouch FORCE Fusion Monitor Replacement Visit the Merit Industries Inc Web site http www meritind com...

Page 2: ...nstall the monitor FIGURE 2 FUSION WITHOUT ELECTRONICS BOX QTY PART NUMBER DESCRIPTION 1 SA0469 03 LCD MONITOR W SIDE BRACKETS TOUCHSCREEN OR 1 SA0469 04 LCD MONITOR W SIDE BRACKETS ONLY 1 SB0016 01 T...

Page 3: ...ct the monitor control board connector See Figure 3 6 Remove the 4 screws fastening the monitor to the game see Figure 4 and remove it Be sure to keep track of the plastic standoffs under the monitor...

Page 4: ...fasten it with the 6 thumbnuts 5 Plug in and turn on the game MONITOR POWER CONNECTOR TOUCHSCREEN CONTROLLER CABLE CONNECTED TO LCD PANEL TOUCHSCREEN CONTROLLER VGA MONITOR CONNECTOR THUMBNUTS SECURI...

Page 5: ...en locate and disconnect the Molex connector orange and gray wires running from the touchscreen controller cable to the main power harness After disconnecting the ground screw pull the cables out of t...

Page 6: ...the front of the touchscreen with the supplied alcohol wipe once it is in place 3 Place the new LCD monitor in the bezel make sure it is not upside down lining up the screw holes on the face of the mo...

Page 7: ...ED ON BEZEL TOUCHSCREEN CONTROLLER CONNECTED TO LCD PANEL SCREWS FASTENING CONTROLLER TO GAME 2 PLACES FIGURE 5 FUSION WITHOUT ELECTRONICS BOX UNDERSIDE OF BEZEL MONITOR POWER CONNECTOR VGA MONITOR CO...

Page 8: ...ONIT ORREPLACEMENT 7 MOLEX CONNECTOR GROUND SCREW FIGURE 7 FUSION WITHOUT ELECTRONICS BOX CLOSEUP OF CPU SECTION FIGURE 8 FUSION WITHOUT ELECTRONICS BOX UNDERSIDE OF MONITOR SCREWS FASTENING LCD MONIT...

Page 9: ...COPYRIGHT 2004 MERIT INDUSTRIES INC FIGURE 9 FUSION WITHOUT ELECTRONICS BOX PLASTIC MOUNTING PIECES ON BEZEL DRILLED HOLES 5 PER SIDE 8 MEGATOUCH FORCE FUSION MONIT ORREPLACEMENT PM0450 03...

Page 10: ...MEGATOUCH FORCE FUSION MONITOR REPLACEMENT PM0450 03...

Reviews: