background image

580 Pilothouse    Owner’s Manual

Chapter 11: Electrical Systems

89

Bonding Harnesses

Summary of Contents for 580 Pilothouse

Page 1: ......

Page 2: ......

Page 3: ...no liability resulting from errors or omissions in this document or from the use of information contained herein Due to our commitment to product improvement Meridian reserves the right to make change...

Page 4: ...re Suppression Systems 43 Shaft Transmission Alignment 44 Shaft Log Packless Sealing System 44 Chapter 4 Controls Gauges Steering 45 Hydraulic Steering System 45 Rudder Stuffing Gland 45 Autopilot 46...

Page 5: ...itioner If Equipped 71 Diesel Heat If Equipped 73 Chapter 11 Electrical Systems 24 12 Volt DC System 76 Batteries 76 Battery Switches 76 Emergency Battery Parallel Switch 77 Fuses Circuit Breakers 77...

Page 6: ...alerts you to hazards or unsafe practices which COULD result in severe personal injury or death if the warning is ignored WARNING This box alerts you to hazards or unsafe practices which COULD result...

Page 7: ...secure yet readily available place Dimensions Tank Capacities Dealer Service Your dealer is your key to service Ask your dealer to explain all systems before taking delivery of your yacht Contact your...

Page 8: ...e you of local sea schools or competent instructors Qualified Maintenance Failure to maintain your yacht s systems listed in the warning above as designed could violate the laws in your jurisdiction a...

Page 9: ...air and at the correct pitch for your particular situation A slightly bent or nicked propeller will adversely affect the performance of your yacht BEFORE starting or working on your engine s read the...

Page 10: ...hang from the back deck or swim platform while the engines are running Teak surfing dragging or water skiing within 20 feet of a moving watercraft can be fatal DANGER DANGER PERSONAL SAFETY HAZARD AL...

Page 11: ...Sacrificial Anodes Zincs Your yacht features sacrificial anodes zincs to protect underwater metal parts from excessive deterioration Check the zincs regularly and replace them if they have deterio ra...

Page 12: ...ing slings together BEFORE lifting WARNING PERSONAL INJURY and or PRODUCT or PROPERTY DAMAGE HAZARD NEVER lift your yacht using the cleats WARNING PERSONAL INJURY and or PRODUCT or PROPERTY DAMAGE HAZ...

Page 13: ...e fatal Breathing CO blocks the ability of your blood to carry oxygen The effects are cumulative Even low levels of exposure can result in injury or death Factors that Increase the Effects of CO Poiso...

Page 14: ...ugh CO can be present without the smell of exhaust fumes if exhaust fumes are detected on your yacht take immediate action to dissipate these fumes Treat symptoms of seasickness as possible CO poisoni...

Page 15: ...Inspect each water pump impeller and the water pump housing Replace if worn Make sure cooling systems are in working condition Inspect all metallic exhaust components for cracking rusting leaking or l...

Page 16: ...10 580 Pilothouse Owner s Manual Chapter 2 Locations Exterior Views Hull Views...

Page 17: ...580 Pilothouse Owner s Manual Chapter 2 Locations 11 Forward Deck View...

Page 18: ...Chapter 2 Locations 580 Pilothouse Owner s Manual 12 Aft Deck View...

Page 19: ...C OUTLET SPOTLIGHT CONTROL COMPASS TACHOMETERS HOURMETERS STARBOARD ENGINE FUEL VOLT OIL TEMPERATURE PORT ENGINE FUEL VOLT OIL TEMPERATURE THRUSTER STEREO SYSTEMS MONITOR SHIFT AUTOPILOT CONTROL FIRE...

Page 20: ...ACHOMETERS HOURMETERS VARY DEPENDING ON ENGINE AND ACCESSORY OPTIONS NOTE TYPICAL HELM LAYOUTS SHOWN ACTUAL LAYOUTS MAY SHIFT THROTTLE VHF PORT ENGINE FUEL VOLT OIL TEMPERATURE PILOTHOUSE SWITCH PANEL...

Page 21: ...ets 2 total One is located on the ignition switch panel at the command bridge helm One is located aft of the spotlight control panel at the pilot house helm 12 VOLT DC OUTLET IGNITION SWITCH PANEL COM...

Page 22: ...uit breaker may have been moved to the 24 volt DC master panel The circuit breaker on the battery switch panel marked davit would then be a spare circuit breaker 120 240 Volt AC Master Panel Located i...

Page 23: ...ock If Equipped Located in the forward bilge area of the engine room Air Conditioners If Equipped 5 total One is located inside the forward bunk hatch in the forward stateroom One is located inside th...

Page 24: ...e s forward seat cushion One is located behind the master stateroom entertainment center Access through the back wall panel inside the lower cabinet One is located under the pilothouse helm Access thr...

Page 25: ...loor hatch in the cockpit Battery Charger Located on the aft wall of the engine room Battery Equalizer Located on the aft wall of the engine room Battery Inverter Located on the aft wall of the engine...

Page 26: ...cated at the aft end of the engine room bilge Two are located at the forward end of the engine room bilge Access the second pump and autofloat switch by lifting the floor plate GENERATOR BILGE PUMP AU...

Page 27: ...let Located on the starboard aft deck above the transom platform step Davit Hydraulic Pump Located on the port side of the lazarette Access through the port floor hatch in the cockpit NOTE CARPET SHOW...

Page 28: ...sducers 2 total Located at the forward end of the engine room bilge Engine Cooling System Sea water Intake Seacocks 2 total Located in the engine room bilge at the aft inboard corner of each engine En...

Page 29: ...er tanks are con nected and both will fill when using this fitting Freshwater Pumps 2 total Located on a small shelf on the forward wall of the engine room Freshwater Pump Switch Located on the 24 vol...

Page 30: ...f the master stateroom head NOTE Remove the cabinet by unscrewing the four phillips head screws located next to each door hinge inside the cabinet Access the port freshwater tank fit tings by pulling...

Page 31: ...ets 2 total One is located in the anchor locker storage hatch on the starboard side of the forward deck One is located inside the port storage hatch in the cockpit Fuel Fill Deck Fittings 2 total Loca...

Page 32: ...Fuel Shut off Valves 3 total Located on a panel at the aft inboard end of each fuel tank in the engine room Fuel Tanks 2 total Located on each side of the engine room Fuel Transfer Pump Located on th...

Page 33: ...the hatch on the star board side of the pilothouse helm Two are located behind the command bridge helm Access by removing the port helm panel Generator Located in the lazarette Generator Seawater Int...

Page 34: ...d floor hatch in the hallway Holding Tank Monitor Located in the DC electri cal cabinet on the port wall of the pilothouse staircase Holding Tank Pump out Deck Fitting marked WASTE Located forward of...

Page 35: ...dge helm Access by removing the port helm panel Lazarette Access the lazarette through the cockpit floor hatches Macerator Switch Panel Located inside the DC electrical cabinet on the port wall of the...

Page 36: ...in the hallway and then lift and remove the hallway step Marine Head Vacuum Flush Pumps 2 total Both units are located under the aft floor hatch in the hallway STAIRS TO PILOTHOUSE FORWARD GUEST HEAD...

Page 37: ...ed along the inboard side of each engine Two of the engine oil change shut off valves are located at the aft inboard end of each engine The generator oil change shut off valve is located on the starbo...

Page 38: ...chor locker storage hatch on the starboard side of the forward deck One is located inside the port stor age hatch in the cockpit Seawater Washdown Intake Seacock Located under the aft floor hatch in t...

Page 39: ...the DC electrical cabinet on the port wall of the pilot house staircase Spotlight Located on the forward area of the command bridge Spotlight Control Panels 2 total One is located at each helm SEAWATE...

Page 40: ...he cabi net by unscrewing the four phillips head screws located next to each door hinge inside the cabinet Access the forward sump box and pump by removing the forward floor hatch in the hallway then...

Page 41: ...hatch in the forward stateroom The stern thruster oil reservoir is located above the bilge pump in the lazarette Transom Shower Located on the starboard aft deck above the transom platform step FLOOR...

Page 42: ...unge seat cushion on the starboard side of the salon Water Heater Access the water heater by removing the cabinet on the aft wall of the master stateroom head NOTE Remove the cabi net by unscrewing th...

Page 43: ...580 Pilothouse Owner s Manual Chapter 2 Locations 37 Windshield Washer Fluid Res ervoir Located under the port forward lounge seat cushion in the pilothouse...

Page 44: ...y time you use your yacht See the Seawater Systems section in Chapter 6 of this Owner s Manual for instructions about cleaning the seawater strainers Read the engine manual BEFORE starting or working...

Page 45: ...enerator exhaust is a source of dangerous carbon monoxide gas CO Check ALL exhaust systems BEFORE each trip Look for leaks in the exhaust systems of the engines and the generator Look for discoloratio...

Page 46: ...HAZARD Fuel vapors can explode BEFORE starting the engines 1 Check the bilge areas for fuel vapors or leaking fuel If you see leaking fuel or smell fuel vapors a Do NOT start the engines or generator...

Page 47: ...t Owner s Manual Supplement WARNING Avoid the storage or handling of gear near the fuel lines fittings and tank CAUTION Air in the diesel supply system can stop an engine or severely restrict performa...

Page 48: ...underway 3 After checking the fuel levels hold the fuel transfer switch On to the side you want to pump fuel to NOTE This switch must be held On throughout the entire fuel transfer process If the fuel...

Page 49: ...ystems are designed to extinguish engine room and or lazarette fires Before using your yacht for the first time read the fire suppres sion systems instruction and maintenance manual and follow all war...

Page 50: ...r vibration is noticed have the align ment inspected immediately Shaft transmission alignment should be done by a marine mechanic since it requires moving the engine and prop shaft To insure proper al...

Page 51: ...a leak develops it can usually be stopped by tightening the stuffing gland nuts slightly Do not over tighten the stuffing gland nuts If stuffing gland leakage becomes excessive packing replacement ca...

Page 52: ...you know which type of controls your yacht has Read all of the information about the shift throttle controls in the shift throttle controls manual the engine opera tion manual and the Cruiser Yacht Ow...

Page 53: ...see the Component Locations section in Chapter 2 of this Owner s Manual Dual Thruster System This system features bow and stern thrusters that can help you maneuver your yacht during docking The thrus...

Page 54: ...t damage these gauges or affect their accuracy when the radio is not transmitting Twin Engine Readings It is normal for tachometers and other gauges to have slightly different readings between engines...

Page 55: ...VHF radio usage Compass accuracy can be affected by many factors Have a trained technician calibrate your compass Make sure the technician gives you a deviation card which shows the corrections to app...

Page 56: ...r the 12 volt battery switch on the bat tery switch panel the 12 volt master breaker and the bridge and or pilothouse electronics breaker on the 12 volt DC supplemental panel and then turn on the GPS...

Page 57: ...mps if bilge water rises above a preset level You can also turn On the bilge pumps using the switches at the helm The bilge pumps are wired directly to the batteries Unless the batteries are dead the...

Page 58: ...r and clear any debris Reinstalling the bilge pump 1 Align the tabs on the strainer with the slots on the pump 2 Press down firmly until the tabs click into place 3 Make sure the bilge pump is locked...

Page 59: ...y time you use your yacht Refer to the seawater strainer instruction sheet for cleaning and maintenance information FLOODING and SWAMPING HAZARD Close the seacock s when leaving your yacht unattended...

Page 60: ...ns section in Chapter 2 of this Owner s Manual FLOODING and SWAMPING HAZARD NEVER leave your yacht unattended while the seawater washdown system is running Any leak or break in this system may allow l...

Page 61: ...city water supply on the dock before leaving your yacht unattended Turn Off the freshwater pump switch when your yacht is not in use or when the freshwater tanks are empty Inspect and clean the freshw...

Page 62: ...ortion of the Freshwater System section in the Cruiser Yacht Owner s Manual Supplement Turn Off the freshwater pump s 24 volt DC breaker before pressurizing the freshwater system with a city water sup...

Page 63: ...he freshwater pump opposite side from filter 2 Open the faucet that is furthest away from the fresh water pump 3 Place the air nozzle against the end of the just removed water line and blow air throug...

Page 64: ...ank is full if water flows from the tap when the hot water is turned On in the galley Even brief water heater operation with a dry tank WILL damage the heating elements Warranty replacements will NOT...

Page 65: ...eave the pressure relief and drain valves Open until you fit out your yacht after storage WATER HEATER DAMAGE HAZARD NEVER turn On the water heater breaker on the 120 volt AC master panel while the wa...

Page 66: ...l after the water heater tank is com pletely filled with freshwater 6 Turn On the water heater breaker WATER HEATER DAMAGE HAZARD Fill the water heater tank BEFORE turning On the water heater breaker...

Page 67: ...equipped drain into the sump boxes Each sump box has an auto float switch When the drain water rises to a preset level the auto float switch turns On the sump pump and the drain water is pumped overbo...

Page 68: ...tion in Chapter 2 of this Owner s Manual Empty the hold ing tank at every opportunity Winterizing the System Read the marine head s operation and maintenance manual for winterizing instructions Macera...

Page 69: ...lling it straight up with the windlass Before getting underway make sure the anchor is secured and the windlass circuit breaker is turned Off PERSONAL INJURY and or PRODUCT or PROPERTY DAMAGE HAZARD N...

Page 70: ...ully sand with the grain until the stain or mark is removed The sanded area will be lighter than the surrounding area but will darken and blend in over time PRODUCT DAMAGE HAZARD When installing acces...

Page 71: ...hinges on the radar wing and secure with the screws 4 Zip the aft end of the canvas top E to the zippered track on the radar wing The jaw slides should not need to be adjusted If you decide to adjust...

Page 72: ...ethods may remove the waterproof finish of the fabric and may also decrease the life of the polyester thread used in the canvas Reapply a water repellent treatment as necessary Method 1 1 Add 1 8 cup...

Page 73: ...sh the clear vinyl with soap and water 3 Rinse thoroughly to remove the soap 4 Before stowing the clear vinyl must be completely dry Air drying is best but you can also carefully dry the vinyl with a...

Page 74: ...r on the 120 volt AC master panel is turned On Range Oven Coffeemaker Always keep an approved ABC type fire extinguisher in galley area NOTICE BURN HAZARD Do NOT touch stove burners grates or areas ne...

Page 75: ...Systems 69 Audio Visual Equipment Dockside Television Telephone Inlet Plug a dockside source into the TV telephone inlet if you want to watch cable TV or use a telephone NOTICE AM radio reception may...

Page 76: ...with non conductive electrical lubricant Interior Exterior Lights The lights are powered by your yacht s 24 volt DC system The battery switch must be in the On position for the lights to work Navigati...

Page 77: ...se Check the seawater strainer for debris before each use of the air conditioning system If the strainer needs to be cleaned out follow the directions in the Seawater Systems sec tion in Chapter 6 of...

Page 78: ...Chapter 10 Air Conditioning Heating 580 Pilothouse Owner s Manual 72...

Page 79: ...ISONING HAZARD Carbon monoxide gas CO is colorless odorless tasteless and extremely dangerous ALL engines generators and fuel burning appliances produce CO as exhaust Prolonged exposure to low concent...

Page 80: ...Chapter 10 Air Conditioning Heating 580 Pilothouse Owner s Manual 74...

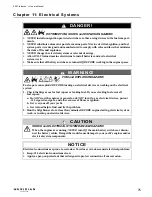
Page 81: ...the electrical system 1 Check the bilge areas for fuel vapors or leaking fuel If you see leaking fuel or smell fuel vapors a Do NOT start the engines or generator do NOT turn On any electrical devices...

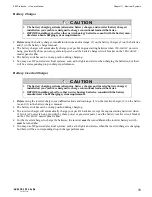
Page 82: ...the Component Locations sec tion in Chapter 2 of this Owner s Manual Standby loads such as the automatic bilge pumps and the stereo memory are not affected by the battery switches since they are wired...

Page 83: ...lemental panel Battery switch panel For the locations of these panels see the Compo nent Locations section in Chapter 2 of this Owner s Manual NOTE Some equipment may have secondary fuse protection at...

Page 84: ...accessory outlets see the Component Locations section in Chapter 2 of this Owner s Manual Alternators The engine alternators will keep the batteries properly charged when running at cruising speeds B...

Page 85: ...utomatically charge your yacht s batteries except the engine starting batteries when 120 volt AC power is being provided by shore power or generator power and the battery inverter circuit breaker on t...

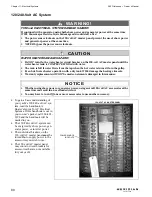
Page 86: ...ator power at the same time WILL cause major electrical system damage and could start a fire The power source lockouts on the 120 volt AC master panel prevent the use of shore power and generator powe...

Page 87: ...n breaker switches Instead IMMEDIATELY unplug the shore power cord and alert marina management WARNING SHOCK and ELECTRICAL SYSTEM DAMAGE HAZARD BEFORE each use check the shore power cord s for defect...

Page 88: ...t con nected to shore power Primary control is from the inverter remote control panel located inside the AC electrical cabinet and controls are also on the inverter itself Before using the inverter re...

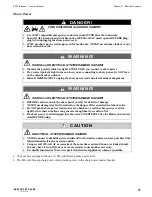
Page 89: ...ngines do NOT turn On any electrical devices and put out ALL cigarettes cigars and other sources of flame or ignition b Get everyone off your yacht c Get trained help to find and fix the problem 2 Run...

Page 90: ...rator is supplied from the port fuel tank Periodically replace the filter on the generator to make sure it remains clean and free of debris The generator also has a fuel filter water separa tor Servic...

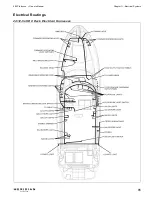
Page 91: ...580 Pilothouse Owner s Manual Chapter 11 Electrical Systems 85 Electrical Routings 24 12 Volt DC Deck Electrical Harnesses...

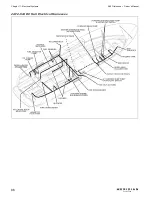
Page 92: ...Chapter 11 Electrical Systems 580 Pilothouse Owner s Manual 86 24 12 Volt DC Hull Electrical Harnesses...

Page 93: ...580 Pilothouse Owner s Manual Chapter 11 Electrical Systems 87 24 12 Volt DC Radar Wing Harness 24 12 Volt DC Command Bridge Electrical Harness...

Page 94: ...Chapter 11 Electrical Systems 580 Pilothouse Owner s Manual 88 Battery Systems Batteries Cables...

Page 95: ...580 Pilothouse Owner s Manual Chapter 11 Electrical Systems 89 Bonding Harnesses...

Page 96: ...Number Generator Manufacturer Model Name Number Serial Number Oil Type SAE Quarts Filter Type Fuel System Fuel Capacity Filter Type Plumbing Freshwater Tank Capacity Waste Holding Tank Capacity Key Nu...

Page 97: ...Engine Type Number of Engines Distinguishing Features Distinguishing Features Operator of Yacht Full Name Male or Female Age Health Address Address Phone FAX E mail Operator s Experience Persons Onboa...

Page 98: ...e Stopover 1 Arrive No Later Than Date Arrive No Later Than Time Stopover 2 Arrive No Later Than Date Arrive No Later Than Time Stopover 3 Arrive No Later Than Date Arrive No Later Than Time Stopover...

Page 99: ...Owner s Notes...

Page 100: ...Owner s Notes...

Page 101: ...Owner s Notes...

Page 102: ...Owner s Notes...

Page 103: ......

Page 104: ......

Reviews: