350.155UK User Manual
Installation:
1.
To take control of your Mercury power strip you first need to install the free TuyaSmart application from your
relevant smartphone service provider (i.e Apple App Store, Google Play Store etc). Once this is installed you will
need to follow the onscreen instructions to setup an account.
2.
Plug in your Mercury power strip and with the TuyaSmart application running on your device press the power
button on the unit for around 5 seconds until the LED indicator blinks rapidly.
3.
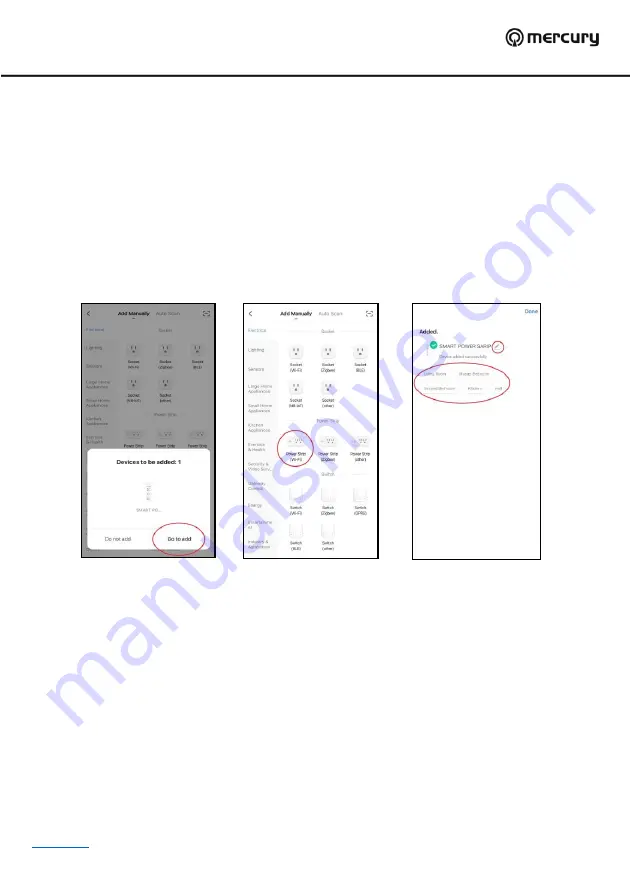
Sometimes the app will auto-detect the power strip, if this is the case select
“
Go to add
”
and proceed to point 4
(
Fig.1
). If you need to manually add the power strip, click on the blue cross in the top right-hand corner of the
screen and select
“
Power Strip (Wi-Fi) from the menu (
Fig.2
)
4.
Confirm the Wi-Fi your smart device is connected to and enter the password then click next.
Note:
this power strip
is only compatible with 2.4Ghz signals and wont work on 5G networks.
5.
Once the app has successfully loaded the settings for the power strip you can amend the name by clicking on the
pencil next to the heading at the top. You can also allocate the device to a default room by selecting from the
choices on the screen.
6.
Once you have made your selections select done to complete the setup (
Fig.3
)
Controlling using the application:
1.
Once setup is complete you will enter the main control screen for the power strip. From here its possible to control
all 3 sockets independently along with all 3 together (
Fig.4
).
2.
Press on the large switches to control sockets 1-3 independently, after selection the switch surround on the screen
will be illuminated, you will hear the switch click on and off and the blue LED on the unit will illuminate.
3.
You may also press the smaller Master switch at the top to turn on and off all 3 sockets simultaneously.
4.
On the right of each socket is a small pencil symbol which when selected enables the socket names to be
amended.
5.
The small clock symbol that sits underneath each socket name, enables entry to the timer functions for the
switches. There are 4 different timer functions in this section namely Countdown, Schedule, Circulate and
Random. Each one of these functions provides different options for each individual socket as indicated in the
sections below.
6.
There is also a Relay Status setting at the top which can be set to either on or off. This setting determines the
status of the power strip after a loss of power or power surge causing shutdown. The default setting is off which
means after any loss of power to the unit it will remain switched off even after power has been restored and will
need resetting accordingly.
Fig.1
Fig.2
Fig.3


