INSTALLATION
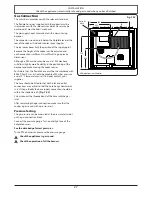
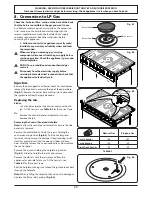
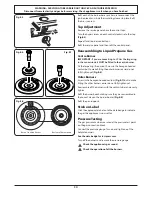
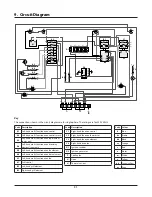
Check the appliance is electrically safe and gas sound when you have finished.
24
1.
Rear tab
3.
Front tab
4.
Rear slotted tab
2.
Locating slot
Obscuring trim
Retaining
screws
Fitting the Side Panels
1.
Fit the two rear side panel brackets onto the rear of the
cooker
(Fig. 7.9)
and secure. Make sure the brackets are
correctly orientated.
2.
Located near the front on each side of the cooker there
are three screws – loosen the top and bottom screws
(Fig. 7.10)
. Slide the obscuring trim onto the screws and
tighten to secure.
3.
Fit the side panel
(Fig. 7.11)
using the following steps:
A.
On each side of the cooker are two side panel
locating slots. Fit the rear side panel tab
(1)
to the
rear cooktop slot
(Fig. 7.12)
, making sure to align
the rear slotted tab
(4)
to the flue slot.
B.
Slide the side panel bottom locating slot
(2)
onto
the rear bracket washer
(Fig. 7.13)
and push back
(Fig. 7.14)
.
C.
Locate the front panel side tab
(3)
to the front
cooktop slot
(Fig. 7.15)
.
D.
Make sure the rear slotted tab
(4)
locates properly
with the slot in the flue vent
(Fig. 7.16)
.
E.
With fixing points
(1)
to
(4)
successfully located,
push the side panel backwards so that it touches
the rear flue.
Note:
If a side panel is loose, fit one of the extra
gaskets to the inner face of the front bracket
locating tabs
(Fig. 7.17)
and refit.
4.
Using a suitable screwdriver, tighten the screw in the
vent to secure the side panel
(Fig. 7.18)
.
5.
Repeat for the other side panel.
Rear left
Rear right
Note the position
of locating washer
Fig. 7.9
Fig. 7.10
Fig. 7.11
Summary of Contents for 1082 Dual Fuel
Page 1: ...1082 Dual Fuel USER GUIDE INSTALLATION INSTRUCTIONS ...
Page 4: ...ii ...


