background image

Section 5 - Maintenance

90-899883272   MARCH  2008

Page  53

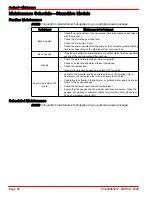
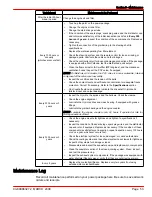
Task Interval

Maintenance to Be Performed

After the initial 20‑hour

break‑in period

Change the engine oil and filter.

Every 100 hours or

annually

(whichever occurs first)

Touch up the paint on the power package.

Change the engine oil and filter.

Change the sterndrive gear lube.

If the condition of the spark plugs, spark plug wires, and the distributor cap

and rotor was satisfactory at the initial inspection (as listed in 

Every 300

hours or 3 years

), inspect the condition of these components. Replace as

necessary.

Tighten the connection of the gimbal ring to the steering shaft to

specifications.

Replace the water‑separating fuel filter element.

Check the steering system and the remote control for loose, missing, or

damaged parts. Lubricate the cables and the linkages.

Check the continuity circuit for loose or damaged connections. If the package

is equipped with a MerCathode, test the MerCathode unit output.

Clean the flame arrestor, IAC muffler (MPI engines), and the crankcase

ventilation hoses. Inspect the PCV valve, if equipped.

NOTE: On MerCruiser V6 models, the PCV valve is a non‑serviceable, internal

component of the valve cover assembly.

Inspect the condition and the tension of the belts.

Check the coolant level and antifreeze concentration for adequate freeze

protection. Correct if necessary. Refer to the 

Specifications

 section.

On driveshaft extension models, lubricate the driveshaft U‑joints and

tailstock input and output bearings.

Every 200 hours or 3

years

Inspect the U‑joints, the splines, and the bellows. Check the clamps.

Check the engine alignment.

Lubricate the U‑joint splines and cross bearing, if equipped with grease

fittings.

Lubricate the gimbal bearing and the engine coupler.

NOTE:  Lubricate  the  engine  coupler  every  50  hours  if  operated  at  idle  for

prolonged periods of time.

Every 300 hours or 3

years

Check the engine mounts for tightness and tighten to specifications if

necessary.

Inspect the condition of the spark plugs, spark plug wires, and the distributor

cap and rotor, if equipped. Replace as necessary. If the condition of these

components is satisfactory at inspection, repeat inspection every 100 hours

or once a year, whichever occurs first.

Check the electrical system for loose, damaged, or corroded fasteners.

Check the cooling system and the exhaust system hose clamps for tightness.

Inspect both systems for damage or leaks.

Disassemble and inspect the seawater pump and replace worn components.

Clean the seawater section of the closed‑cooling system. Clean, inspect,

and test the pressure cap.

Inspect the exhaust system components. If the package was equipped with

water shutters (flapper valves), verify that they are not missing or worn.

Every 5 years

Replace the coolant/anitifreeze. Replace every two years if not using

extended‑life coolant/antifreeze.

Maintenance Log

Record all maintenance performed on your power package here. Be sure to save all work

orders and receipts.

Summary of Contents for 3.0 MPI

Page 1: ...46 SAE J1171 SAE J1191 SAE J 2031 Mercury MerCruiser declares that our sterndrive or inboard engines without integral exhaust when installed in a recreational craft in accordance with the manufacturers supplied instructions will meet the exhaust emissions requirements of the directive mentioned above This engine must not be put into service until the recreational craft in which it is to be install...

Page 2: ...to change specifications or designs without notice and without incurring obligation Mercury Marine Fond du Lac Wisconsin U S A Printed in U S A 2007 Mercury Marine Mercury Mercury Marine MerCruiser Mercury MerCruiser Mercury Racing Mercury Precision Parts Mercury Propellers Mariner Quicksilver 1 On The Water Alpha Bravo Pro Max OptiMax Sport Jet K Planes MerCathode RideGuide SmartCraft Zero Effort...

Page 3: ...Marine product sold as new receives the applicable limited warranty coverage whether the engine participated in one of the test programs described above or not Read This Manual Thoroughly IMPORTANT If you don t understand any portion of this manual contact your dealer for a demonstration of actual starting and operating procedures Notice Throughout this publication and on your power package danger...

Page 4: ...ver is responsible for the correct and safe operation of the boat the equipment aboard and the safety of all occupants aboard We strongly recommend that the operator read this Operation Maintenance and Warranty Manual and thoroughly understand the operational instructions for the power package and all related accessories before the boat is used WARNING The engine exhaust from this product contains...

Page 5: ...ow Your Power Package Identification 20 Alpha Sterndrive Decal Identification 20 Alpha Transom Serial Number 20 Engine Serial Number Decal 21 Lanyard Stop Switch 22 Instrumentation 23 Remote Controls 24 Panel Mount Features 24 Console Mount Features 25 Power Trim 25 Single Engine Trim Trailer 26 Dual Engine Trim Trailer 27 Electrical System Overload Protection 27 Audio Warning System 30 Caution 31...

Page 6: ...e Oil Filter 56 Power Assisted Steering Fluid 57 Checking 57 Filling 57 Changing 58 Engine Coolant 58 Checking 58 Filling 59 Changing 60 Drive Unit Oil 60 Checking 60 Filling 60 Changing 60 Power Trim Fluid 62 Checking 62 Filling 62 Changing 62 Cleaning the Flame Arrestor 63 Positive Crankcase Ventilation Valve PCV 63 Changing 63 Cleaning the IAC Muffler 64 Changing the Water Separating Fuel Filte...

Page 7: ... or Backfires 99 Poor Performance 99 Excessive Engine Temperature 99 Insufficient Engine Temperature 99 Low Engine Oil Pressure 100 Battery Will Not Recharge 100 Remote Control Is Difficult to Move Has Excessive Play or Makes Unusual Sounds 100 Steering Wheel Jerks or Is Difficult to Turn 100 Power Trim Does Not Operate Motor Does Not Operate 100 Power Trim Does Not Operate Motor Operates but Ster...

Page 8: ...Page iv 90 899883272 MARCH 2008 ...

Page 9: ... Chart 7 Commercial Application Warranty Chart 8 Government Application Warranty Chart 9 Mercury Installation Quality Certification Program 9 California Emissions Limited Warranty 10 What Is Covered 10 Duration Of Coverage 11 How To Obtain Warranty Coverage 12 What Mercury Will Do 12 What Is Not Covered 12 Components Of The Emission Control System 12 Disclaimers And Limitations 14 California Emiss...

Page 10: ...rned to him for warranty service The product warranty is not effective until the product is registered at the factory NOTE Registration lists must be maintained by the factory and dealer on marine products sold in the United States in the event that a safety recall notification under the Federal Boat Safety Act is required You may change your address at any time including at time of warranty claim...

Page 11: ...g the warranty registration card and its relationship to warranty claim processing refer to the International Warranty See Table of Contents NOTE Registration lists must be maintained by the factory and dealer on marine products sold in the United States in the event of a safety recall notification under the Federal Boat Safety Act Transfer of Warranty The limited warranty is transferable to a sub...

Page 12: ...ed installations Coverage for SeaCore Sterndrive Models The Limited Warranty for SeaCore Sterndrive Models is four 4 years when installed by an Installation Quality Certified Installer or three 3 years for noncertified installations Coverage for Standard Models The Limited Warranty for Standard Models which do not include Sterndrive Models with Closed Cooling Inboard Models Scorpion 377 Models Vaz...

Page 13: ... purchaser cannot deliver the product to such a dealer written notice must be given to Mercury Marine Mercury Marine will then arrange for the inspection and any covered repair The purchaser in that case shall pay for all related transportation charges and travel time If the service provided is not covered by this warranty the purchaser shall pay for all related labor and material and any other ex...

Page 14: ...t noncommercial use purchaser upon proper re registration of the product Warranty coverage is terminated for used product repossessed from a retail customer purchased at auction from a salvage yard or from an insurance company that obtained the product as a result of an insurance claim Condition That Must Be Met in Order to Obtain Warranty Coverage Warranty coverage is available only to retail cus...

Page 15: ...nds Region Standard SeaCore Vazer and Models with Closed Cooling Scorpion 377 Standard SeaCore Vazer and Models with Closed Cooling Scorpion 377 Vazer Standard Models and and Models with Closed Cooling SeaCore USA and Canada 1 year 3 years 3 years 3 years 2 years 4 years 4 years 4 years 3 years 4 years Latin America 1 year 3 years 1 year 1 year 2 years 4 years 2 years 2 years 3 years 4 years Mexic...

Page 16: ...year 1 year 1 year Europe 1 year or 500 hours 1 year or 500 hours 1 year or 500 hours 1 year or 500 hours 1 year or 500 hours 1 year or 500 hours 1 year or 500 hours 1 year or 500 hours none none Japan 1 year or 500 hours 1 year or 500 hours 1 year or 500 hours 1 year or 500 hours 1 year or 500 hours 1 year or 500 hours 1 year or 500 hours 1 year or 500 hours none none Australia and New Zealand 1 ...

Page 17: ...r 500 hours 1 year or 500 hours 1 year or 500 hours 1 year or 500 hours 1 year or 500 hours 1 year or 500 hours none none Japan 1 year or 500 hours 1 year or 500 hours 1 year or 500 hours 1 year or 500 hours 1 year or 500 hours 1 year or 500 hours 1 year or 500 hours 1 year or 500 hours none none Australia and New Zealand 1 year or 500 hours 1 year or 500 hours 1 year or 500 hours 1 year or 500 ho...

Page 18: ...rtification Program and communicate its benefits to consumers For a current list of MerCruiser powered boat brands that have earned Installation Quality Certification visit www mercurymarine com mercruiser_warranty California Emissions Limited Warranty NOTE Mercury Marine does not establish model years for the Mercury MerCruiser product line In order to comply with CARB warranty regulations and fo...

Page 19: ...endar year As an example 2003 model year products refers to products manufactured during calendar year 2003 This limited warranty provides coverage for the components of the emissions control systems Select emission control parts from model year 2003 2005 inboard or sterndrive engines are warranted for 2 years from either the date the product is first sold or first put into service whichever occur...

Page 20: ...sistent with the recommended operation procedures neglect accident submersion improper installation proper installation specifications and techniques are set forth in the installation instructions for the product improper service use of an accessory or part not manufactured or sold by us jet pump impellers and liners operation with fuels oils or lubricants which are not suitable for use with the p...

Page 21: ...tion System a Oil pump and internal parts b Oil injector s c Oil meter 5 Positive Crankcase Ventilation PCV System a PCV Valve b Oil filler cap 6 Exhaust System a Exhaust manifold b Exhaust elbow c Intermediate exhaust elbow d Lower exhaust pipe e Tailpipe 7 Catalysts or Thermal Reactor System a Catalytic converter b Thermal reactor c Exhaust manifold d Exhaust valve s 8 Miscellaneous Items Used i...

Page 22: ...o included may be hoses belts connectors and other emission related assemblies Where a warrantable condition exists Mercury Marine will repair your inboard or sterndrive engine at no cost to you including diagnosis parts and labor Manufacturer s Warranty Coverage For 2003 2008 spark ignition inboard and sterndrive marine engines Select emission control parts from model year1 2003 2008 inboard and ...

Page 23: ...e label or the part it is affixed to before sale If modifications are necessary contact Mercury MerCruiser about the availability of replacement decals before proceeding NOTE When the CE mark is present in the lower right corner of the Emission Control Information Label on the engine the Declaration of Conformance applies Refer to the front page of this manual for further information EMISSION CONT...

Page 24: ...my burns up to 30 40 percent less gas and oil than conventional carbureted two stroke engines saving money and resources 3 Longer Emission Warranty Protects consumer for worry free operation Beginning January 1 2003 one Three Star or Four Star label will be included with each factory certified Mercury MerCruiser engine All Mercury MerCruiser engines 500 hp and below will have a Three Star Ultra Lo...

Page 25: ...arine engine 2004 exhaust emission standards Engines meeting these standards have 20 lower emissions than One Star Low Emission engines Three Stars Ultra Low emission A SS D mc79571 1 The three star label identifies engines that meet the Air Resources Board s Personal Watercraft and Outboard marine engine 2008 exhaust emission standards or the Sterndrive and Inboard marine engine 2003 exhaust emis...

Page 26: ...Section 1 Warranty Notes Page 18 90 899883272 MARCH 2008 ...

Page 27: ...0 Alpha Transom Serial Number 20 Engine Serial Number Decal 21 Lanyard Stop Switch 22 Instrumentation 23 Remote Controls 24 Panel Mount Features 24 Console Mount Features 25 Power Trim 25 Single Engine Trim Trailer 26 Dual Engine Trim Trailer 27 Electrical System Overload Protection 27 Audio Warning System 30 Caution 31 Severe 31 OBDM 32 Testing The Audio Warning System 32 Guardian Strategy 32 2 ...

Page 28: ...e always specify model and serial numbers Alpha Sterndrive Decal Identification The Drive Serial No is located on the port side of the alpha sterndrive The Drive Ratio is located on the starboard side of the alpha sterndrive b a 25681 Alpha sterndrive a Drive gear ratio decal starboard b Serial number decal port Alpha Transom Serial Number The transom serial number is located on the top of the tra...

Page 29: ...Decal The serial number decal is located on the aft portion of the starboard side of the block near the starter motor 32121 The engine transom and drive serial numbers are also located on the engine identification plate a b c 32636 a Engine serial number b Transom serial number c Drive serial number ...

Page 30: ... is coiled to make its at rest condition as short as possible to minimize the likelihood of lanyard entanglement with nearby objects Its stretched out length is made to minimize the likelihood of accidental activation should the operator choose to move around in an area close to the normal operator s position If it is desired to have a shorter lanyard wrap the lanyard around the operator s wrist o...

Page 31: ...rumentation typically found on some boats The owner operator should be familiar with all instruments and their functions Because of the large variety of instrumentation and manufacturers you should have your boat dealer explain the particular gauges and normal readings for your boat L H OIL C H TEMP 0 1 2 3 4 5 6 7 8 R P M X 1000 MPH KPH 10 20 30 40 50 60 70 80 30 40 50 60 70 80 90 100 120 110 10 ...

Page 32: ...e depressed only when the remote control handle is in the neutral position and should only be used to assist in starting the engine Lanyard Stop Switch Turns the ignition off whenever the operator when attached to the lanyard moves far enough away from the operator s position to activate the switch Refer to Lanyard Stop Switch for information on the use of this switch Control Handle Operation of t...

Page 33: ...to increase speed Control Handle Tension Adjustment Screw not visible This screw is used to adjust the effort required to move the remote control handle Refer to instructions provided with remote control for complete adjustment instructions Power Trim Switch See Power Trim section for detailed power trim operating procedures Trailer Switch Used to raise drive unit for trailering launching beaching...

Page 34: ...terndrive unit down in can Help the boat accelerate and plane off quicker Generally improve the ride in choppy water In most cases reduce boat speed If in excess lower the bow of some boats to a point at which they begin to plow with their bow in the water while on plane This can result in an unexpected turn in either direction called bow steering or over steering if any turn is attempted or if a ...

Page 35: ...ical overload will either fail a fuse or trip a circuit breaker You must find and repair the source of the overload before replacing the fuse or resetting the circuit breaker NOTE In an emergency when you must operate the engine but cannot isolate the cause for the high current draw turn off or disconnect all accessories connected to the engine and instrumentation wiring Reset the circuit breaker ...

Page 36: ...e top of the engine underneath the engine information plate a b 32638 a O2 sensor fuses b Main power fuel pump ignition and accessory fuses A 90 amp fuse is located on the large post of the starter solenoid This fuse protects the engine wiring harness mc74907 1 A 15 amp accessory fuse protects the accessory circuits This fuse is located on the rear of the engine a b c 32206 a Fuse cover b 5 amp fu...

Page 37: ...n the ignition key to the START position and nothing happens assuming the circuit breaker is not tripped mc70525 1 The power trim system is protected from overload by a 110 amp fuse and a 20 amp spade fuse on the power trim pump The trim pump may also have an in line circuit protection device in the power trim positive lead near the battery switch or battery connection a b 9208 a 20 amp spade fuse...

Page 38: ...stem if equipped The fuse is located in the wire connecting the positive terminal on the controller If the fuse fails the system will not operate and corrosion protection will be disabled mc79977 Audio Warning System IMPORTANT The audio warning system alerts the operator that a problem has occurred It does not protect the engine from damage Your Mercury MerCruiser power package may be equipped wit...

Page 39: ...on fault Transmission fluid temperature is too hot Drive oil is low Sensor failure Severe IMPORTANT If you experience a severe fault contact your authorized Mercury MerCruiser dealer If a severe fault is detected the audio warning system will sound for six seconds turn off for six seconds then sound for six more seconds 33403 a ON ON 6 6 6 OFF b a Horn on or off b Time in seconds Below are some ex...

Page 40: ...uce power anywhere from 100 to idle depending on the severity of the problem If forced to idle boat speed might not respond to throttle operation The PCM stores the fault for diagnostics For example if the water inlet becomes partially blocked Guardian reduces the available power level of the engine to help prevent damage from decreased water flow to the engine If the debris passes through and ful...

Page 41: ... Drain Plug and Bilge Pump 38 Protecting People in the Water 39 While You Are Cruising 39 While Boat Is Stationary 39 High Speed and High Performance Operation 39 Passenger Safety in Pontoon Boats and Deck Boats 39 Boats Having An Open Front Deck 39 Boats With Front Mounted Raised Pedestal Fishing Seats 40 Wave and Wake Jumping 40 Impact with Underwater Hazards 41 Drive Unit Impact Protection 42 C...

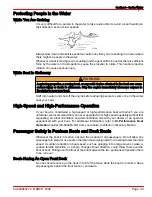
Page 42: ...instructions Water proof storage containers Spare operating equipment batteries bulbs and fuses Compass and map or chart of the area Personal flotation device 1 per person on board Watch for signs of weather change and avoid foul weather and rough sea boating Tell someone where you are going and when you expect to return Passenger boarding Stop the engine whenever passengers are boarding unloading...

Page 43: ... similar activities always keep a fallen or down skier on the operator s side of the boat while returning to attend to the skier The operator should always have the down skier in sight and never back up to the skier or anyone in the water Report accidents Boat operators are required by law to file a Boating Accident Report with their state boating law enforcement agency when their boat is involved...

Page 44: ...the boat is moored in a confined space b Mooring close to another boat with its engine operating 2 Examples of poor ventilation while a boat is moving mc79556 1 a b a Operating the boat with the trim angle of the bow too high b Operating the boat with no forward hatches open station wagon effect Basic Boat Operation Launching and Boat Operation IMPORTANT Install bilge drain plug prior to launching...

Page 45: ...sufficient cooling water the engine the water pump and other components will overheat and suffer damage Provide a sufficient supply of water to the water inlets during operation WARNING Explosive fumes contained in the engine compartment can cause serious injury or death from fire or explosion Before starting the engine operate the bilge blower or vent the engine compartment for at least five minu...

Page 46: ... Moving the control lever back to the idle neutral position will disengage the throttle only button and allow the engine to shift into gear 5 Throttle only mode is deactivated by moving the control lever to the idle neutral position Moving the control lever from the idle neutral position to the idle forward or idle reverse position without pressing the throttle only button will shift the unit into...

Page 47: ... and High Performance Operation If your boat is considered a high speed or high performance boat with which you are unfamiliar we recommend that you never operate it at its high speed capability without first requesting an initial orientation and demonstration ride with your dealer or an operator experienced with your boat For additional information refer to Hi Performance Boat Operation booklet 9...

Page 48: ...ling at faster speeds Any unexpected sudden reduction in boat speed could result in the elevated passenger falling over the front of the boat mc79557 1 Wave and Wake Jumping WARNING Wave or wake jumping can cause serious injury or death from occupants being thrown within or out of the boat Avoid wave or wake jumping whenever possible mc79680 1 Operating recreational boats over waves and wakes is a...

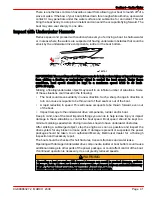
Page 49: ...Such a sharp change in direction or turn can cause occupants to be thrown out of their seats or out of the boat A rapid reduction in speed This will cause occupants to be thrown forward even out of the boat Impact damage to the underwater drive components rudder and or boat Keep in mind one of the most important things you can do to help reduce injury or impact damage in these situations is contro...

Page 50: ... when coming off plane At extremes can cause the boat to porpoise Shifting weight to front bow Improves ease of planing Improves rough water ride At extremes can cause the boat to veer back and forth bow steer The Bottom of the Boat To maintain maximum speed the boat bottom should be Clean free of barnacles and marine growth Free of distortion nearly flat where it contacts the water Straight and s...

Page 51: ...Once the RPM returns to the recommended operating RPM range normal engine operation resumes The boat manufacturer and the selling dealer are responsible for equipping the power package with the correct propeller Refer to Mercury Marine s web page http www mercurymarine com everything_you_need_to_know_about_propellers6 Select a propeller that will allow the engine power package to operate at or nea...

Page 52: ...ottle until the engine reaches normal operating temperature Frequently check engine oil level Add oil as needed It is normal for oil consumption to be high during the break in period After Break In Period To help extend the life of your Mercury MerCruiser power package the following recommendations should be considered Ensure that propeller allows the engine to operate at or near the top of the sp...

Page 53: ... 45 Section 4 Specifications Table of Contents Fuel Requirements 46 Fuel Ratings 46 Using Reformulated Oxygenated Gasoline USA Only 46 Gasoline Containing Alcohol 46 Engine Oil 47 Engine Specifications 48 Fluid Specifications 48 Sterndrives 48 Engine 48 4 ...

Page 54: ...soline Containing Alcohol Gasoline Containing Alcohol If the gasoline in your area contains either methanol methyl alcohol or ethanol ethyl alcohol be aware of possible adverse effects These adverse effects are more severe with methanol and worsen according to the percentage of alcohol in the fuel Alcohol in gasoline can absorb moisture from the air causing the water and the alcohol to separate fr...

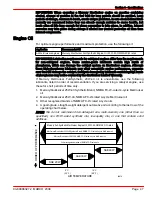
Page 55: ...ants may allow acceptable engine performance exposure over time will damage the catalyst Catalysts damaged by lubricants containing high levels of phosphorus may not be covered by the MerCruiser Limited Warranty If Mercury MerCruiser Full Synthetic 20W 40 oil is unavailable use the following lubricants listed in order of recommendation If you are servicing a catalyst engine use these for short per...

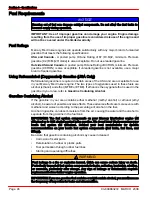
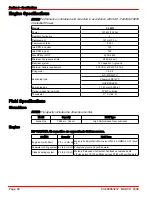
Page 56: ...e AC MR43LTS Champion RS12YC NGK BPR6EFS Spark plug gap 1 143 mm 0 045 in Timing in base timing mode PCM Controlled Thermostat 71 C 160 F Fluid Specifications Sterndrives NOTE Oil capacity includes the drive lube monitor Model Capacity Fluid Type Alpha One 1892 mL 64 oz High Performance Gear Lubricant Engine IMPORTANT All capacities are approximate fluid measures 3 0 MPI Capacity Fluid Type Engine...

Page 57: ...leaning the Flame Arrestor 63 Positive Crankcase Ventilation Valve PCV 63 Changing 63 Cleaning the IAC Muffler 64 Changing the Water Separating Fuel Filter 65 Inspecting the Fuel Pump Sight Tube 66 Lubrication 67 Steering System 67 Manual Steering System 68 Throttle Cable 69 Shift Cable Typical 69 Sterndrive Unit and Transom Assembly 70 Sterndrive U joint Shaft Splines and O rings Sterndrive Unit ...

Page 58: ... Familiarize the customer with the on board equipment Explain and demonstrate the operation of the power package and boat Provide you with a copy of a Predelivery Inspection Checklist Your selling dealer should fill out the Warranty Registration Card completely and mail it to the factory immediately upon sale of the new product Maintenance WARNING Performing service or maintenance without first di...

Page 59: ...engine or drive assembly and are unable to repair it the dealer s mechanic must reassemble the components and test to determine the problem This will cost you more than taking it to the dealer immediately upon having a problem It may be a very simple adjustment to correct the problem Do not telephone the dealer service office or the factory to attempt for them to diagnose a problem or to request t...

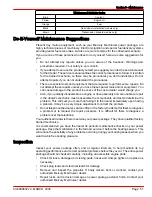
Page 60: ...water section of the cooling system after each use Weekly Check the water inlets for debris or marine growth Check and clean the seawater strainer if equipped Check the coolant level Inspect the sterndrive anodes and replace if 50 eroded Every two months or 50 hours Lubricate the propeller shaft and retorque the nut If operating only in freshwater you can extend the interval to every four months I...

Page 61: ...s section On driveshaft extension models lubricate the driveshaft U joints and tailstock input and output bearings Every 200 hours or 3 years Inspect the U joints the splines and the bellows Check the clamps Check the engine alignment Lubricate the U joint splines and cross bearing if equipped with grease fittings Lubricate the gimbal bearing and the engine coupler NOTE Lubricate the engine couple...

Page 62: ...ent when using or servicing your boat Be aware of the local restrictions governing the disposal or recycling of waste and contain and dispose of fluids as required IMPORTANT Always use the dipstick to determine the exact quantity of oil or fluid required 1 Stop the engine and allow the oil to drain into the oil pan for approximately five minutes with the boat at rest in the water 2 Remove the dips...

Page 63: ...id Type 3 0 MPI 3 8 L 4 US qt Mercury Full Synthetic MerCruiser Oil 20W 40 5 Replace the fill cap Changing Oil and Filter See Maintenance Schedule for the change interval Engine oil should be changed before placing the boat in storage IMPORTANT Change engine oil when the engine is warm from operation Warm oil flows more freely carrying away more impurities Use only recommended engine oil refer to ...

Page 64: ...hanging the Oil Filter Engine Oil Drain Pump 1 Loosen the oil filter to vent the system 2 Remove the dipstick 3 Install the oil pump onto the dipstick tube mc70571 1 a c b a Oil pump b Dipstick tube c Oil drain hose 4 Insert the hose end of the crankcase oil pump onto an appropriate container and usie the handle to pump until the crankcase is empty 5 Remove the pump 6 Install the dipstick Changing...

Page 65: ...th the boat at rest in the water 7 Check the oil level and add more if necessary Power Assisted Steering Fluid Checking 1 Stop the engine and center the sterndrive unit 2 Remove the fill cap from the power steering pump reservoir and observe the level The oil level must be at the lower mark when the engine is cold and at the upper mark when the engine is warm 32553 a b c a Power steering pump rese...

Page 66: ...use hot coolant to boil and discharge violently resulting in serious injury from burns Allow the engine to cool down before removing the coolant pressure cap 1 Remove the cap from the thermostat housing and observe the fluid level 32637 2 The coolant level in the thermostat housing should be at the bottom of the filler neck If the coolant level is low contact your authorized Mercury MerCruiser dea...

Page 67: ...ets during operation NOTICE Air trapped in the closed cooling system can cause the engine to overheat resulting in engine damage Minimize the possibility of trapping air when initially filling the closed cooling system by positioning the boat so that the front of the engine is higher than the rear of the engine NOTE Add coolant only when the engine is at normal operating temperature 1 Remove the f...

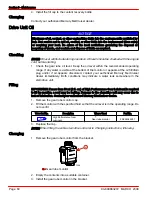
Page 68: ...ppears at the oil fill drain plug and or if oil appears discolored contact your authorized Mercury MerCruiser dealer immediately Both conditions may indicate a water leak somewhere in the sterndrive unit Filling IMPORTANT If more than 59 ml 2 fl oz of High Performance Gear Lubricant is required to fill the monitor a seal may be leaking Damage to the sterndrive unit may occur due to lack of lubrica...

Page 69: ...nit so that the propeller shaft is level Fill the sterndrive unit through the oil fill drain hole with specified gear lubricant until an air free stream of lubricant flows from oil vent hole Tube Ref No Description Where Used Part No 87 High Performance Gear Lubricant Sterndrive unit 92 858064K01 IMPORTANT Use only Mercury Quicksilver High Performance Gear Lubricant in sterndrive unit 7 Install th...

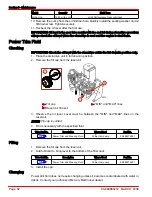
Page 70: ...ce the sterndrive unit in full down in position 2 Remove the fill cap from the reservoir b c a 5573 a Fill cap b Reservoir fill neck c MIN and MAX lines 3 Observe the oil level Level must be between the MIN and MAX lines on the reservoir NOTE Fill cap is vented 4 Fill as necessary with the specified fluid Tube Ref No Description Where Used Part No 114 Power Trim and Steering Fluid Power trim pump ...

Page 71: ...Flame arrestor b Clamp IMPORTANT Do not use an acid based cleaner as it can deteriorate portions of the flame arrestor 3 Clean the flame arrestor with warm soapy water 4 Inspect the flame arrestor for holes cracks or deterioration Replace if necessary 5 Allow the flame arrestor to air dry completely before use 6 Install the flame arrestor Tighten the flame arrestor clamp to specifications Descript...

Page 72: ... end of the valve check the hose connection and for vacuum leaks in the hose If no leaks are present replace the PCV valve 5 Clean the crankcase ventilation hose with warm soapy water Dry with compressed air or allow to air dry completely 6 Inspect the crankcase ventilation hose for cracks or deterioration Replace if necessary 7 Install the PCV valve in the valve cover and reconnect the hose to th...

Page 73: ...ting Fuel Filter WARNING Fuel is flammable and explosive Ensure the key switch is off and the lanyard is positioned so that the engine cannot start Do not smoke or allow sources of spark or open flame in the area while servicing Keep the work area well ventilated and avoid prolonged exposure to vapors Always check for leaks before attempting to start the engine and wipe up any spilled fuel immedia...

Page 74: ...Start the engine and check for leaks around the fuel filter assembly If leaks exist stop the engine immediately check the filter installation clean spilled fuel and properly ventilate the engine compartment If leaks continue stop the engine immediately and contact your authorized Mercury MerCruiser dealer Inspecting the Fuel Pump Sight Tube The engine fuel pump sight tube gives you visual evidence...

Page 75: ...f Steering Cable Has Grease Fittings Turn steering wheel until steering cable is fully retracted into cable housing Apply approximately 3 pumps of grease from a typical hand operated grease gun 6221 a a Steering cable grease fitting Tube Ref No Description Where Used Part No 34 Special Lubricant 101 Steering cable grease fitting 92 802865Q02 2 Turn steering wheel until steering cable fully extende...

Page 76: ... No Description Where Used Part No Synthetic Blend MerCruiser Engine Oil SAE25W 40 Tie bar pivot points 92 883725K01 5 Upon first starting engine turn steering wheel several times to starboard and then port to ensure that the steering system operates properly before getting underway Manual Steering System 1 Inspect the bushings for debris and lubricate the bushings a 7167 a Bushings Tube Ref No De...

Page 77: ...l 32586 a a b a Pivot points b Guide contact surfaces Shift Cable Typical 1 Lubricate the pivot points and the guide contact surfaces mc79736 a b a Pivot points b Guide contact surfaces Tube Ref No Description Where Used Part No Synthetic Blend MerCruiser Engine Oil SAE25W 40 Shift cable pivot points guide contact surfaces 92 883725K01 ...

Page 78: ...ft lubrication refer to Propellers Sterndrive U joint Shaft Splines and O rings Sterndrive Unit Removed 1 Coat sterndrive U joint O rings and driveshaft splines with grease a b 17293 a U joint O rings 3 b Driveshaft splines Tube Ref No Description Where Used Part No 91 Engine Coupler Spline Grease Driveshaft splines and U joint O rings 92 802869A 1 2 For propeller shaft lubrication refer to Propel...

Page 79: ...lubricated without removing the sterndrive unit The Perm a Lube U joints do not require lubrication Driveshaft Extension Models 1 Lubricate the transom end grease fitting and engine end grease fitting by applying approximately 10 12 pumps of grease from a typical hand operated grease gun 2 Lubricate the driveshaft grease fittings by applying approximately 3 4 pumps of grease from a typical hand op...

Page 80: ...n tab washer 2 Turn propeller shaft nut counterclockwise to remove nut 3 Slide tab washer drive sleeve propeller and thrust hub off propeller shaft Alpha Propeller Installation NOTICE Operating the engine with a loose propeller can damage the propeller the drive or drive components Always tighten the propeller nut or nuts to specification and check for tightness periodically and at the required ma...

Page 81: ...rst use bend the three tabs straight and retorque the propeller nut Bend tabs back down into spline washer Check propeller at least after 20 hours of operation Do not operate with loose propeller Drive Belts WARNING Inspecting the belts with the engine running may cause serious injury or death Turn off the engine and remove the ignition key before adjusting tension or inspecting belts b d c a 7170...

Page 82: ...assembly and the engine block You may need to tap gently on the spacer 4 Loosen the alternator Remove and replace the alternator belt 5 Replace the spacer block between the bracket assembly and the engine block Install the two screws using the washers removed previously 6 Adjust the crank position sensor so the gap between the sensor and the flywheel meets the following specification Description S...

Page 83: ...the power steering brace to its original position and adjust tension of both drive belts Description Deflection 6 mm 1 4 in Flushing the Power Package Your boat comes equipped with through the sterndrive water pickups See Sterndrive Water Pickups following for the flushing procedure Consult your authorized Mercury MerCruiser dealer for further explanation IMPORTANT Alpha engines with the sterndriv...

Page 84: ...n the water a Raise the sterndrive to trailer position b Install the appropriate flushing attachment over the water inlet holes in the gear housing c Lower sterndrive to full down in position 3 If flushing the cooling system with the boat out of the water a Lower sterndrive to full down in position WARNING Rotating propellers can cause serious injury or death Never operate the boat out of the wate...

Page 85: ...e is completed remove the seawater inlet hose from the thermostat housing and plug the hose to prevent water from siphoning into the boat This prevents seawater from contaminating the engine flush 14 Tag the ignition switch with an appropriate tag requiring the seawater inlet hose to be reconnected prior to operating engine Battery Refer to specific instructions and warnings accompanying your batt...

Page 86: ...er two or more dissimilar metals like those found on the sterndrive are submerged in a conductive solution such as saltwater polluted water or water with a high mineral content a chemical reaction takes place causing electrical current to flow between metals The electrical current flow causes the metal that is most chemically active or anodic to erode This is known as galvanic corrosion and if not...

Page 87: ...ome models have a MerCathode System as standard equipment 5 6 1 7 8 2 4 3 1 2 3 4 5 6 7 8 17276 1 Gearcase anodic plate 2 Ventilation plate anode 3 Gimbal mounted anodic block 4 MerCathode System 5 Anode kit 6 Trim cylinder anodes 7 Bearing carrier anodes Alpha only 8 Propshaft Anode Bravo III standard IMPORTANT Replace sacrificial anodes if eroded 50 percent or more The following sacrificial anod...

Page 88: ...ront of the gearcase a 6122 a Anode Drive Mounted Anodic Block if equipped Mounted to underside of gimbal housing 5640 MerCathode System Electrode assembly replaces Anodic block System should be tested to ensure adequate output The test should be performed where boat is moored using Quicksilver Reference Electrode and Test Meter Contact your authorized Mercury MerCruiser dealer ...

Page 89: ...that the MerCathode reference electrode is not damaged do not paint or pressure wash 6206 a b a MerCathode controller b MerCathode assembly Anode Kit if equipped Mounted to the boat transom 5642 Trim Cylinder Anodes Mounted on each trim cylinder a 7460 a Trim cylinder anodes ...

Page 90: ...ly steering system shift and throttle linkages should be kept well lubricated 4 Flush cooling system periodically preferably after each use Painting Your Power Package IMPORTANT Corrosion damage that results from the improper application of anti fouling paint will not be covered by the limited warranty 1 Painting Boat Hull or Boat Transom Anti fouling paint may be applied to boat hull and boat tra...

Page 91: ...ansom of the boat around these items b a 5578 a Painted boat transom b Unpainted Area on Transom 2 Painting Sterndrive Unit or Transom Assembly Sterndrive unit and transom assembly should be painted with a good quality marine paint or an anti fouling paint that does not contain copper tin or any other material that could conduct electrical current Do not paint drain holes anodes MerCathode system ...

Page 92: ...Section 5 Maintenance Notes Page 84 90 899883272 MARCH 2008 ...

Page 93: ...86 Preparing Power Package for Storage 86 Engine and Fuel System Preparation 87 Draining the Seawater System 88 Single Point Drain System 88 Draining the Seawater Section of Models with Closed Cooling 89 Clearing Clogged Blue Drain Hoses 92 Draining the Sterndrive 94 Battery Storage 95 Power Package Recommissioning 95 6 ...

Page 94: ... for Storage 1 Fill the fuel tanks with fresh gasoline that does not contain alcohol and a sufficient amount of Quicksilver Gasoline Stabilizer for Marine Engines to treat the gasoline Follow instructions on the container 2 Check the antifreeze concentration Refer to the Specifications section 3 If the boat is to be placed in storage with fuel containing alcohol in fuel tanks if fuel without alcoh...

Page 95: ... out of fuel can damage catalyst components Do not allow the fuel tanks to become empty during operation 1 In a 23 liter 6 US gal remote fuel tank mix a 19 liter 5 US gal regular unleaded 87 octane 90 RON gasoline b 1 89 liter 2 US qt Premium Plus 2 Cycle TC W3 Outboard Oil c 150 ml 5 oz Fuel System Treatment and Stabilizer or 30 ml 1 oz Fuel System Treatment and Stabilizer Concentrate Tube Ref No...

Page 96: ... System CAUTION Disconnecting the blue drain hoses can cause serious burns due to hot water Check all hose connections before operating the engine and never disconnect the hoses until the engine has had suffient time to cool NOTICE If the boat is at rest in the water with the engine off an open seacock or water inlet hose could introduce water into the engine s cooling system or the boat Keep the ...

Page 97: ...ly connected 10 Push down on the T handle until seated 11 Turn off the bilge pump 12 If the boat was drained in the water open the seacock if equipped or unplug and reconnect the water inlet hose prior to operating the engine IMPORTANT The next time you start the engine check the blue drain hoses for leaks Draining the Seawater Section of Models with Closed Cooling NOTICE Water trapped in the seaw...

Page 98: ...e boat out of the water place the boat on a level surface to ensure complete draining of the system 2 Remove the drain plug from the aft drain plug from the heat exchanger 7184 a a Aft heat exchanger drain plug 3 Clean out the drain hole with a stiff piece of wire until the entire system is drained NOTE It may be necessary to lift or bend hoses to allow water to drain completely ...

Page 99: ...99883272 MARCH 2008 Page 91 4 Remove and lower the hose connecting the water inlet to the power steering cooler or the water inlet to the heat exchanger 32651 a b a Power steering cooler b Water inlet to heat exchanger hose ...

Page 100: ...n plug Tube Ref No Description Where Used Part No 19 Perfect Seal Aft heat exchanger plug 92 34227 1 8 Prior to launching the boat or starting the engine install the drain plug reconnect the hoses and tighten all hose clamps securely 9 If the boat was drained in the water open the seacock if equipped or unplug and reconnect the water inlet hose prior to operating the engine Clearing Clogged Blue D...

Page 101: ... 5 Start the engine and allow it to operate at idle until the obstruction is cleared from the hose or for approximately 1 minute whichever occurs first 6 Check for water draining from the blue drain hose If after 1 minute of idling the blue drain hose is still clogged proceed to Step 7 If water is draining shut off the engine and continue with Step 3 of Single Point Drain System 7 Shut off the eng...

Page 102: ...ve NOTE This procedure is needed only for salty brackish mineral laden or polluted water applications and for freezing temperatures or extended storage 1 Insert a small wire repeatedly to make sure that vent holes water drain holes and passages are unobstructed and open b a d e f c 6146 Sterndrive Water Drain Holes a Speedometer pitot tube b Trim tab cavity vent hole c Trim tab cavity drain passag...

Page 103: ...nect the negative battery cable first and connect it last 2 Install a fully charged battery Clean the battery cable clamps and terminals and reconnect cables Tighten each cable clamp securely when connecting 3 Coat the terminal connections with a battery terminal anti corrosion agent 4 Perform all the checks in the before starting column of the Operation Chart NOTICE Without sufficient cooling wat...

Page 104: ...Section 6 Storage Notes Page 96 90 899883272 MARCH 2008 ...

Page 105: ...d to Start 98 Engine Runs Rough Misses or Backfires 99 Poor Performance 99 Excessive Engine Temperature 99 Insufficient Engine Temperature 99 Low Engine Oil Pressure 100 Battery Will Not Recharge 100 Remote Control Is Difficult to Move Has Excessive Play or Makes Unusual Sounds 100 Steering Wheel Jerks or Is Difficult to Turn 100 Power Trim Does Not Operate Motor Does Not Operate 100 Power Trim Do...

Page 106: ...ff Turn the switch on Remote control not in neutral position Position the control lever in neutral Open circuit breaker or fuse Check and reset the main power circuit breaker or replace the fuse Check the 5 amp fuse on the power harness connected to the battery and replace if necessary Loose or dirty electrical connections or damaged wiring Check all electrical connections and wires especially bat...

Page 107: ...r redistribute load more evenly Flame arrestor dirty Clean the flame arrestor Boat bottom fouled or damaged Clean or repair as necessary Ignition problem See Engine Runs Rough Misses or Backfires Engine overheating See Excessive Engine Temperature EFI System fault Have EFI System checked by an authorized Mercury MerCruiser dealer Excessive Engine Temperature Possible Cause Remedy Water inlet or se...

Page 108: ...lay or Makes Unusual Sounds Possible Cause Remedy Insufficient lubrication on shift and throttle linkage fasteners Lubricate Obstruction in shift or throttle linkages Remove obstruction Loose or missing shift and throttle linkages Check all throttle linkages If any are loose or missing see authorized Mercury MerCruiser dealer immediately Shift or throttle cable kinked Straighten cable or have auth...

Page 109: ...Check all associated electrical connections and wires especially battery cables Clean and tighten faulty connection Repair or replace wiring Power Trim Does Not Operate Motor Operates but Sterndrive Unit Does Not Move Possible Cause Remedy Trim pump oil level low Fill pump with oil Drive unit binding in gimbal ring Check for obstruction ...

Page 110: ...Section 7 Troubleshooting Notes Page 102 90 899883272 MARCH 2008 ...

Page 111: ...ssistance 104 Local Repair Service 104 Service Away From Home 104 Stolen Power Package 104 Attention Required after Submersion 104 Replacement Service Parts 104 Parts and Accessories Inquiries 105 Resolving a Problem 105 Mercury Marine Service Offices 105 Ordering Literature 106 United States and Canada 106 Outside The United States and Canada 106 8 ...

Page 112: ...t an authorized Mercury MerCruiser dealer 2 After recovery immediate service by an authorized Mercury MerCruiser dealer is required to reduce the possibility of serious engine damage Replacement Service Parts WARNING Avoid fire or explosion hazard Electrical ignition and fuel system components on Mercury Marine products comply with federal and international standards to minimize risk of fire or ex...

Page 113: ... the owner of the dealership if the sales manager and service manager have been unable to resolve the problem 2 If your question concern or problem cannot be resolved by your dealership please contact Mercury Marine Service Office for assistance Mercury Marine will work with you and your dealership to resolve all problems The following information will be needed by the Service Office Your name and...

Page 114: ...ed States and Canada For information on additional literature that is available for your particular Mercury MerCruiser power package and how to order that literature contact your nearest dealer or contact Mercury Marine Publications P O Box 1939 Fond du Lac WI 54936 1939 920 929 5110 Fax 920 929 4894 Outside The United States and Canada Contact your nearest dealer or Marine Power Service Center fo...

Reviews: