
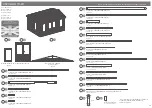


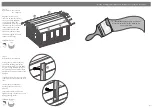

Felt Tacks x600
70mm Screw x80
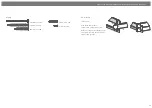
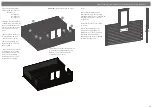
Pre-assembly
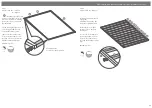
*Please note:
Each board interlocks at
either end in a staggered pattern.
Before securing ensure that the boards
are fitted properly in their respective
tongues and grooves.
Nail Bag
40mm Screw x700
30mm Screw x 78
P 3
Please retain product label and instructions for future reference
80mm Bolt Set x16


