background image

P 6

Please retain product label and instructions for future reference


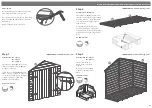
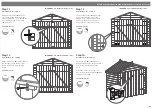
Step 11

Parts Needed - No. 7 Qty 4

Attach the bolt blocks 

(No. 7)

 to the 

doors using 2 x 30mm screws, in the 

positions illustrated. Screw through the 

door cladding into the blocks using 

30mm screws.

8 x 30mm Screws

30mm 

screw

Pre drill 

hole

IMPORTANT: 

Pre-drill before fixing screws.

7

7

7

7

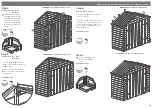
Step 12

Parts Needed - No. 17 Qty 4

Fix the turn buttons 

(No. 17)

 to the bolt 

blocks at the top and bottom of the 

door using a 30mm screw per turn 

button.

2 x 30mm Screws

30mm 

screw

Pre drill 

hole

IMPORTANT: 

Pre-drill before fixing screws.

17

17

17

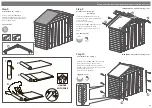
Step 13

Parts Needed - No. 11 Qty 2

Locate the Door strips 

(No.11)

 onto the 

door gable and fix into place using 

3x30mm screws. Ensure that the screw 

is parallel with the door frame when 

fixing, as shown in the close up view.

6 x 30mm Screws

Pre drill 

hole

IMPORTANT: 

Pre-drill before fixing screws.

11

30mm 

screw

11

11

15

Step 14

Parts Needed - No. 15 Qty 4

Fix the pad bolt 

(No. 15)

 to the door 

using 8 x 30mm screws. Ensure the pad 

bolt lines up with the block on the 

back.

Attach the retainer to the opposite 

door in-line with the bolt block

 (No.15) 

using 4 x 30mm screws.

12x 30mm Screws

30mm 

screw

Pre drill 

hole

Summary of Contents for 05DTMBAX0307DD-V1

Page 1: ...placing your garden building underneath large trees to prevent the tree causing damage to the building TIMBER As with all natural materials timber can be affected during various weather conditions For the duration of heavy or extended periods of rain swelling of the wood panels may occur Warping of the wood may also occur during excessive dry spells due to an interior moisture loss Unfortunately t...

Page 2: ...X1327 V1 5 Door Qty 2 AI S11FBMBZBD781X1320 V1 4 Floor Qty 2 AI R11MBF795X988 V1 3 Roof Qty 2 AI S11MBOHAR1110X825 V1 7 Bolt Block 28x28x132mm Qty 4 FS2828 132mm 8 Fascia 12x56x1095mm Qty 4 s1256 1095mm 9 Ridge Bar 28x28x744mm Qty 1 FS2828 744mm 10 Cover Trim 12x45x1324mm Qty 4 S1245 1324mm 14 Felt PI 01 0025 15 Pad Bolt Qty 1 PI 07 0035 17 Turn Button Qty 2 PI 07 0034 12 Corner Brace Qty 2 PI 07 ...

Page 3: ...mm screws per hinge 28 x 30mm Screws Step 1 1 5 13 30mm screw Pre drill hole IMPORTANT Pre drill before fixing screws Parts Needed No 4 Qty 2 Place the floors No 4 on a firm and level base ensure the base has suitable drainage free from areas where water can collect see front page for base requirements Position the floors side by side as shown in the diagram Fix together using 4 x 50mm screws alte...

Page 4: ...n line with the central framing of the gable tops No 1 2 Fix in place with one Corner Brace No 12 at each end using 4x30mm screws per brace 8 x 30mm Screws Pre drill hole 50mm screw 9 12 A Step 6 IMPORTANT Pre drill before fixing screws Parts Needed No 3 Qty 2 Attach the roof No 3 using 7 x 30mm screws on each side Secure the roofs No 3 into place using 7 x 30mm screws ensure the roof sits square ...

Page 5: ...m screws as shown Pre drill to avoid splitting Attach the finial No 16 to the fascias at the front and the back of the building using 2 x 30mm screws per finial 16 x 30mm Screws IMPORTANT Pre drill before fixing screws 30mm screw Pre drill hole 16 16 8 8 8 8 10 10 10 Step 10 IMPORTANT Pre drill before fixing screws 30mm screw Pre drill hole Parts Needed No 10 Qty 1 Fit the Cover Trims No 10 to the...

Page 6: ...utton 2 x 30mm Screws 30mm screw Pre drill hole IMPORTANT Pre drill before fixing screws 17 17 17 Step 13 Parts Needed No 11 Qty 2 Locate the Door strips No 11 onto the door gable and fix into place using 3x30mm screws Ensure that the screw is parallel with the door frame when fixing as shown in the close up view 6 x 30mm Screws Pre drill hole IMPORTANT Pre drill before fixing screws 11 30mm screw...

Page 7: ...label and instructions for future reference It is ESSENTIAL that you apply wood treatment immediately after the building has been assembled AFTER TREATMENT score around protective cover on glazing and carefuly peel covering back ...

Page 8: ...P 8 2 1 3 4 ...

Page 9: ...P 9 1 2 ...

Reviews: