background image

— 35 —

Web Apps

6

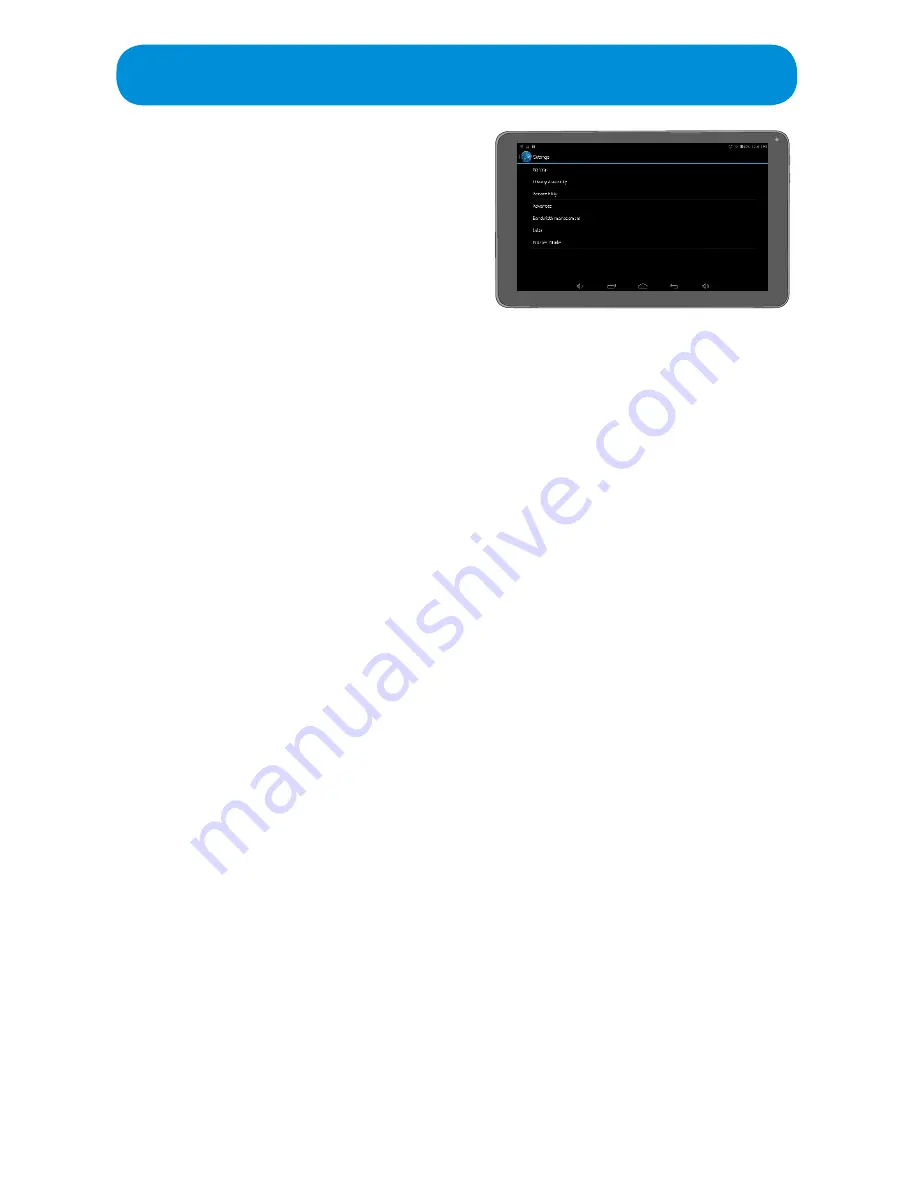
  Set the Browser Settings as follows:

General: 

  Set Home Page: Set the page 

that will appear when opening the 

Browser.

  Form Auto-Fill:  Turn the Form Auto 

Fill option On or Off. Turning this On will allow the filling of forms with a 

single touch.

Private & Security:

  Clear Cache: Clear the locally cached content and databases.

  Clear History: Clear Browser history.

  Show Security Warnings: Turn this option On or Off. Turning this On will 

warn you if the site you are visiting has possible security risks.

  Accept Cookies: Turn this option On or Off. Turning this On will allow 

cookies to be saved on your Tablet. Cookies are usually small text files 

stored on your Tablet and are created when you use your browser to visit a 

website that uses cookies to keep track of your movements within the site, 

help you resume where you left off, remember your registered login, theme 

selection, preferences, and other customization functions. 

  Clear All Cookie Data: Clear all cookie data.

  Enable Location: Turn this option On or Off. Turning this On will allow sites 

to request access to your location.

  Clear Location Access: Clear location data.

  Remember Passwords: Turn this option On or Off. Turning this On will 

save usernames and passwords for websites.

  Clear Passwords: Clear all username/password data.

Accessibility:

  Force Enable Zoom: Turn this option On or Off. Turning this On will 

override a website’s request to control zoom behavior.

  Text Size: Set the desired text size.

  Text Scaling: Set the text scale using the sliding scale. 

  Zoom on Double Tap: Set the Zoom scale using the sliding scale.

  Minimum Font Size: Set the minimum font size using the sliding scale.

  Inverted Rendering: Turn this option On or Off. Turning this On will invert 

the screen (black becomes white and vice-versa). 

  Contrast: Set the desired contrast using the sliding scale.

Summary of Contents for MTAB-09541AB

Page 1: ...Tablet Quad Core I ll Keep You Productive User Guide Please read these instructions completely before operating this product memorex ce com Model MTAB 09541AB PLEASE RECYCLE Facilities may not exist in your area ...

Page 2: ...or Widget to the Home Screen 11 Removing a Home Screen App Widget 11 Creating a Folder 11 Screen Orientation 12 Screen Gestures 12 Headphones 14 Notifications 14 Getting Started 15 Installing a Micro SD Card 15 Charging the Tablet Using with the AC Adapter 16 Turning the Tablet On 16 Turning the Tablet Off or into Sleep Mode 17 Rebooting the Tablet 17 ...

Page 3: ...4 Setting the Clock Alarm Options 26 Setting the Timer or Stopwatch 27 Web Apps 28 Setting up Email 28 Using Email 29 Setting the Email Options 30 Using the Browser 33 Camera Video App 37 Camera Taking a Standard Photo 37 Camera Taking a Panoramic Photo 38 Taking a Video 40 Viewing and Editing Photos 42 Viewing and Editing Videos 44 File Management 46 File Management 46 App Stores 47 Purchasing Ap...

Page 4: ... 51 Device 51 Personal 54 Accounts 55 System 56 Connecting to a Computer 58 Connecting to External Storage 60 Updating Firmware 61 Resetting the Tablet 62 Troubleshooting 63 Safety and Information 64 Care and Maintenance 67 SPECIFICATIONS 68 Customer Support 69 ...

Page 5: ...e Micro USB to USB Cable What is in the Box 9 Android Tablet Quad Core I ll Keep You Productive Quick Start Guide Please read these instructions completely before operating this product memorex ce com Model MTAB 09541AB PLEASE RECYCLE Facilities may not exist in your area ...

Page 6: ... 5 Learning Your New Tablet Front Facing Camera Charge Indicator Touchscreen Description of Controls Front ...

Page 7: ... 6 Learning Your New Tablet Power Button Rear Camera HOME Button Microphone DC Jack Micro USB Jack Micro SD Card Slot not included Headphones Jack Rear Side ...

Page 8: ... 7 Learning Your New Tablet Clasp Micro USB Cable Keyboard Indicator Retaining Clips Keyboard ...

Page 9: ...ed to PC Airplane Mode activated Wi Fi connected Downloading data Battery power level Screenshot taken Silent Mute is activated Headphones connected Micro SD Card is mounted Micro SD Card issue POWER SAVING Swipe to the left to bring up the Power Saving screen where you will be shown three options Wi Fi Reload and Brightness to reduce the power requirements of the Tablet Simply tap to turn the sel...

Page 10: ...ogle Icons v Apps Widget Screen Icon w Task Bar Lower volume View open Apps To open an app tap it To remove a thumb nail from the list swipe it up Return to Home screen Return to Previous screen Raise volume TIP Swipe to the right to bring up additional Widgets ...

Page 11: ... it Swipe to the left if more than one page of Apps exist Swipe again for more pages or to view the Widgets Apps Screen Widget Screens Widgets are shortcuts to applications that bring your favorite apps and content right to the Home screen without having to launch Apps To add widgets to your home screen see the next page ...

Page 12: ...emoving a Home Screen App Widget Tap and hold and then drag the desired App Widget link to the X at the top left of the screen This will not delete the App it will only remove the Home screen link Creating a Folder On a Home screen tap and hold an App you want to group then drag it to an App that you would like to group it with Drop it on top of that App a folder will automatically be created Repe...

Page 13: ...ation Screen Gestures Throughout this manual you will receive instructions such as Tap or Stretch see as follows for the descriptions Tap What does it do Opens selects the item you tap similar to clicking a mouse How do I do it Simply tap an item with your finger Tap and Hold What does it do Selects an item to move or brings up addition information How do I do it Tap and hold your finger on the it...

Page 14: ...tem from one location to another How do I do it Tap and hold an item with your finger then move it to the desired position and release your finger Pinch What does it do Zooms out of on an item like a picture or a map How do I do it Touch the screen or an item with two or more fingers then move the fingers toward each other Swipe What does it do Move the screen vertically or horizontally How do I d...

Page 15: ...he Headphone jack on the side of the Tablet Notifications Swipe down from the top left of the screen once to view the icons and once again to bring up the notifications Swipe down once again to view more info Swipe up to remove it SETTINGS See page 50 for the Setting screen which will allow you to change many settings and options of the Tablet ...

Page 16: ... 32GB with music video photos etc and view them on this Tablet Insert the Micro SD Card as follows Simply slide a Micro SD Card as shown until it clicks in place To remove press in on the Micro SD Card to release it Tip See page 53 to mount un mount erase etc the Micro SD Card ...

Page 17: ...e AC plug into a standard AC outlet having 120V 60Hz When the AC Adapter is connected the Charge indicator will light up blue When done charging the Charge indicator will turn off When in the OFF mode press and hold the POWER button for three seconds to turn the unit ON At the Lock screen Tap and Swipe the LOCK icon towards the UNLOCK icon to unlock the tablet When in the Sleep mode see next page ...

Page 18: ...off You can also press and release the POWER button to put the unit to Sleep mode where it will not be turned off but the screen will be off to save battery power When in the On mode press and hold the POWER button until the Pop up Menu appears Select REBOOT to restart the Tablet To mute the sound press and hold the POWER button until the Pop up Menu appears Select SILENT MODE to mute the sound Re...

Page 19: ... Tablet The single top clip will be spring loaded so slide up to enable easy insertion To connect the keyboard plug the micro USB plug into the Micro USB jack on the side of the Tablet 2 The Android should immediately recognize the keyboard but if it does not tap the Settings App on the Home screen Retaining Clips Retaining Clips Connect to side of Tablet 3 Tap Language Input ...

Page 20: ...ing Started 4 Tap on Android Keyboard AOSP 5 Tap on A to bring up the Keyboard s options 6 Set the desired keyboard options but most importantly tap Input Languages and select English as the Active Input Method ...

Page 21: ... most out of your Tablet 1 With the power on swipe down from the top right of the screen once to show the indicators and again to bring up the Quick Menus 2 Tap on Wi Fi or an existing network 3 Tap the ON OFF switch at the top right of the screen to turn Wi Fi On NAME AUTO ROTATE LOCATION SCREEN SHOT Tip If you previously connected to a Network it will automatically be connected ...

Page 22: ...enter the password then Tap Done Tap Connect and if the password was correct and the Network is valid Saved or Connected will appear under the Network name Tip If a lock appears next to the icon then the network is secure and will require a password to connect ...

Page 23: ...ot in use after a period of between 15 seconds and 30 minutes See page 52 to set this option 1 While on the Home screen tap and hold the screen until the Wallpaper pop up appears 2 Select an option to set the Wallpaper Live Wallpapers Pre installed animated wallpapers UHD Player Photos taken by the camera Wallpapers Pre installed wallpapers Tap SET WALLPAPER Choose wallpaper from Live Wallpapers U...

Page 24: ...n to bring up the Apps screen Tap the Clock App to open 2 To set the Time Zone tap the icon then select the Time Zone you are in 3 To set to Night Mode tap at the top right of the screen and tap Night Mode the display will darken and the time will appear smaller on the screen Tip Tap the magnifying glass at the top right to search easily ...

Page 25: ...p Setting the Alarm s Set the desired alarm s as follows 1 At the Home screen tap the icon to bring up the Apps screen Tap the Clock App to open 2 Tap the Alarm icon 3 Tap one of the Alarms the Setting screen will appear ...

Page 26: ...ith the Additional Settings options 7 To set another alarm tap the icon at the bottom right of the screen 6 At this screen set the following u Tap to turn the alarm On or Off v Tap to name the alarm w Tap to delete the alarm x Tap to Repeat Alarm y Tap to set the desired days the alarm will sound U Tap to set the Alarm sound V Tap to collapse the pull down menu u v w x U V y ...

Page 27: ...ings the options will appear 3 At this screen set the following CLOCK OPTIONS Style Tap to select a clock format Analog or Digital Automatic Home Clock Tap to turn On or Off Turning this option On will keep your home time zone time when traveling out of your time zone Home Time Zone If above option is activated select the home time zone Tip Date and Time options can also be set changed using the S...

Page 28: ...p the stopwatch Clock Alarm App 4 ALARM OPTIONS Silence After Tap to select the desired time for the alarm to sound when activated Snooze Length When the alarm sounds you can select Snooze Use this option to set the desired Snooze time Volume Buttons Tap to bring up the Volume Button options Tap Snooze and the Volume icons will operate as Snooze buttons Tap Dismiss and the Volume icons will turn t...

Page 29: ... tap the icon to bring up the Apps screen 2 Tap the Email App 3 Enter your email address and password and then tap Next If entered correctly the Account Options screen will appear Set the desired options and your email will be set up Tip You can also tap the Manual Setup button if you would prefer to manually setup your email ...

Page 30: ... appear See as follows for descriptions of the icons on this page Compose a new email Search the Emails Tap to Refresh the emails or to access the Settings see next page 3 Tap an email to read it While an email is open tap the icons to perform the following Compose a new email Search the Emails Delete the selected message Mark the message as unread Tap to Refresh the emails or to access the Settin...

Page 31: ... tap the Email App the Email Options screen will appear 2 Tap the icon at the top right and the tap Settings to bring up the Email Settings 4 Tap the icon at the top left of the screen to bring up the Folders menus where you can select a desired folder to view ...

Page 32: ... Conversation List Sender Image Tap to turn this option On or Off Select On and the sender s image will appear next to the name Reply All Tap to turn this option On or Off Select On and Reply All will be the default when replying to emails Swipe to Delete Tap to turn this option On or Off Select On and you can swipe to delete an email Tap the icon at the top right of the screen to Select Clear Pic...

Page 33: ...Signature Text entered here will appear on the bottom of every email you send Quick Responses Freqently used Quick Responses Sync Frequency Time frame to sync emails Download Attachments Auto download attachments when connected to Wi Fi Email Notifications Send notification when email arrives Choose Ringtone Select the desired ringtone Server Setting Select incoming and outgoing settings ...

Page 34: ...access the Browser by tapping the Browser App in the Apps screen 2 Enter a URL and tap Go press Enter if using the keyboard or tap on one of the options that pre fill as you type to go to that page 3 When a web site appears you can navigate it by swiping up down left and right Tip To zoom in or out on some web pages double tap the screen or stretch ...

Page 35: ...o refresh the page Forward Tap to go to the next page New Incognito Tab Tap to open a new Browser window and browse in Private mode Share Page Tap to share the page via Email etc Find on Page Tap to search the page for a specific word Request Desktop Site Tap to attempt to view the standard website instead of the mobile website Page Info Tap to view info of the page such as the URL Certificate etc...

Page 36: ...ume where you left off remember your registered login theme selection preferences and other customization functions Clear All Cookie Data Clear all cookie data Enable Location Turn this option On or Off Turning this On will allow sites to request access to your location Clear Location Access Clear location data Remember Passwords Turn this option On or Off Turning this On will save usernames and p...

Page 37: ...ablet s screen Block Pop ups Turn this option On or Off Turning this On will block websites from using pop up menus Text Encoding Set the desired text encoding Reset to Default Resets the option s values to the factory settings Bandwidth Management Search Result Preloading Turn this option On or Off Turning this On will allow the Browser to preload high confidence search engine results in the back...

Page 38: ...phs using the built in front or rear camera 1 At the Home screen tap the icon to bring up the Apps screen You can also access the Camera directly from the Home screen or by dragging the lock towards the camera on the Lock screen 2 Tap the Camera App 3 Select the camera mode by tapping the Mode icon and selecting ...

Page 39: ...tion info with the photo A Tap to enable the countdown timer When set tap Done and when the Shutter icon is tapped the unit will countdown and then take a picture A Tap to set the desired picture size 2M Pixels or SVGA A Tap to set the desired white balance A Tap to switch between the front and rear cameras 5 Pinch and sweep to Zoom in or out of the picture 6 When ready tap the icon to take a phot...

Page 40: ...n You can also access the Camera directly from the Home screen or by dragging the lock towards the camera on the Lock screen 2 Tap the Camera App 3 Select the panoramic camera mode by tapping the Mode icon and selecting 4 Hold the Tablet steady and then tap the n icon Slowly pan across the scene to take the desired panoramic image When done tap the g icon Swipe to the left to view the photos and v...

Page 41: ... the Home screen tap the icon to bring up the Apps screen You can also access the Camera directly from the Home screen or by dragging the lock towards the camera on the Lock screen 2 Tap the Camera App 3 Select the Video mode by tapping the Mode icon and selecting 4 Pinch and Sweep to Zoom in or out of the picture before you start recording ...

Page 42: ...e photos and videos see page 44 for more details 5 Set the desired Video options by pressing the Z icon and then setting as follows A Tap to set the desired white balance A Tap to set the following A Tap to turn Location Access On or Off Turning On will include the location info with the photo A Tap to switch between the front and rear cameras ...

Page 43: ... Editing Photos This section explains how to view or edit photos on this Tablet 1 When the Camera App is open swipe to the left to view the videos and photos 2 Select a photo to edit by tapping on it 3 Tap the icon to share the photo ...

Page 44: ...ft corner to save the altered photo 6 Tap the icon at the top right of the screen to bring up more options such as Edit same as step 5 Rotate Left Rotate Right Crop Set Picture As and Details Set Picture As option will allow you to use the selected photo as your Contact Photo or as Wallpaper Details will give details of the photo such as file size title date taken and more ...

Page 45: ...ting Videos This section explains how to view or edit videos on this Tablet 1 When the Camera App is open swipe to the right to view the videos and photos 2 Select a video to view or edit by tapping on it 3 Tap the icon to share the video ...

Page 46: ... screen to view the on screen controls to Rewind Forward Pause and more 6 Tap the icon at the top right of the screen to bring up two more options as follows Trim Tap this to trim the beginning or end of the video as desired When done tap SAVE Details Tap to view details of the photo such as File Size Title Duration and more ...

Page 47: ...At the Home screen tap the icon to bring up the Apps screen 2 Tap File Management App the File management screen will appear 3 Tap the top row of icons to view the files on the selected source or format Tap on the folders to open to view contents Notes Some files formats are not supported Some files may not play properly depending on how they are encoded ...

Page 48: ...p Stores including on this Tablet 1 At the Home screen tap the icon to bring up the Apps screen The Home screen will also have a couple Apps that you can tap on right from the Home screen 2 Tap the desired store and follow the App s instructions to order additional Apps ...

Page 49: ...function calendar Camera Camera and video camera Clock Alarm clock Download Downloads will appear here Email Access email Facebook Manage and view your Facebook account File Management Web browser GetJar App store Google Google search Google Settings Google settings Office Suite Collection of productivity programs People Contacts Play Music Music player Settings Set the tablet s options SlideMe Ap...

Page 50: ...t the desired Wi Fi Network AUTO ROTATE Tap to turn Auto Rotate option On or Off BATTERY Tap to view the remaining battery power and the Apps battery usage AIRPLANE MODE Tap to turn the Airplane Mode On or Off Turning this option On will allow you to use the tablet but not Wi Fi LOCATION OFF Tap to turn Location Access On or Off SCREEN SHOT Tap to take a screen shot of the current screen without t...

Page 51: ...follows 1 With the power on swipe down from the top right of most screens to bring up the Quick Menus You can also tap the Settings App in the Apps screen 2 Tap SETTINGS to open the Settings App NAME AUTO ROTATE NETWORK LOCATION SCREEN SHOT ...

Page 52: ...Hotspot or to Set up a Wi Fi Hotspot Ethernet Not used VPN You can create virtual private networks and connect to your private network securely through a public network such as the internet Tap this option and set up a VPN username and password DEVICE Sound Tap to set the following Volumes Tap to set volumes for the various sounds Music Video Games Other Media Notifications and Alarms Default Noti...

Page 53: ...eter Coordinate System If is recommended to keep this set to Default Coordinate System unless a game system requests it to change Gravity Sensor Calibration Tap to set the Gravity Sensor Calibration the tilt sensitivity Always perform on a flat table Cast Screen Tap to cast mirror this tablet s screen to another device such as a TV PC another tablet etc The receiver must have an Android Dongle or ...

Page 54: ...SB jack This should be automatic but if not use this function Unmount option will be here if a Micro SD card is already inserted Mount USB Storage Tap to erase the storage Tablet connected to the USB jack Battery Tap to view the remaining battery power and the Apps battery usage Apps Tap to view Apps Swipe through the screens to view Downloaded Running and All Apps Tap an App to view the various f...

Page 55: ...it each time you turn it on Make sure to read the Encrypt Tablet page for details Make Passwords Visible Tap to turn this option On or Off Turning this option On will allow the passwords you type to be visible to you Tablet Administrators Tap and the make sure the item is checked to allow the Android Tablet manager to lock and erase a lost Tablet Unknown Sources Tap to turn this option On or Off T...

Page 56: ...droid Keyboard AOSP after connecting to the included Keyboard Additional This menu may have additional options they are subject to change without notice Backup Reset Tap to set options as follows Factory Data Reset Tap to erase all data on the Tablet Additional This menu may have additional options they are subject to change without notice ACCOUNTS Google Tap to set Google options IMAP Tap to set ...

Page 57: ...d and low vision users Tap SETTINGS at the top right to set up various Talkback options Captions Tap to enter the Captions screen Tap the switch at the top right of the screen to enable Captions which will enable you to set the Standard Options Default Language Text size and Caption Style on the page Magnification gestures Tap to enter the Magnification Gestures screen Tap the switch at the top ri...

Page 58: ...ging the side of your hand from the left to the right of the screen Touch Hold Delay Tap to set the delay when you touch and hold Quick Boot Mode Tap to turn this option On or Off Turn On to enable Quick Boot mode High Speed Mode Tap to turn this option On or Off Turn On to enable High Speed mode Screen Record Tap to select the desired Audio Source when performing Screen Record Printing Tap to ent...

Page 59: ... allows you access the file directory as follows 1 Connect the small end of the micro USB cable to the side of the Tablet 2 Connect the other end standard USB plug of the USB cable to the USB jack on your computer Mac Note When transferring to a Mac make sure to download the required software at www android com filetransfer ...

Page 60: ...ons then tap Connected as a Media Device Connecting to a Computer 4 Tap one of the following options Media Device Select to transfer media files Camera PTP Select to transfer photos only This option is useful for older computers that do not support MTP ...

Page 61: ... an external Flash drive or Hard drive using the included OTG Cable as follows 1 Connect the small male end of the On the Go OTG cable to the side of the Tablet 2 Connect an external Storage unit s standard USB plug into the female end of the OTG cable ...

Page 62: ... 61 Updating Firmware Updating the Firmware to add features and fix issues To update perform the following 1 Upgrading Firmware to be included in a future owner s manual update ...

Page 63: ...f trouble has occurred in which you need to reset the Tablet press and hold the POWER button for at least six seconds This will reset all data and ERASE the Tablet so only do so with no other options You can also reset the Tablet in the Settings menu see page 55 ...

Page 64: ...UTION 2 Make sure the Tablet and the wireless router is within the range of the wireless network to be connected too Walls or other obstructions will reduce the possible distances between wireless devices SOLUTION 3 Make you are using the correct password if set TROUBLE System is acting strangely SOLUTION 1 Check for a Firmware update see page 61 SOLUTION 2 Some third party Apps are not stable If ...

Page 65: ...l triangle is intended to alert the user to the presence of important operating and maintenance servicing instructions in the literature accompanying the appliance FCC WARNING This equipment may generate or use radio frequency energy Changes or modifications to this equipment may cause harmful interference unless the modifications are expressly approved in the instruction manual The user could lose ...

Page 66: ...8 Do not install near any heat sources such as radiators heat registers stoves or other apparatus including amplifiers that produce heat 9 Do not defeat the safety purpose of the polarized or grounding type plug A polarized plug has two blades with one wider than the other A grounding type plug has two blades and a third grounding prong The wide blade or the third prong are provided for your safet...

Page 67: ...ned between a wireless device and a pacemaker to avoid potential interference with the pacemaker Operation of any radio transmitting equipment including wireless phones may interfere with the functionality of inadequately protected medical devices Consult a phy sician or the manufacturer of the medical device to determine if they are adequately shielded from external RF energy or if you have any q...

Page 68: ...d all types of liquids may damage de vice parts or electronic circuits Do not use or store the device in dusty dirty areas Do not store the device in hot or cold areas Do not store your device near magnetic fields Do not store your device with such metal objects as coins keys and necklaces Do not drop your device or cause any impacts to your device Care and Maintenance ...

Page 69: ...n Rechargeable Battery Li Poly RAM 1GB DDR3 Display 9 1 TFT LCD 1024 x 600 Touchscreen Wi Fi Networking IEEE 802 11 b g n Audio Output 1W Built In Speaker or 3 5mm Headphone Jack PC Interface USB 2 0 High Speed Operating System Kit Kat AndroidTM 4 4 ...

Page 70: ...t If you have any questions setting up or using your tablet please visit www memorextablet com for help or for any technical support You can also contact us at Telephone 1 855 982 2538 Email Memorex digitalsupportdesk com ...

Page 71: ...and the Memorex logo are trademarks of Imation Corp and its affiliates All other trademarks are the property of their respective owners Distributed by MEM CE LLC 11485 Valley View Road Eden Prairie MN 55344 memorex ce com ...

Reviews: