EMT16_MOS_v11_EMT16_Handout.pub 17 Rev: 080515
3-D Foam Digitizing and Embroidering Help
General tips
:
1. The type of garment or finished product you’re working with should be evaluated for design
with 3-D foam. Stay away from unstable fabrics such as pique. The more stable the fabric,
the better. Examples are denim shirts, sweatshirts, jackets and caps. This process would al-
so be nice for bags, aprons and other stable surfaces.
2. The portion of the design that will be puffed must be the last section to sew. You will be lay-
ing down a piece of 3-D foam, so all flat sections of the embroidery must be sewn first.
3. The needle penetrations perforate the foam and allow for the excess to be pulled away
upon completion of the sewing.
4. In addition to being the last section to sew, the segment of the design that will take on the
raised appearance must be hefty enough to allow the foam to work its magic.
Only satin
stitches will give the raised puff look
. A satin stitch width of between 3mm and 11mm
should be used.
5. Alphabet text can be used as a starting point for puff letters, but they must be modified to
work with Foam due to the “open ends” of traditional alphabet letter stitching.
Digitizing Tips:
1. Set your walk stitch and edge walk underlay stitch lengths to 20 – 25 pts. (2 – 2.5 mm). It is
important to use a shorter stitch length for the edge walk stitching. This helps to cut the
foam aiding in the excess removal process.
2. Digitize the satin cover stitching using a very heavy density, about 1.5 to 1.7 pts. A heavier
than normal cover stitching is used to insure that none of the foam peeks through the foam.
Also, overlapping the satin stitches in areas where any two sections of the stitches meet at
perpendicular or parallel angles will help ensure that the foam does not push through the
top of these seams.
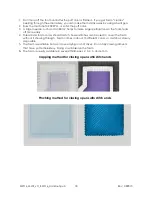
3. Close any open satin stitch ends with a capping or pinching method. This is important be-
cause needle penetrations are required around the entire perimeter of the foam satin top
stitching in order to get the excess foam to separate. Sample pictures of both of these
open end treatment methods are shown at the end of this document.
4. Increase the “Use Fill for stitch lines greater than” parameter in the Top Stitching properties
tab to 300 pts. This will disable the “Auto fill” wide satin stitches feature of DesignShop. We
don’t want this active for puff.
Use 5 tie-in and 5 tie-off stitches to make sure that the thread is securely locked down.
Embroidering tips:
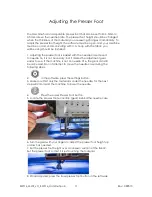
1. Leave the presser foot at the usual setting for the non-puff colors in the design, but
raise it
all of the way to its highest setting
for the puff colors. This will better define the raised edges
of the puff embroidery.
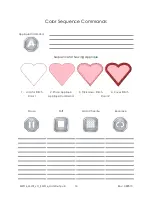
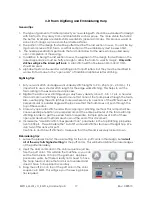
2. Insert the Hold command in the color sequence just be-
fore the puff color. This will stop the machine so you can
set the foam piece on top of the garment. Applique
pause also works, but there is really not a need to have
the hoop feed out since the foam is cut oversized and
doesn’t have to be placed accurately.
3. Drag the puff icon on top of the puff color in the color
sequence in MOS. This will give you the sewing proper-
ties required.

