background image

9 Maintenance

29

4.

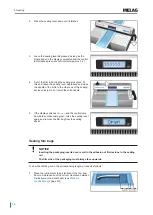
Switch on the sealing device.

Ê

The following display will appear after only a few seconds: 

Update?

5.

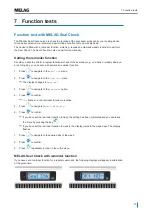
If you wish to perform an update, confirm with 

OK

.

Ê

The update will then be started, the display will extinguish and the LED control lamp flashes
yellow.

6.

Should you not wish to perform an update, interrupt the procedure by pressing the key 

.

Ê

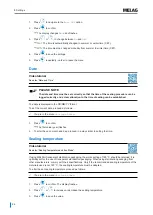
Once the update has been competed, the display will issue 

Update OK

 and the LED will

illuminate green.

7.

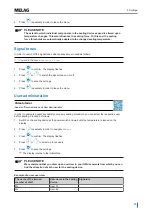
Press 

OK

 to complete the procedure.

Ê

The display changes to 

MELASEAL

.

8.

Then switch off the sealing device and remove the USB flash drive.

9.

Delete the update file from the USB flash drive. Otherwise, an update will be requested after every
activation.

Ê

The device settings e.g. date/time etc. are retained during a software update. A renewed performance
qualification (validation) is not necessary after the software update.

Summary of Contents for MELAseal 200

Page 1: ...s established MELAG as the world s leading manufacturer in the instrument treatment and hygiene field You our customer are justified in your demand for the best products quality and reliability Provid...

Page 2: ......

Page 3: ...g on the sealing device 13 5 Sealing 14 Sealing procedure with pre finished film bags 14 Sealing procedure for film rolls 15 6 Logging 18 Documenting the sealing process 18 Using the USB flash drive a...

Page 4: ...dard 31 Roll dispenser comfort 31 Roll dispenser Deluxe 32 Wall mounted roll dispenser 32 12 Malfunctions 33 13 Manufacturer s recommendation for routine operation 35 Performing the peel test 36 MELAG...

Page 5: ...hich if not avoided could entail slight to life threatening injuries Draws your attention to a situation which if not avoided could result in damage to the instruments the practice fittings or the dev...

Page 6: ...perate the device in a frost free environment n The device is conceived for use outside the patient area The device should be located a minimum of 1 5 m radius away from the treatment area Power cable...

Page 7: ...ials Sterilization packaging that is not compatible with the requirements of DIN EN 868 5 is incompatible with this device Pure hose film double sided film as these tends to become adhere to the seali...

Page 8: ...2 Display with control lamp View from rear 3 1 4 3 2 5 3 1 Bracket for roll dispenser 3 2 Bracket for roll dispenser 4 Power cable connection 5 USB port type B for connection to a computer View from t...

Page 9: ...evice AC current The user manual includes important safety information Failure to comply with these instructions can result in injury and material damage Please read this user manual carefully before...

Page 10: ...eck Settings Settings Temp Sealing temperature Tone Switch signal tones on off Time Time Adjust Set current time Auto_DST Autom change from summer winter time CET Date Date TT MM JJ Eco Mode Eco Mode...

Page 11: ...age Open is issued Raise the sealing lever as soon as the display message Open is issued otherwise the sealing procedure is unsuccessful Failure to comply with these provisions can result in the melti...

Page 12: ...1 5 m radius away from the treatment area u Install the device in a dry and dust protected location u Maintain sufficient clearance to the surrounding surfaces in order to ensure sufficient ventilati...

Page 13: ...onnected to the power supply The USB flash drive is connected for documentation purposes Switch on the sealing device at the power switch After activation the display issues system information e g the...

Page 14: ...sealing rail The film side of the packaging must always face upwards PLEASE NOTE When sealing MELAfol bags with a side gusset ensure compliance with the manufacturer s specifications e g the operating...

Page 15: ...mportant sealing parameters will be displayed alternately up to four times Then the display changes to Ready 5 Perform a visual inspection of the film after every successful sealing procedure PLEASE N...

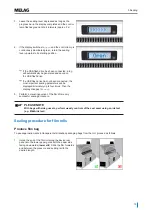
Page 16: ...n the knife handle 5 If the display switches to Open and the control lamp illuminates continuously green raise the sealing lever again and remove the film bag from the sealing device Sealing film bags...

Page 17: ...display switches to Open and the control lamp is continuously illuminated green return the sealing lever upwards to its starting position If the USB flash drive has been connected a log will automati...

Page 18: ...on the inserted USB flash drive A USB flash drive will be delivered with every sealing device as standard Should you wish to save the log of a sealing procedure on the USB flash drive automatically co...

Page 19: ...sealing logs are to be archived Further information relating to the operation of the sealing device with the documentation software can be found in the corresponding operating manual PLEASE NOTE The...

Page 20: ...r sealing duration too short Time Time of the sealing procedure Dur Sealing duration Temp Sealing temperature in C Force The force in N with which the packaging was sealed Limits The threshold ranges...

Page 21: ...on 1 Press to navigate to the seal chk menu 2 Press OK to navigate to the seal chk menu The display changes to Approve 3 Press to navigate to the reminder option 4 Press OK to confirm Off flashes i e...

Page 22: ...witched on until a seal check has been performed MELAG Seal Check without reminder function If you have not set a reminder function proceed as follows to perform a seal check You will require MELAG Se...

Page 23: ...edure can be logged correctly and a clear allocation to the time of sealing can be established To set the current time proceed as follows You are in the menu Settings Time 1 Press OK to confirm The di...

Page 24: ...e proceed as follows You are in the menu Settings Date 1 Press OK to confirm The first value year flashes 2 To alter the year month and day proceed in a way similar to setting the time Sealing tempera...

Page 25: ...User administration See also Documentation and User Administration Video tutorial In order to guarantee exact traceability over every sealing procedure you can select the respective user before seali...

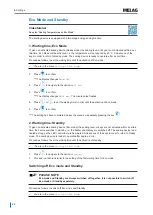
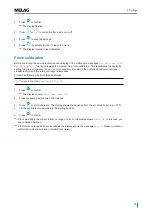
Page 26: ...activation of Eco mode 5 Press OK to confirm The setting has been completed Leave the menu by repeatedly pressing the key 2 Waiting time Standby If given an activated sealing device Eco mode the seal...

Page 27: ...zed customer services stockist technician if this tolerance range is exceeded Proceed as follows to perform force calibration You are in the menu Settings Adj Frc 1 Press OK to confirm The display sho...

Page 28: ...07 2 Conformity is confirmed with the declaration of conformity included in the scope of delivery We recommend performing the initial validation before commissioning and the renewed performance quali...

Page 29: ...y pressing the key Once the update has been competed the display will issue Update OK and the LED will illuminate green 7 Press OK to complete the procedure The display changes to MELASEAL 8 Then swit...

Page 30: ...then into Standby following a further waiting time see Eco Mode and Standby page 26 Transport and storage NOTICE Damage to the housing and the device interior as a result of using unsuitable transport...

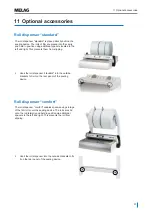
Page 31: ...from slipping Hook the roll dispenser standard into the outside brackets to fix it on the rear panel of the sealing device Roll dispenser comfort The roll dispenser comfort enables space saving storag...

Page 32: ...vice thus saving space The integrated feeding device enables easy feeding of the film via a hand wheel Further information regarding assembly and operation is specified in the appendent operating manu...

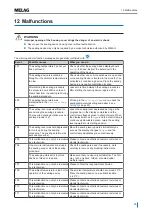
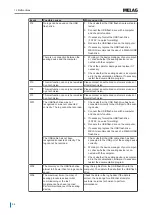
Page 33: ...ar in the display completes and the control lamp flashes green in short intervals When the display switches to Open and the control lamp is continuously illuminated green return the sealing lever upwa...

Page 34: ...flash drive was not recognized or was not connected correctly The log cannot be recorded 1 Check whether the USB flash drive has been connected correctly to the USB port of the seal ing device 2 Conn...

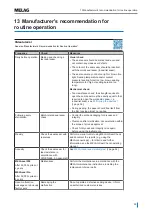
Page 35: ...aper should free itself from the film leaving almost no residue Following every sterilization Batch related seal seam check Control the entire packaging for dryness and integrity Clearance after steri...

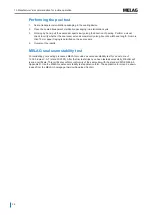
Page 36: ...tire width and length No more than 10 mm paper fraying is permitted on the seal seams 4 Document the results MELAG seal seam stability test For validating your sealing processes MELAG provides a seal...

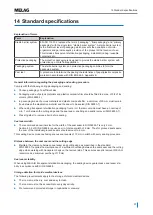
Page 37: ...tween the sterilization material and the seam to be sealed DIN 58953 7 u When using transparent sterilization packaging from a roll the removal side must have an overlap of min 1 cm between the cuttin...

Page 38: ...influences during storage as well as transport and handling An defensible storage time can thus not be generally specified The following table only makes recommendations regarding the storage duratio...

Page 39: ...W Fuses 1x 2 A Overheat control 240 C Length of the power cable 2 m Ambient conditions Max altitude 2000 m Ambient temperature 5 40 C Relative humidity max 80 at 31 C max 50 at 40 C decreasing in lin...

Page 40: ...acer washer 1 pcs for wall mounted roll dispenser 13330 Spacer washer 1 pcs for roll dispenser Deluxe and comfort 89740 Distance plate for roll dispenser standard 2 pcs 72335 Calibration box for MELAs...

Page 41: ......

Page 42: ...e 6 10 10829 Berlin Germany Email info melag com Web www melag com Original instructions Responsible for content MELAG Medizintechnik GmbH Co KG We reserve the right to technical alterations BA_seal20...

Reviews: