
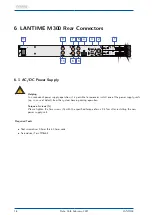


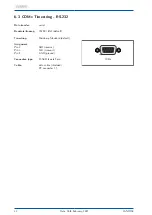


6 LANTIME M300 Rear Connectors
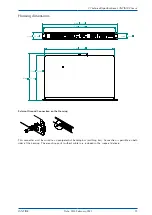
Hints for Hot-Plug compatible Power Supplies
Replacing the power supply unit
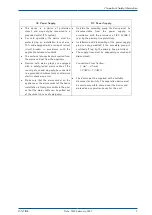
N/-
L/+
AD1
0
PWR
P
ower
U
= 1
00
V - 240
V
N
U
= 90
V - 265
V
max
I
= 1
.0A
N
f
= 50 - 60Hz
N
U
= 1
00
V - 20
0
V
N
U
= 90
V - 250
V
max
I
= 0.6A
N
A
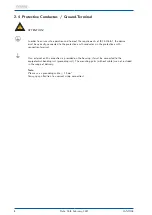
A
B
B
C
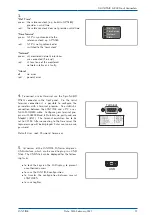
1.
Interrupt the power supply of the power supply unit by pulling off the protective plug of the power cable.
2.
Remove the 5-pin DFK-jack from the power supply after dissolving the two clamping screws (B) with the
slot screwdriver.
3.
Then loosen the two Torx screws (A) of the power supply that needs to be replaced with the
Torx screwdriver (TR8).
4.
The dissolved power supply can be removed with the handle (C) now.
5.
Put the new power supply in the free slot and secure it with the two previously dissolved Torx
fastening screws (A).
6.
Connect the 5-pin DFK jack of the power cable to the power supply and put the two slit screws (B) back on.
7.
The protective contact plug of the power cable can be reconnected to the power supply.
8.
The status LED of the new power supply should now light up and an "OK" status should be displayed in the
system’s web interface.
Checking Power Status
The status of the power supplies can be viewed in the web interface under "System
→
Redundant Power Supply"
(depending on the equipment, i. e. if one or two power supply slots are installed, the web interface displays
this status).
LANTIME
Date: 16th February 2021
19
Summary of Contents for LANTIME M300/MRS/AD10-AD10
Page 2: ......