17
Menu Operation
At this step, moving up/down/left/right and zoom of the camera is possible; if in other menu /
sub-menu, movement from controller can only move the cursor or image in the menu. This is
the last step of 2. Set valid area
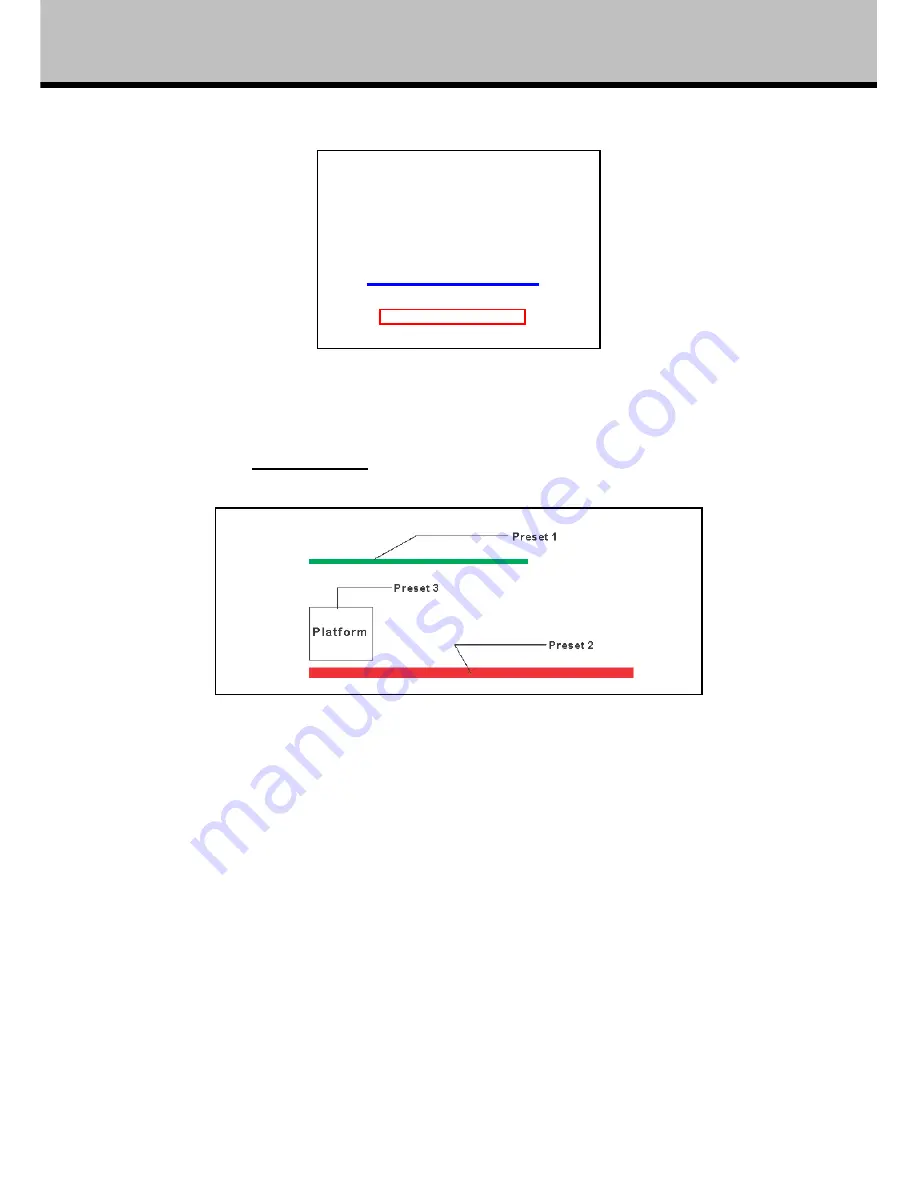
Preset 1
Preset 1 is the starting position for tracking, for example, the lecturer is 1.7 meter tall standing in
front of the blackboard, his/her head is of the same height as the green line; move the camera’s
pan/tilt/zoom to put the lecturer in the appropriate position and size in the image, then set it as
preset 1; this position is the actual tracking position where lecturer stands the closest to the
blackboard.
Preset 2
Preset 2 is the closest tracking position, have the lecturer walk down platform, put his/her head
inside the red rectangular frame; move the camera’s pan/tilt/zoom to put the lecturer in the
appropriate position and size in the image; this position is the actual closest tracking position where
, to set preset 1,2 and 3, see below sketch for details.
the camera is the closest to the lecturer.
Control teacher-camera to set
1#, 2#, 3# preset positions
according to 'User Manual', then set
96# to save parameters.


