background image

3

1.  Notes on how to use these instructions

Please be sure to read these operating instructions carefully and follow all instructions given. This guar-
antees reliable operation and a longer life expectancy for your monitor. Always store these instructions 
near your monitor. Keep the operating instructions so that you can pass them on with the monitor if you 
sell it.

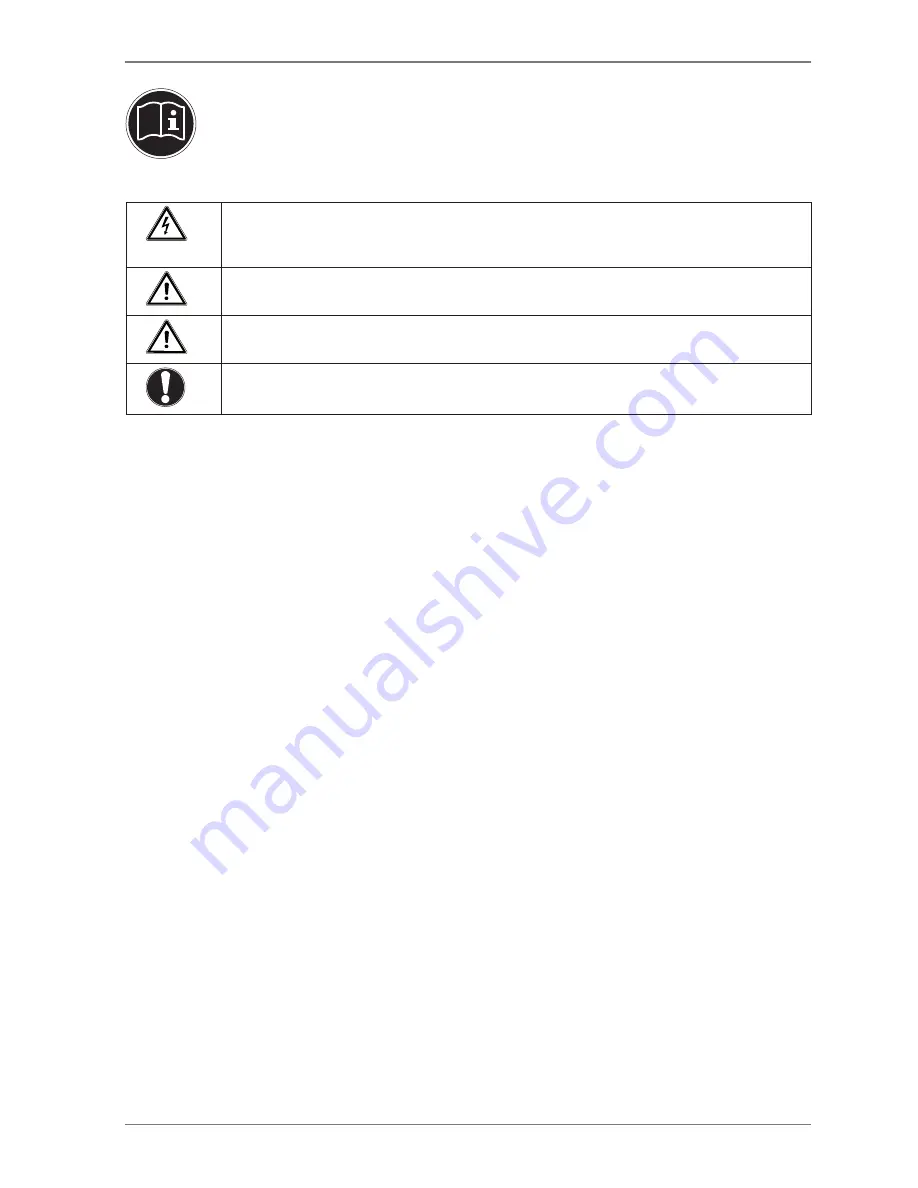
1.1.  Symbols and key words used in these instructions

DANGER! 

Observe these instructions to avoid an electric shock. 
Risk of fatal injury!

WARNING! 

Please observe to avoid injury!

CAUTION! 

Please observe instructions to avoid damage to property.

IMPORTANT! 

Additional information on using the device

2. Proper 

use

• 

This TFT monitor is designed exclusively for the playback of video and audio signals from external devices, such as 
computers, whose connections and screen resolutions match the specified technical data of the TFT monitor. Any 
other use is deemed as improper.

• 

This device is intended for use in dry, indoor areas only.

• 

This device is intended for private use only. The device is not intended for use by companies in the heavy industry 
sector. Use under extreme environmental conditions may result in damage to the device.

• 

This device is not suitable for use with VDU workstations in accordance with §2 of the German VDU workstation reg-
ulation.

3. Package 

contents 

Please check your purchase to ensure all items are included and contact us within 14 days of purchase if any compo-
nents are missing. The following items are supplied with your monitor:
• Monitor 
• VGA 

cable

• Audio 

cable

• Power 

cord

• Monitor 

stand

• Cable 

holder

• Documentation

Summary of Contents for AKOYA P55664

Page 1: ...61 cm 24 LED Backlight Monitor MEDION AKOYA P55664 MD 20664 Instruction manual ...

Page 2: ...reparations at your PC 7 6 3 Supported monitor settings 8 6 4 Supported settings in video mode 8 6 5 Monitor settings under Windows 7 9 6 6 Monitor settings under Windows 8 9 6 7 Rear connections 10 6 8 Connecting the monitor 11 6 9 Setting up the monitor 12 7 Operating elements 14 8 Setting the screen 15 8 1 Using the OSD menu 15 8 2 The OSD menu 15 9 Power saving options 17 10 Customer service 1...

Page 3: ...gned exclusively for the playback of video and audio signals from external devices such as computers whose connections and screen resolutions match the specified technical data of the TFT monitor Any other use is deemed as improper This device is intended for use in dry indoor areas only This device is intended for private use only The device is not intended for use by companies in the heavy indus...

Page 4: ...eaked out To avoid damaging the screen do not touch it with your fingers or sharp objects Contact customer services if the power cable is burnt or damaged liquid has penetrated the monitor the monitor is not operating correctly the monitor has been dropped or the housing is damaged 4 2 Installation location Keep your monitor and all connected devices away from moisture and avoid dust heat and di r...

Page 5: ...der if you are not sure if the socket is earthed or not For extra safety we recommend using an overvoltage protection device to prevent your monitor from sustaining damage as a result of power surges or lightning strikes To disconnect the power supply from your monitor pull the mains plug from the power outlet The power outlet must be close to the monitor and easy to access To prevent non permissi...

Page 6: ...ion 1275 2008 However this device is not equipped with any complete function for minimizing consumption in accordance with the eco design directive This function is generally defined or specified for this product category using the connect ed end device Personal Computer This monitor is ENERGY STAR compliant As an ENERGY STAR partner MEDION guarantees that this device complies with the ENERGY STAR...

Page 7: ...ns at your PC If you have been operating your computer with a CRT monitor it may be necessary to make some adjustments This is necessary if your previous monitor used settings for its operation that will not be supported by your new monitor The monitor displays up to 1920 x 1080 pixels This resolution corresponds to the physical resolution Monitors achieve full image quality with the physical reso...

Page 8: ...87 kHz 75 Hz 832 x 624 48 67 kHz 75 Hz 1024 x 768 48 36 kHz 60 Hz 1024 x 768 56 48 kHz 70 Hz 1024 x 768 60 0 kHz 75 Hz 1152 x 864 67 0 kHz 75 Hz 1152 x 870 68 6 kHz 75 Hz 1280 x 768 47 0 kHz 60 Hz 1280 x 960 60 0 kHz 60 Hz 1280 x 1024 63 98 kHz 60 Hz 1280 x 1024 80 0 kHz 75 Hz 1440 x 900 56 0 kHz 60 Hz 1440 x 900 71 0 kHz 75 Hz 1400 x 1050 65 1 kHz 60 Hz 1600x 1200 75 0 kHz 60 Hz 1680 x 1050 65 0 ...

Page 9: ... frequency You can also change the orientation of the screen here should you wish to work in portrait or landscape format 6 6 Monitor settings under Windows 8 Open the screen resolution setting Point the mouse curser at the top right hand corner of the screen and then move the mouse curser downwards Then click on Search Enter Display in the search field Then click on Settings and afterwards on Dis...

Page 10: ...ing headphones earphones at high volume can result in permanent damage to your hear ing Before pressing play set the volume to the lowest setting Start playback and increase the volume to a comfortable level Using headphones earphones to listen to a device at high volumes for an extended period can damage your hearing 9 Opening for Kensington lock This serves to protect the monitor from theft 10 P...

Page 11: ...o the PC connecting USB devices The product has an inbuilt USB hub offering the facility for the connection of two external USB devices Connect the USB cable to the PC USB port on the product and to a vacant USB port on the computer Then connect USB devices to the USB ports on the side of the product The USB devices will be detected as normal by the operating system of your computer 6 8 4 Connecti...

Page 12: ...nitor in such a way as to avoid reflections glare and excessive contrast 90 40 45 50 60 cm 46 55 cm 66 71 cm 6 9 1 Setting the monitor to landscape portrait format It is possible to change the orientation of the monitor from landscape to portrait format by turning the monitor by 90 Please make the corresponding settings in the operating system or in the graphics settings on the graphics card for c...

Page 13: ...the monitor up or pushing in down with both hands 6 9 3 Adjusting the inclination of the monitor turning the monitor Set the inclination of the monitor by tiling it horizontally either up or down using both hands In addition you can can also turn the entire monitor with the aid of the rotating base ...

Page 14: ...l appear on the screen 2 When the OSD is switched on select a parameter with this button and reduce the value If you are not in the OSD direct call up of the CONTRAST BRIGHTNESS menu 3 When the OSD is switched on select a parameter with this button and increase the value If you are not in the OSD picture mode standard game video landscape text 4 Confirm the choice of the parameter to be changed wi...

Page 15: ...re DCR Here you can switch the DCR function dynamic contrast on and off ECO Switch the ECO on and off Contrast and brightness adjustment as well as DCR are deactivated in ECO mode OD Activate deactivate the overdrive function When the function is activated the reaction time is reduced from 14 ms typ to 6 ms grey to grey typ INPUT SOURCE Switch the signal input here AUDIO ADJUSTMENT VOLUME Sets the...

Page 16: ...ustment horizontal image error can appear only in VGA mode SHARPNESS For adjusting the sharpness for a signal which does not comply with the physical resolution of the screen VIDEO MODE ADJUSTMENT Choose a video mode of the options 16 9 und 4 3 This option is only available when the resolution of the picture is no native 16 9 picture MENU SETTING Language OSD position OSD time out and background L...

Page 17: ...upply The mains cable must firmly inserted in the socket and the power switch must be switched on Signal source Please check if the signal source computer or similar is switched on and that the connection cables are firmly inserted in the sockets Refresh rates The current refresh rate must be suitable for the monitor Power saving mode Press any key or move the mouse to deactivate the mode Screen s...

Page 18: ...have you already taken to try and rectify the problem Please provide your customer number if you have one 11 Cleaning You can increase the lifespan of your monitor with the following measures IMPORTANT None of the parts inside the housing require cleaning or maintenance Always unplug the device and disconnect all cables before cleaning Do not use solvents corrosive or aerosol detergents Clean the ...

Page 19: ...ts MEDION therefore adheres to the strict and transparent requirements of the standard ISO 9241 307 Class II which has been briefly summarised below The ISO standard ISO 9241 307 defines amongst other things the generally applicable guidelines relating to pixel de fects Pixel defects are categorised into four fault classes and three defect types Every individual pixel consists of three sub pixels ...

Page 20: ...ereo jack Audio output 2 x 2 W max via loudspeakers 3 5 mm headphone jack User control OSD Temperatures In operation 0 C to 35 C Not in operation 20 C to 60 C Humidity In operation 80 non condensing Not in operation 90 Weight with stand approx 5 98 kg Weight without stand approx 3 32 kg Dimensions with stand WxHxD approx 569 x 404 537 x 244 mm Dimensions without stand WxHxD approx 569 x 336 x 53 m...

Page 21: ...anufacturer Copyright is owned by the company Medion AG Am Zehnthof 77 45307 Essen Germany The operating manual can be reordered via the service hotline and is available for download via the service portal at www medion com gb service start You can also scan the QR code above and download the operating manual onto your mobile device via the service por tal 20 2010 1062 2014 30 61 24 P55664 MD 2066...

Page 22: ......

Reviews: