


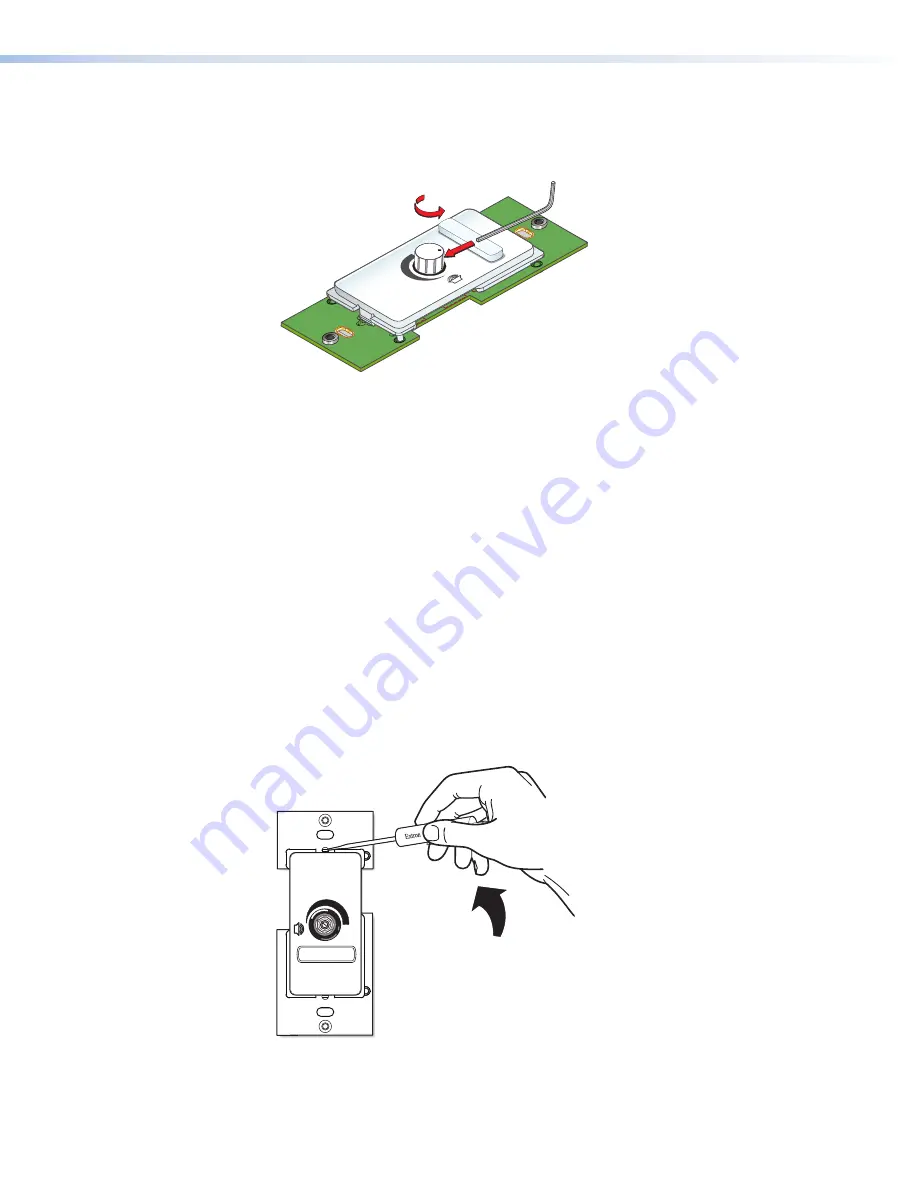
3.
Give the Allen wrench a one-half turn counterclockwise to loosen the hex screw
holding the knob.
MUTE
VOLUME
Turn Knob to
Expose Screw
Use Allen Wrench
to Loosen Screw
Figure 14.
Removing the Volume Knob
4.
Lift off the knob.
5.
Press the new knob onto the spindle of the VCM, making sure that the spindle is
turned all the way to the left and that the dot on the knob is aligned with the bottom
edge of the volume icon on the faceplate.
6.
Tighten the hex nut by inserting the Allen wrench and giving it one-half turn clockwise.
Replacing the MLC 64 volume control module faceplate
To change the faceplate on the MLC 64 volume control module, you must remove the
volume control module from the wallplate.
1.
Remove the volume control knob from the faceplate (see
, steps
1
through
4
).
2.
At the center top and bottom of the faceplate are tabs, which insert into slots on the
VCM module board and hold its faceplate in place. For each tab:
a.
Insert the flat end of the provided Extron Tweeker or other small screwdriver into
the hole above or below the tab (see figure 15).
b.
Pressing each tab in and up, pry the top and bottom of the faceplate away from
the board.
MUTE
VOLUME
Figure 15.
Removing the MLC 64 Volume Control Module Faceplate
MLC 60 Series MediaLink Controllers • Features, Installation, and Operation
21