background image


CD-3706/P


Operator’s Guide 


Document Revision: 030501.1 


DVD-QuadraPRO LX Operator’s Guide 


Document Revision: 070102 


Page 44


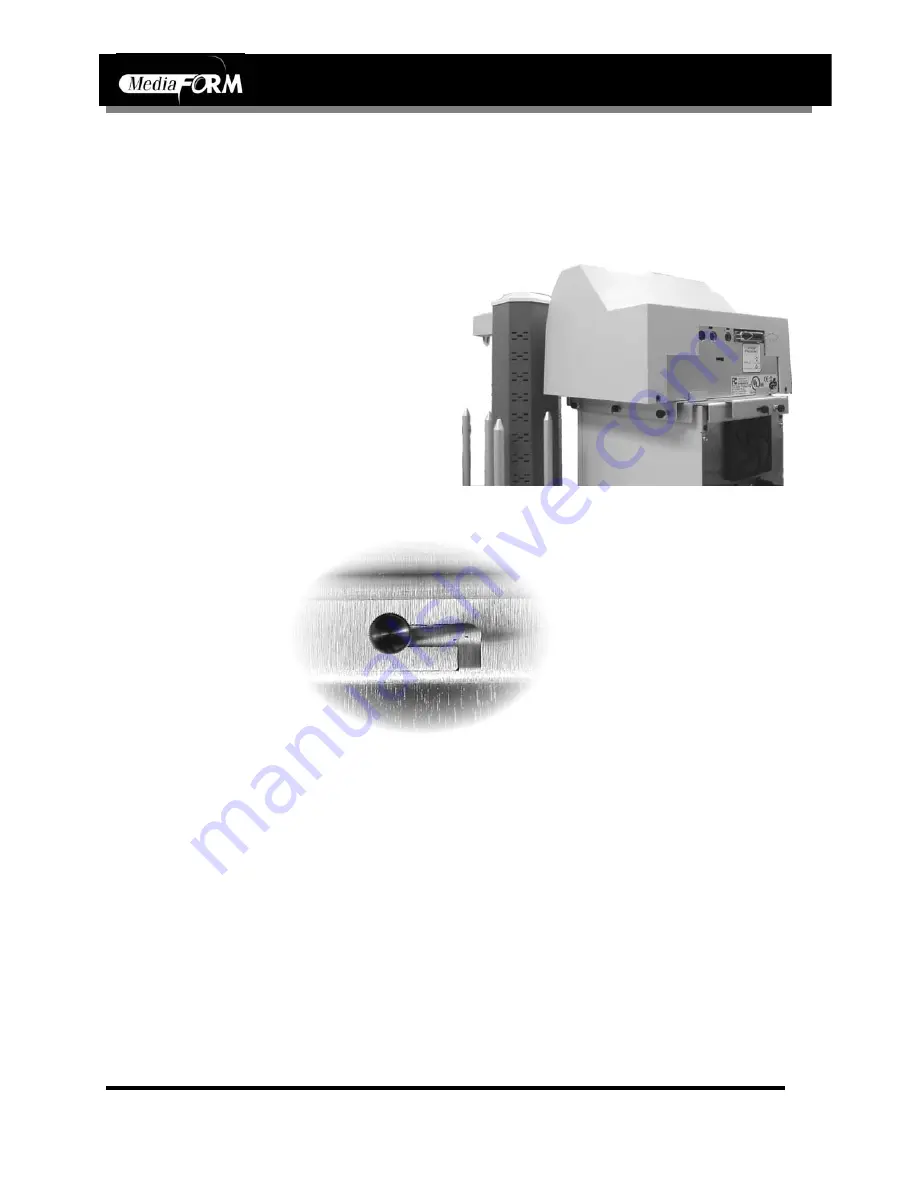
Mounting the Printer 

• 

Remove the two thumb-screws from 
the bracket attached to the top of the 
drive bays. 

• 

Loosen the three screws in the 
bracket attached to the printer 

• 

Gently place the printer on top of the 
drive bays. 

• 

Line up the holes from which you 
removed the screws in the lower 
drive bay bracket with the key-ways 
of the bracket attached to the printer 
and replace screws loosely threaded. 


Summary of Contents for DVD-QuadraPro LX

Page 1: ...DVD QuadraPRO LX Operator s Guide...

Page 2: ...r the products they provide As a convenience MediaFORM will honor any service issue related to a defective recorder while under its respective manufacturer s warranty providing that the recorder has b...

Page 3: ...BINDING ON MS Note on Java Support The SOFTWARE may contain support for programs written in Java Java technology is not fault tolerant and is not designed manufactured or intended for use or resale as...

Page 4: ...INPUT AND OUTPUT 12 Installing the Output Spindle 12 INSTALLING FIREWIRE CABLES 13 SYSTEM STARTUP 14 LOADING A DISC 16 REMOVING A DISC 16 GENERAL OPERATION 17 FUNCTION KEYS 17 CREATING A HARD DISK IM...

Page 5: ...port Bracket to the QuadraPRO 41 Preparing the Printer 42 Mounting the Printer 44 Making the Connection 45 ALIGNING THE PRINTER 46 UTILIZING THE PRINTER OPTION 47 COPY AND PRINT 47 PRINT ONLY 48 VIEWI...

Page 6: ...n needs What To Expect From Your MediaFORM DVD Duplicator Your MediaFORM QuadraPRO DVD duplicator is professionally designed and manufactured to give you years of trouble free operation To avoid accid...

Page 7: ...rify them against the packing slip Report any errors in shipping as soon as possible What s In The Box Your new QuadraPRO DVD duplicator includes QuadraPRO DVD duplicator Power cord Firmware CD Manual...

Page 8: ...room for all incidental work materials Provide at least six inches of clearance on all sides of the unit for ventilation Safety Precautions The system is shipped with a three prong power connector and...

Page 9: ...CD 3706 P Operator s Guide Document Revision 030501 1 DVD QuadraPRO LX Operator s Guide Document Revision 070102 Page 8 Location Of QuadraPRO Components Front View Rear View...

Page 10: ...pen the tray when the power to the 5000 Series is switched on 2 Headphone Jack Connect headphones here 3 Volume Control Knob This controls the volume level of the headphones 4 Disc Indicator Light ind...

Page 11: ...to reduce the possibility of damage in transit This restraint must be removed before operation or power on Gently remove the foam tube from around the transfer arm Save the foam tube as you will need...

Page 12: ...ith a picker column restraint to reduce the possibility of damage in transit This restraint must be removed before operation or power on Once removed save the restraint bracket and reattach it when tr...

Page 13: ...ted product to the output spindle When BIN 1 becomes empty the QuadraPRO will automatically switch to BIN 2 for additional blank discs and use BIN 1 for output Similarly when BIN 2 runs empty the Quad...

Page 14: ...3706 P Operator s Guide Document Revision 030501 1 DVD QuadraPRO LX Operator s Guide Document Revision 070102 Page 13 Installing Firewire Cables Please install the firewire cables as illustrated belo...

Page 15: ...cle at the rear of the unit Next verify that the voltage selector switch is set correctly It is located between the two power receptacles The QuadraPRO supports both 115 VAC and 230 VAC at 50 60 Hz Pl...

Page 16: ...s time to turn on the unit The power switch is located at the back of the unit next to the AC power input Wait a minute or two while the system starts up The screen will now read M F I N C D U P L I C...

Page 17: ...placing the disc label side up into the recessed area of the disc tray so that the disc lays flat Press the eject button on the front of the recorder to close the disc tray Removing A Disc While the Q...

Page 18: ...setting for this function is copy The simulate mode is a diagnostic tool which is useful for testing the readability of a master disc without actually writing to blank discs loaded into the recorders...

Page 19: ...Y O R C O M P A R E Press the 2 key on the keypad You will see several functions scroll across the screen Select a function by pressing the corresponding number on the keypad Enable or disable the fu...

Page 20: ...information into data discs copied by the QuadraPRO 5 P R I N T E R S E L E C T O P T I O N Pressing the 5 key will give you the option to choose a printer or disable the printer option See the Utili...

Page 21: ...ort and press the Start Yes key Only one track may be imported at a time All of the tracks will create one master image on the hard drive Once you have imported all of the tracks copy the image you ju...

Page 22: ...the Start Yes key and you will then see the following screen O P E N I N G D R I V E S All of the drives will open at this time T E S T I N G D R I V E S T A T U S C L O S E D R I V E T R A Y 1 Close...

Page 23: ...f the recorders installed in the QuadraPRO Press the 0 key to select 16x or the 1 key for 24X or the 3 key for 40X After pressing any of those keys the screen will now read x R E C O R D I N G S P E E...

Page 24: ...ies as required Creating A Single Hard Disk Image Although the QuadraPRO s internal hard disk can store up to four images of master discs it is sometimes prudent not to use this Multiple Image feature...

Page 25: ...now stored as an image on the hard disk Note If discs failed to copy properly the discs will be placed in the reject area in front of the drives These discs should not be used To help you determine t...

Page 26: ...S E L E C T O P T I O N S 1 M U L T I P L E I M A G E S S E L E C T O P T I O N S Press the 1 key to select multiple images The screen will now read MU L T I P L E I M A G E S M O D E S E L E C T O P...

Page 27: ...030501 1 DVD QuadraPRO LX Operator s Guide Document Revision 070102 Page 26 L O A D I N G M A S T E R WA I T I N G F O R D R I V E R E A D Y R E A D 7 5 G O O D 0 B A D 0 O F 0 MA S T E R A R C H I V...

Page 28: ...sequence 0 V E R I F Y A F T E R C O P Y S E L E C T O P T I O N S 1 M U L T I P L E I M A G E S S E L E C T O P T I O N S Press the 0 key and the screen will now read V E R I F Y A F T E R C O P Y Y...

Page 29: ...creen depicted below S E L E C T C O P Y O R C O M P A R E Load as many blank discs as are required into the DVD R RW recorders Press the COPY key on the keypad The screen will now read F R O M H D Pr...

Page 30: ...rating screen depicted below S E L E C T C O P Y O R C O M P A R E Load as many blank discs as are required into the recorders Press the COPY key on the keypad The screen will now read F R O M H D Pre...

Page 31: ...and you will be returned to the main operating screen S E L E C T C O P Y O R C O M P A R E Note If discs failed to copy properly the discs will be placed in the reject area in front of the drives Th...

Page 32: ...k image that was previously created with the Multiple Images feature disabled i e from a single hard disk image the steps are as follows From the main operating screen depicted below S E L E C T C O P...

Page 33: ...created with the Multiple Images feature enabled the steps are as follows From the main operating screen depicted below S E L E C T C O P Y O R C O M P A R E Load the copied discs to be compared into...

Page 34: ...0 O F 0 Press the START YES key and you will be returned to the main operating screen S E L E C T C O P Y O R C O M P A R E Note If discs failed to copy properly the discs will be placed in the reject...

Page 35: ...epicted below S E L E C T C O P Y O R C O M P A R E Press the Copy key on the keypad You will then press the Stop No key until you reach the following screen E R A S E O N L Y Load the DVD RW disc you...

Page 36: ...adraPRO setup procedures as described earlier in this guide If you have not already familiarized yourself with the basic operation of the QuadraPRO and Spectrum2 printer from their accompanying docume...

Page 37: ...ter while the other attaches to the top of the vertical drive bays Locate the two brackets depicted below Attaching Support Bracket to QuadraPRO Place the bracket picture to the left labeled Attaches...

Page 38: ...Before the printer can be mounted to the QuadraPRO a few minor changes must be made 1 Turn off the power to the printer and disconnect all cables 2 Turn over the unit so that the bottom is facing up...

Page 39: ...in place using four countersunk screws provided Mounting the Printer Remove the two thumb screws from the bracket attached to the top of the drive bays Loosen the three screws in the bracket attached...

Page 40: ...printer port on the back of the printer and to the DB 25 female 25 pin connector on the back of the QuadraPRO Connect the serial cable from the serial port located on the Spectrum2 printer to the seri...

Page 41: ...QuadraPRO setup procedures as described earlier in this guide If you have not already familiarized yourself with the basic operation of the QuadraPRO and Signature IV printer from their accompanying d...

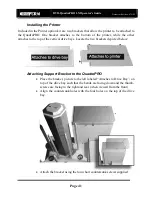
Page 42: ...r while the other attaches to the top of the vertical drive bays Locate the two brackets depicted below Attaching Support Bracket to the QuadraPRO Place the bracket picture to the left labeled Attache...

Page 43: ...n 070102 Page 42 Preparing the Printer Before the printer can be mounted to the QuadraPRO a few minor changes must be made 3 Turn off the power to the printer and disconnect all cables 4 Turn over the...

Page 44: ...Document Revision 070102 Page 43 4 Lay the printer on its back and place the remaining bracket on the printer as pictured below Line up and insert the bracket pin into the bottom of the inkjet printer...

Page 45: ...thumb screws from the bracket attached to the top of the drive bays Loosen the three screws in the bracket attached to the printer Gently place the printer on top of the drive bays Line up the holes f...

Page 46: ...king the Connection Connect the parallel printer cable to the printer port on the back of the printer and to the DB 25 female 25 pin connector on the back of the QuadraPRO Connect the power cord from...

Page 47: ...I N T E R A L I G N M E N T T E S T Press the Start Yes key O P E N I N G T R A Y P R I N T E R A L I G N M E N T At this point the automated arm will pick a disc up from the input area and place it...

Page 48: ...A G E S 2 C L I C K D E T E C T I O N 3 C O P Y P R O T E C T I O N 5 P R I N T O N L Y Press the 5 key Something similar to the following will scroll across the screen 0 P R I N T E R D I S A B L E...

Page 49: ...m the main operating screen press the Copy key on the keypad S E L E C T C O P Y O R C O M P A R E You will be prompted to C O P Y F R O M H D Press the Stop No key C O P Y T O H D Press the Stop No k...

Page 50: ...ator s Guide Document Revision 030501 1 DVD QuadraPRO LX Operator s Guide Document Revision 070102 Page 49 The print job will now run the status will be shown as seen below L O A D I N G D I S C S G O...

Page 51: ...evice information the steps are as follows From the main operating screen depicted below S E L E C T C O P Y O R C O M P A R E Press the 6 key Something similar to the following will be displayed on t...

Page 52: ...y CD RW discs written in most logical formats ISO 9660 audio etc but not those created using the Universal Disk Format UDF CD RW discs using UDF are produced by packet writing software such as Adaptec...

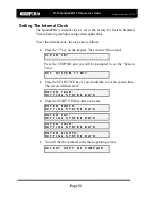
Page 53: ...H D Press the STOP NO and you will be prompted to set the System Time S E T S Y S T E M T I M E Press the START YES key if you would like to set the system time The screen will then read E N T E R Y...

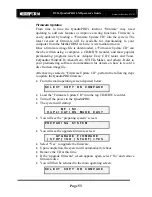
Page 54: ...efer to your premastering software documentation for details on how to record a disc from an image file After having created a Firmware Update CD perform the following steps to update the QuadraPRO fi...

Page 55: ...y on your QuadraPRO MediaFORM will do its best to promptly add support for this format Dealing with custom formats however may be subject to a development charge Keeping track of how the various forma...

Page 56: ...1 DVD QuadraPRO LX Operator s Guide Document Revision 070102 Page 55 High Speed CD RW is not supported to write QuadraPRO Supported Formats CD ROM Mode 1 CD ROM XA Mode 2 form 1 form 2 Photo CD single...

Reviews: