background image

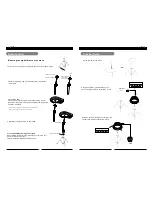
Mounting the digital drum on the stand

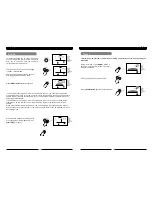
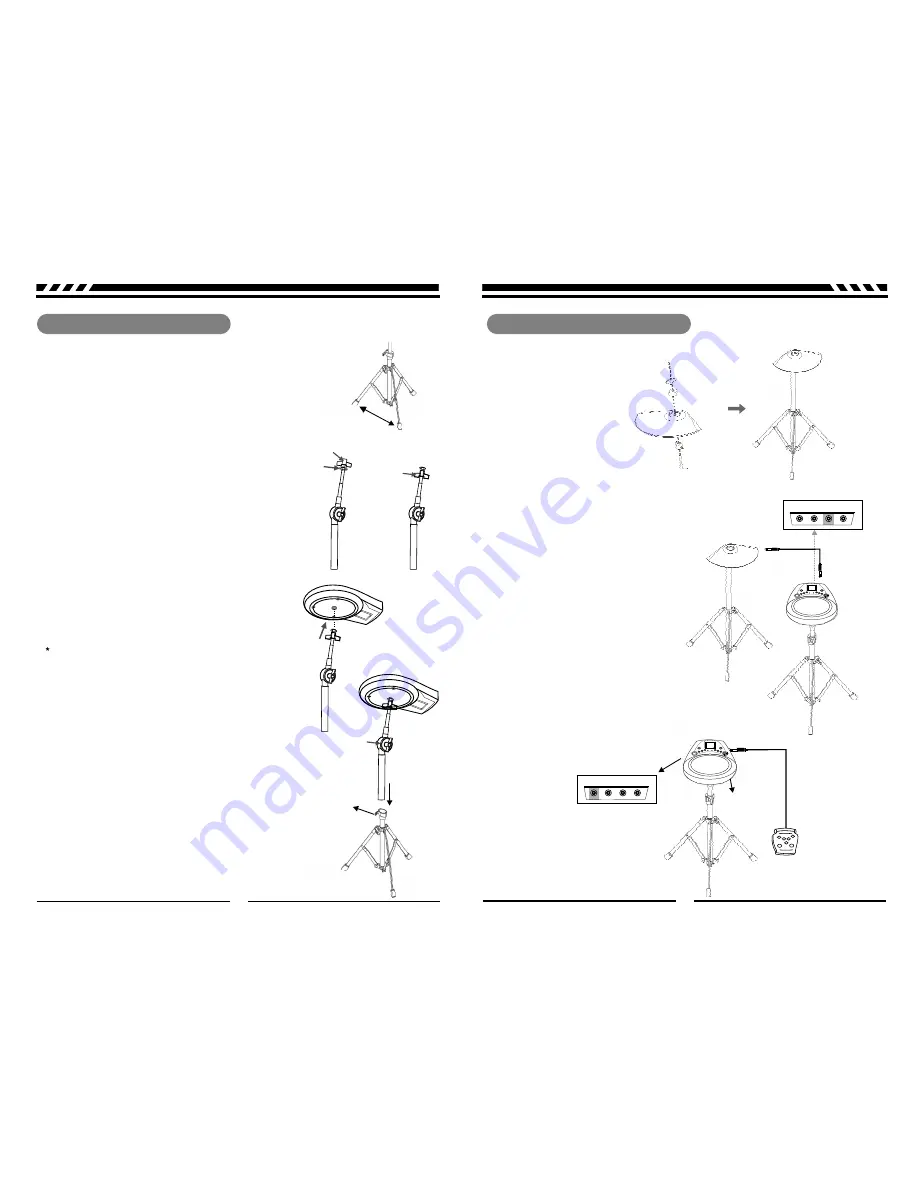
1.First, open the tripod so the legs are spaced at least 30cm apart.

2. Attach the wing screw and washer in the order shown

in the figure.

3.Attach the pad
Turn the pad until the screw is just about all the way in;
then adjust the angle of the pad and tighten the wing screw
from side the stand.

Do not forcefully try to turn the pad after the screw is already all

the way in. doing so may damage the stand's screw

4.Mounting the digital drum on the tripod.

Precautions When Folding the Tripod

when folding the digital drum tripod legs to store the unit,
be cautious not to get your
fingers pinched while handling the stand.

30

cm

Stand setup

Cymbal Setup

6

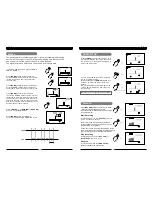
Setup cymbal on the tripod.

Using an optional cymbal cable you can
connect cymbal pads to the HI-HAT in jack.

Using an optional kick cable of kick you can
connect KICK pads to the KICK in jack.

KICK

HI-HAT

CONTROL

KICK

HI-HAT

PHONES

Take out washer

Attach wing screw
and washer
in the order

Loosen wing screw

Tighten the knob

Wing screw

7

HI-HAT

CONTROL

KICK

HI-HAT

PHONES

Cymbal

Summary of Contents for DD6

Page 1: ...User s Manual Digital Practice Drum...

Page 2: ...ls connectors or other parts of the instrument Always unplug cables by gripping the plug firmly but not pulling on the cable Disconnect all cables before moving the instrument Physical shocks caused b...

Page 3: ...e AC power adaptor into an AC power outlet An optional set of stereo headphones can be connected to the Headphones jack located on the rear panel When a pair of headphones is connected to the jack the...

Page 4: ...e stand s screw 4 Mounting the digital drum on the tripod Precautions When Folding the Tripod when folding the digital drum tripod legs to store the unit be cautious not to get your fingers pinched wh...

Page 5: ...the values of each parameter Select the training mode Enter game mode Hold and press this button to enter TIMER mode Only the metronome sound is played from here Not including the stroken sound 1 2 3...

Page 6: ...d notes of current playing song 1 3 4 5 6 7 8 9 10 11 12 13 9 2 10 Fig 4 LCD Display 1 2 3 4 5 6 7 8 9 10 11 12 13 Below is a list of beats to be chosen from the drum 0 9 2 3 3 2 3 4 4 3 4 5 5 4 5 6 6...

Page 7: ...vel This function checks the differences in playing dynamics between the left and right hands or one hand Press the button to start stop the exercise START STOP Balance Quarter note relatively easier...

Page 8: ...ect the type for this exercise Press the button to start stop the exercise START STOP Gradual Up down 14 15 P 1 P 2 P 3 P 4 P 5 P 6 P 7 P 8 The accuracy result is displayed on LCD show picture This fu...

Page 9: ...ith includes 200 500 1000 In fixed time accounting mode After a one measure count in the counting of pad hitting will be displayed on LCD in real time The time left will be shown in the shape of metro...

Page 10: ...or the first time to enter the GAME mode the drum track of the rhythm is turned on and it won t score the note you play Press button for the second time to enter the GAME 1 mode the drum track of the...

Page 11: ...19 Electronic snare7 53 Jazz hiihat cl_op 20 Electronic snare8 54 Standard Crash 21 Electronic snare9 55 Rock Crash 22 Electronic snare10 56 Standard Ride Kick bank 12 57 Rock Ride 23 Standard kick ME...

Page 12: ...nd_hard Big 6 8 4 4 4 4 6 8 Ballad_easy 6 8 Ballad_hard 8 beat ballad_hard 8 beat ballad_easy Pop bossa_easy Pop bossa_hard 8 beat pop_hard 8 beat pop_easy 31 Jazz_1_easy 4 4 Jazz 32 Jazz_1_hard 4 4 J...

Page 13: ...DD6_G06...
Reviews: