background image

Refer to your instructions for use for more information about cleaning, storage, 

handling and disposal of the ADHEAR system.

If you live in a humid climate or perspire heavily, the audio processor should be 

placed in a drying container (sold separately) instead of in the case when it is 

not being worn.

Storage

Drying

When not in use, the device should be kept in the case provided. You can remove 

the battery from the audio processor to extend battery life. You should always 

remove the battery if you do not use the audio processor for a longer period of 

time to avoid battery leakage and possible damage to the audio processor.

Store the adhesive adapters in a dry place at room temperature.

17

Summary of Contents for ADHEAR System

Page 1: ...Quick Guide AW37225_2 0 English EU ADHEAR...

Page 2: ...4 Applying the adhesive adapter 5 Connecting the audio processor 9 Disconnecting the audio processor 10 Changing the adhesive adapter 11 Changing the program 12 Changing the volume 13 Connecting ADHEA...

Page 3: ...you started with your ADHEAR For detailed information on the intended use indications contraindications warnings and precautions of the ADHEAR system please refer to the instructions for use 2018 MED...

Page 4: ...ADHEAR ADHEAR system Audio input socket Coupling plate Battery compartment Audio processor Volume control Adhesive adapter Snap connector Program button Microphones 2...

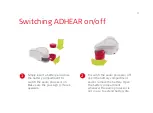
Page 5: ...ompartment to switch the audio processor on Make sure the plus sign faces upwards 1 To switch the audio processor off open the battery compartment and or remove the battery Open the battery compartmen...

Page 6: ...ttery one to two minutes before battery insertion This time is needed for the zinc air battery to charge up completely After closing the battery compartment there is a start up delay of a few seconds...

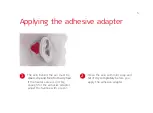
Page 7: ...the ear must be clean dry and free from any hair If the hairless area is not big enough for the adhesive adapter adjust the hairline with a razor 1 Clean the skin with mild soap and let it dry complet...

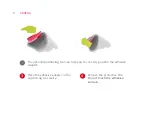
Page 8: ...ace the adhesive adapter in the positioning tool cavity 3 Remove the protective film Do not touch the adhesive surface 4 The optional positioning tool can help you to correctly position the adhesive a...

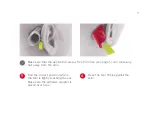
Page 9: ...he tool is lightly touching the ear Make sure the adhesive adapter is placed over bone 5 Press the tool firmly against the skin 6 Make sure that the application area is free from hair see page 5 and m...

Page 10: ...e positioning tool by moving it away from the skin Take care that you do not pull against the adhesive adapter when removing the tool 7 Press firmly on the entire surface of the adhesive adapter for a...

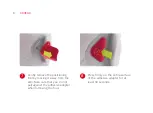
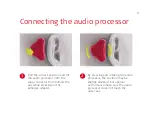
Page 11: ...audio processor onto the snap connector from behind the ear while pressing on the adhesive adapter 1 By pressing and rotating the audio processor the position may be slightly adjusted For optimal perf...

Page 12: ...EAR Disconnecting the audio processor To disconnect the audio processor from the adhesive adapter tilt it towards your ear 1 Remove the audio processor gently and do not pull on the adhesive adapter 2...

Page 13: ...the adhesive adapter Remove the adhesive adapter by slowly peeling it off the skin The adhesive adapter can usually be worn day and night and should be changed once or twice a week It is for single us...

Page 14: ...ADHEAR Changing the program Press the program button to change the program The audio processor always starts up in program 1 when it is switched on 12...

Page 15: ...Changing the volume Scrolling away from the skin increases the volume Scrolling towards the skin decreases the volume Changes of volume are indicated by a beep 13...

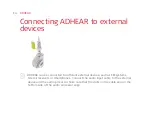
Page 16: ...onnected to different external devices such as FM systems Telecoil receivers or smartphones Connect the audio input cable to the external device and the audio processor Take care that the dots on the...

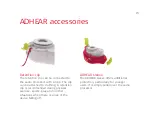
Page 17: ...ip can be attached to clothing A retention clip is recommended during physical exercise sports play and in other situations when there is a risk of the device falling off ADHEAR sleeve The ADHEAR slee...

Page 18: ...outside with soft baby wipes Do not clean the housing in or under water to prevent water from entering the audio processor The coupling plate should be cleaned weekly with the cleaning brush provided...

Page 19: ...tely instead of in the case when it is not being worn Storage Drying When not in use the device should be kept in the case provided You can remove the battery from the audio processor to extend batter...

Page 20: ...medel com MED EL Elektromedizinische Ger te GmbH F rstenweg 77a 6020 Innsbruck Austria office medel com...

Reviews: