


Once you have connected your camera to the computer and opened the Envisage program, you’ll want to start
taking pictures. Follow the steps below to start taking simple pictures with your Deep Sky Imager camera. We
recommend that the first time you take pictures, you do so during daylight hours. Point your telescope at a
stationary landmark, such as a building, telephone pole or so forth—trees and other objects that move slightly
are not the best objects to use during your first
image tests.
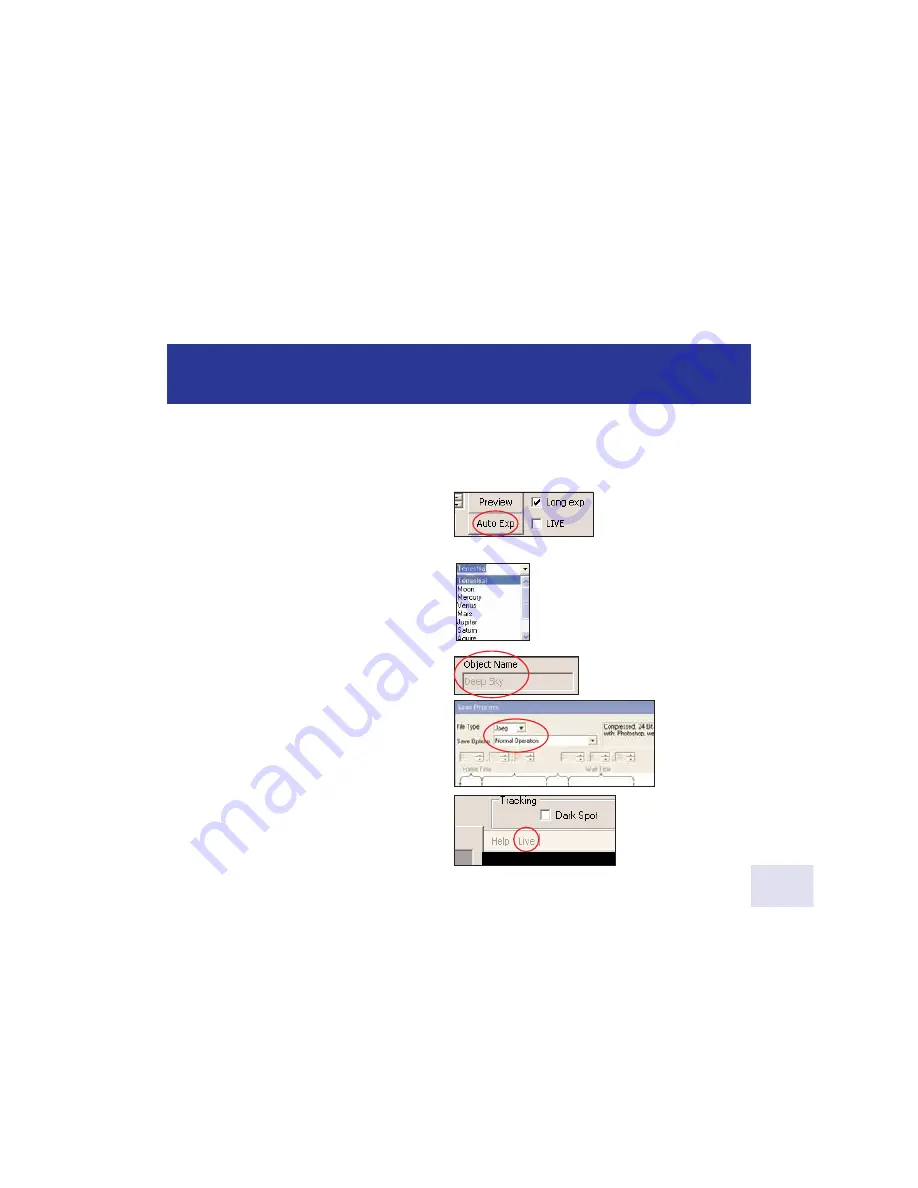
1.
Click on the “Auto Exp” button (3).
See “Auto Exp Button,” page 19, for
more information.
2.
Click on the combo box controls in the “Image
Process” field (10) to display a list of object types.
Scroll down the list and select “Terrestrial.” See
“Image Process,” page 21, for more information.
3.
Type a name for the object in the “Object
Name” box (11). This will be used as the image
file name. See “Object Name,” page 22, for
more information.
4.
Click “Save Process” button (13). Select “JPEG”
and “Normal Operation.” See “Save Process,”
page 22, for more information.
5. Click on the “Live” tab (17). See “Live Image
Check Box,” page 19, for more information.
Start Taking Pictures
1
10