background image

4

ling the illumination of the Power 

Output Meters on McIntosh Power 

Amplifiers. A 3.5mm stereo mini 

phone plug is used for connection 

to the Power Control, Trigger and 

PASSTHRU Outputs on the C2600.

Note: The Power Control, Trigger, 

PASSTHRU and Data Connecting Cable is avail-

able from the McIntosh Parts Department:

Power Control, Trigger, PASSTHRU and Data 

Cable Part No. 170202

Six foot, shielded 2 conductor, with 3.5mm stereo 

mini phone plugs on each end.

Data Port Connectors

The C2600 Data Out Ports 

send Remote Control Signals to 

Source Components. A 3.5mm 

stereo mini phone plug is used 

for connection.

IR IN Port Connectors

The IR IN Port also uses a 3.5mm 

stereo mini phone plug and allows 

the connection of other brand IR 

Receivers to the C2600.

RS232 Data Port Cable

The RS232 Data Cable is a 3.5mm stereo mini phone 

plug to a subminiature DB 9 connector:

General Information and Connector Information

Connector and Cable Information

XLR Connectors

Below is the Pin configuration for the XLR Balanced 

Input and Output Connectors on the C2600. Refer to 

the diagrams for connections:

  PIN 1: Shield/Ground

  PIN 2: + Output

  PIN 3: - Output

Power Control and Trigger Connectors

The C2600 Power Control Out, Trigger and PASSTH

-

RU Output Jacks send Power On/Off Signals (+12 

volt/0 volt) when connected to other McIntosh Com

-

ponents. An additional connection is for control-

Data

Signal

N/C

Data

Ground

PIN 2

PIN 1

PIN 3

PIN 1

PIN 2

PIN 3 

1. For additional connection information, refer to the 

owner’s manual(s) for any component(s) connected 

to the C2600 Tube Preamplifier.

2. The Main AC Power going to the C2600 and any 

other McIntosh Component(s) should not be applied 

until all the system components are connected 

together. Failure to do so could result in malfunc-

tioning of some or all of the system’s normal opera-

tions. When the C2600 and other McIntosh Com

-

ponents are in their Standby Power Off Mode, the 

Microprocessor’s Circuitry inside each component 

is active and communication is occurring between 

them.

3. Balanced and Unbalanced Inputs and Outputs can 

be mixed. For example, you may connect signal 

sources to Unbalanced Inputs and send signals 

from the Balanced Outputs. You can also use Bal-

anced and Unbalanced Outputs simultaneously, 

connected to different Power Amplifiers.

4. The C2600 internal Digital to Analog Converter 

Circuitry is designed to decode 2-channel PCM 

(Pulse Code Modulation) and DSD (Direct Stream 

Digital) Digital Signals. The Coaxial and Optical 

Digital Audio Inputs are for PCM Digital Signals. 

The Digital DIN and USB Audio Inputs are for 

PCM and DSD Digital Signals. Other Digital Audio 

Signal Format Types will cause the Audio Outputs 

of the C2600 to be muted and the Front Panel Infor-

mation Display will indicate an error message.

5. Sound Intensity is measured in units called Deci

-

bels and “dB” is the abbreviation.

6. The McIntosh C2600 is factory configured for im

-

mediate use. It can also be customized to comple-

ment the components making up your system. Refer 

to the C2600 “Setup Mode” starting on page 13 for 

additional information.

General Information

Power

Control

Meter

Illumination

Control Ground

Main, Triggers 1-4

and PASSTHRU

7. The Remote Control Supplied with the C2600 

Preamplifier is capable of operating other com-

ponents. For additional information go to www.

mcintoshlabs.com.

8. The IR Input, with a 3.5mm mini phone jack, is 

configured for non-McIntosh IR sensors such as 

a Xantech Model DL85K Kit. 

The signal from a 

connected External IR Sensor will have priority 

over the signal from the Front Panel IR Sensor.

9. When discarding the unit, comply with local rules 

or regulations. Batteries should never be thrown 

away or incinerated but disposed of in accordance 

with the local regulations concerning battery 

disposal.

10. For additional information on the C2600 

and other McIntosh Products please visit 

the McIntosh Web Site at www.mcintosh

-

labs.com.

IR Data

Control

Ground

N/C

PIN 1

PIN 6

PIN 5

PIN 9

Data In

(DB9-pin2)

Ground

(DB9-pin5)


Data Out

(DB9-pin3)

DB9

(male connector)

Summary of Contents for C2600

Page 1: ...McIntosh Laboratory Inc 2 Chambers Street Binghamton New York 13903 2699 Phone 607 723 3512 www mcintoshlabs com C2600 Tube Preamplifier Owner s Manual ...

Page 2: ...du cordon d alimentation doit demeurer aisément accessible Pour déconnecter complètement l équipement du réseau d alimentation déconnecter la fiche du cordon d alimentation de la prise murale 17 If this equipment is supplied with AC DC Adapter with separate power supply cord or the AC DC Adapter plugging directly into an a c receptacle they shall remain readily operable To completely disconnect th...

Page 3: ...chase date and McIntosh Dealer name are important to you for possible insurance claim or future service The spaces below have been provided for you to record that information Serial Number ________________________________ Purchase Date ________________________________ Dealer Name _________________________________ Safety Instructions 2 Thank You and Please Take a Moment 3 Technical Assistance and C...

Page 4: ...roprocessor s Circuitry inside each component is active and communication is occurring between them 3 Balanced and Unbalanced Inputs and Outputs can be mixed For example you may connect signal sources to Unbalanced Inputs and send signals from the Balanced Outputs You can also use Bal anced and Unbalanced Outputs simultaneously connected to different Power Amplifiers 4 The C2600 internal Digital t...

Page 5: ...214 individual 0 5dB volume level steps with no noise as the volume level is changed Variable Rate Volume and Balance Controls The C2600 Preamplifier s Volume and Balance Con trol Circuitry provides an ideal rate of change with control rotation Electronic Tone Controls with Bypass Electronic Bass and Treble Circuitry allow volume level adjustments for low and high frequencies in precise one Decibe...

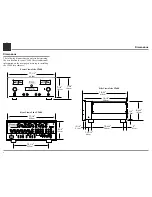
Page 6: ...information on the next page pertaining to installing the C2600 into cabinets 17 1 2 44 5cm 6 3 8 16 2cm 7 5 8 19 4cm 13 1 4 33 7cm 17 1 8 43 5cm 7 1 8 18 1cm 16 1 2 41 9cm 3 16 0 5cm 13 16 2 1cm 6 9 16 16 7cm 10 9 16 26 8cm 14 1 2 36 8cm 2 5 1cm 1 15 16 4 9cm Front View of the C2600 Rear View of the C2600 Side View of the C2600 ...

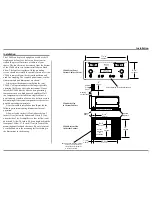
Page 7: ...maintaining all the system components at the coolest possible operating temperature A custom cabinet installation should provide the following minimum spacing dimensions for cool operation Allow at least 6 inches 15 2cm above the top 2 inches 5 1cm below the bottom and 1 inch 2 5cm on each side of the Preamplifier so that airflow is not obstructed Allow 20 inches 50 8cm depth behind the front pane...

Page 8: ...nnection Diagrams located on the separate folded sheets Mc1A 1B and Mc2A are an example of a typical audio system Your system may vary from this however the actual components would be connected in a similar manner For additional information refer to Connector and Cable Information on page 4 Notes 1 The C2600 allows renaming of the Audio Inputs Names as indicated on the Front Panel Infor mation Dis...

Page 9: ...formation note 8 on page 4 Audio Connections 14 Connect an Audio Cable from the C2600 UN BALANCED INPUT 1 Tuner Jacks to the Tuner Unbalanced Output Jacks 15 Using the DIN Cable Twisted Pair cable sup plied with a MCT Transport from the C2600 MCT DIGITAL AUDIO INPUT connector to the SACD CD Transport DIN Output connector 16 Connect an XLR Audio Cable from the C2600 BALANCED INPUT 1 connectors to t...

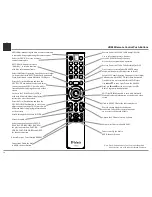
Page 10: ...uctions on a video screen Press to change broadcast bands on a connected Tuner Select certain functions on a variety of McIntosh Models Select the DEVICE to issue a remote control command to Direct access to stored Tuner PRESETS when used with the numeric Push buttons 0 thru 9 Press the Trim Push button and then the LEVEL DOWN Push button to select and adjust various functions INFO is used with Mc...

Page 11: ...nformation on assigning the Data Ports refer to How to Setup on page 16 Trim Press the TRIM Push button until the desired Trim function Balance Trim Level etc appears on the C2600 Front Panel Display then press the LEVEL Up or Down Push button to adjust the Trim setting Note Press the TRIM Push button to recall the last Trim function selected For additional information on using the Trim Functions ...

Page 12: ... Control used to select a source for listening and recording The control is also used to enter the TRIM or SETUP Modes and select the various functions Meter indicates the Right Channel Output of the Preamplifier Meter indicates the Left Channel Output of the Preamplifier OUTPUT 1 and 2 Push buttons with indicators switch the Preamplifier Outputs 1 and 2 On or Off INFORMATION DISPLAY indicates the...

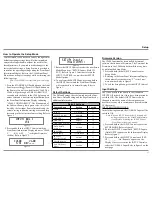
Page 13: ...sion of the Firmware in the C2600 can be identified at any time by utilizing the Setup Mode 1 Press and hold in the INPUT Control to enter Setup Mode 2 Referring to the Front Panel Information Display the number after the character V is the Firm ware number Refer to figure 2 3 To exit the Setup Mode press the INPUT Control How to Operate the Setup Mode The Default Settings Chart below indicates th...

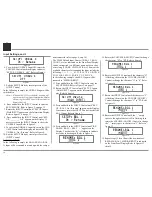
Page 14: ...acter L to D Refer to figure 11 18 Rotate the INPUT Control until the _ empty space to the right of character D is flashing then rotate the VOLUME ADJUST Control to change the _ empty space to character to I Refer to figure 12 19 Repeat steps 15 thru 18 until the new name of RENAME BAL 1 MEDIA BRDG is indicated on the Front Panel Display Refer to figures 13 thru 19 nent connected refer to page 9 s...

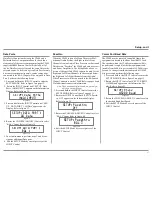
Page 15: ...UTPUT 1 and 2 Push buttons on the Remote Control If it is desirable to have OUTPUT 1 and or 2 always On regardless of the OUTPUT 1 and 2 Push button settings perform the following 1 Press and hold in the INPUT Control to enter the SETUP MODE Refer to figure 2 on page 13 2 Rotate the INPUT Control until SETUP Out puts Hold INPUT appears on the Information Display Refer to figure 21 3 Press and hold...

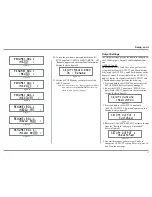
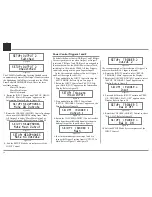
Page 16: ...il SETUP TRIGGER 1 Output 1 appears on the Display Refer to figure 30 4 Rotate the VOLUME ADJUST Control to select Main from the available additional selections in cluding Output 2 or Input Refer to figure 31 5 In a similar manner perform steps 3 and 4 to change the Trigger 2 setting from OUTPUT 2 to Main Refer to figure 31 and figure 32 Figure 29 SETUP Triggers Hold INPUT Figure 31 SETUP TRIGGER ...

Page 17: ...ntrol to enter the SETUP MODE Refer to figure 2 on page 13 2 Rotate the INPUT Control until SETUP RS232 115200 Baud appears on the Information Dis play Refer to figure 41 3 Rotate the VOLUME ADJUST Control to select the desired Baud Rate Speed 4 Exit the SETUP Mode by several presses of the INPUT Control Setup con t Comm Port Baud Rate SETUP Passthru BAL 3 Figure 40 SETUP Passthru Off Figure 39 Da...

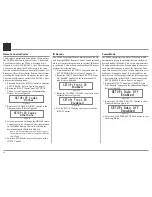
Page 18: ...pears on the Information Dis play Refer to figure 44 3 Rotate the VOLUME ADJUST Control to select Disabled Refer to figure 45 5 Exit the SETUP Mode by several presses of the INPUT Control Figure 44 SETUP Front IR Enabled Figure 45 SETUP Front IR Disabled Remote Control Codes The Remote Control included with the C2600 utilizes the NORMAL McIntosh Control Codes The Second Set of Control Codes the C2...

Page 19: ...e 13 2 Rotate the INPUT Control until FACTORY RE SET Hold INPUT appears on the Information Display Refer to figure 48 3 Press and hold in the INPUT Control until FAC TORY RESET In Progress appears on the Infor mation Display then release the INPUT Control Refer to figures 49 and 50 4 Press the Front Panel STAND BY Push button to switch the C2600 on Figure 50 FACTORY RESET Completed Figure 48 FACTO...

Page 20: ...NDBY ON Push button on the Front Panel or the OFF Push button on the Remote Control Note For an explanation of the Remote Control Push button functions refer to pages 10 and 11 Trim Functions The C2600 has eleven different Trim Selections with Adjust ments The Trim Selections in clude Balance Input Trim Level Bass Treble Tone Controls Mono Stereo Mode Meter Lights Tube Lights Display Brightness Ph...

Page 21: ... in the music can be increased or decreased by using the Trim Select and Trim Adjust Control To make an adjustment per form the following 1 Use the Front Panel INPUT TRIM Control or the TRIM Push button on the Remote Control until TREBLE 0 dB appears on the Front Panel Information Display Refer to figure 73 the Loudspeakers Use the Balance Trim Function as needed to achieve approximately equal lis...

Page 22: ...to figure 81 2 Rotate the VOLUME ADJUST Control or press the LEVEL UP DOWN Push buttons to increase refer to figure 74 or decrease refer to figure 75 the volume level of the high frequencies The Front Panel Display indicates the Treble changes in steps from 12dB to 12dB After approximately 8 seconds the Display returns to indicate the Source Selection and Volume Level TONE CONTROL With the Tone Co...

Page 23: ...he Information Display returns to indicate the Source Selection and Volume Level PHONO ADJUSTMENTS When the Phono MC or Phono MM Input is selected an additional TRIM SELECT FUNCTION becomes available for adjustment Perform the following steps to make the Phono Trim Adjustments 1 Select either the Phono MM or Phono MC Source Input 2 Select MC PHONO LOAD 400Ω ohms or MM PHONO LOAD 50pF as indicated ...

Page 24: ...mute the C2600 Tone Controls Press the Front Panel TONE Push button to activate the C2600 TREBLE and BASS Tone Control Cir cuitry for the currently selected Input Source The LED above the TONE Push button will illuminate To bypass the TONE CONTROL CIRCUITRY for the currently selected Input Source press the TONE Push How to Operate the C2600 con t button The LED above the TONE Push button will exti...

Page 25: ...or imped ances ranging from 100 to 600 ohms How To Make a Recording 1 Select the desired signal source you wish to record by using the Front Panel INPUT Control or us ing the INPUT UP DOWN Push button on the Remote Control 2 Adjust the record level using the recorder level con trol and proceed with the recording process 3 Listen to the playback of the program source just recorded by selecting the ...

Page 26: ... listing Make sure to select the McIn tosh HD HS USB Audio from available playback devices listed when using this McIntosh Product for USB Audio Control Panel Settings To activate the McIntosh HD USB Audio Control Panel Click on the McIntosh Icon located in the Windows notification area on the right side of the task bar or click on the Windows Show hid den icons then select the McIntosh Icon Refer...

Page 27: ...ayed back There are many third party Applications besides Applications like Windows Media Player for steam ing music from the computer to McIntosh C2600 USB Input An example of just one of the available applica tions is JRiver Media Center How to Operate the C2600 con t Reset of Microprocessors In the unlikely event the controls of the C2600 stop functioning the microprocessors can be reset by per...

Page 28: ...28 ...

Page 29: ...29 Photos ...

Page 30: ... Digital Input Sample Rates Optical PCM 16Bit 24Bit 32kHz to 192kHz Coaxial PCM 16Bit 24Bit 32kHz to 192kHz MCT PCM SACD 16Bit 24Bit 32kHz to 192kHz USB PCM 16Bit 24Bit 32Bit 32kHz to 384kHz DXD DXD352 8kHz DXD384kHz DSD DSD64 DSD128 DSD256 Power Control and Trigger Output 12VDC 25mA Tube Complement 6 Tubes Five 12AX7A and One 12AT7 viewed thru the Top Cover Window Power Requirements Field AC Volt...

Page 31: ...in shipping damage Use the original shipping carton and interior parts only if they are all in good serviceable condition If a shipping carton or any of the interior part s are needed please call or write Customer Service Depart ment of McIntosh Laboratory Refer to page 3 Please see the Part List for the correct part numbers Quantity Part Number Description 1 033888 Shipping carton only 4 033887 E...

Page 32: ...ucts is the policy of McIntosh Laboratory Incorporated who reserve the right to improve design without notice Printed in the U S A McIntosh Laboratory Inc 2 Chambers Street Binghamton NY 13903 www mcintoshlabs com McIntosh Part No 04167000 ...

Reviews: