24
Note: For an explanation of the Remote Control
Push-button functions, refer to pages 14 and 15.
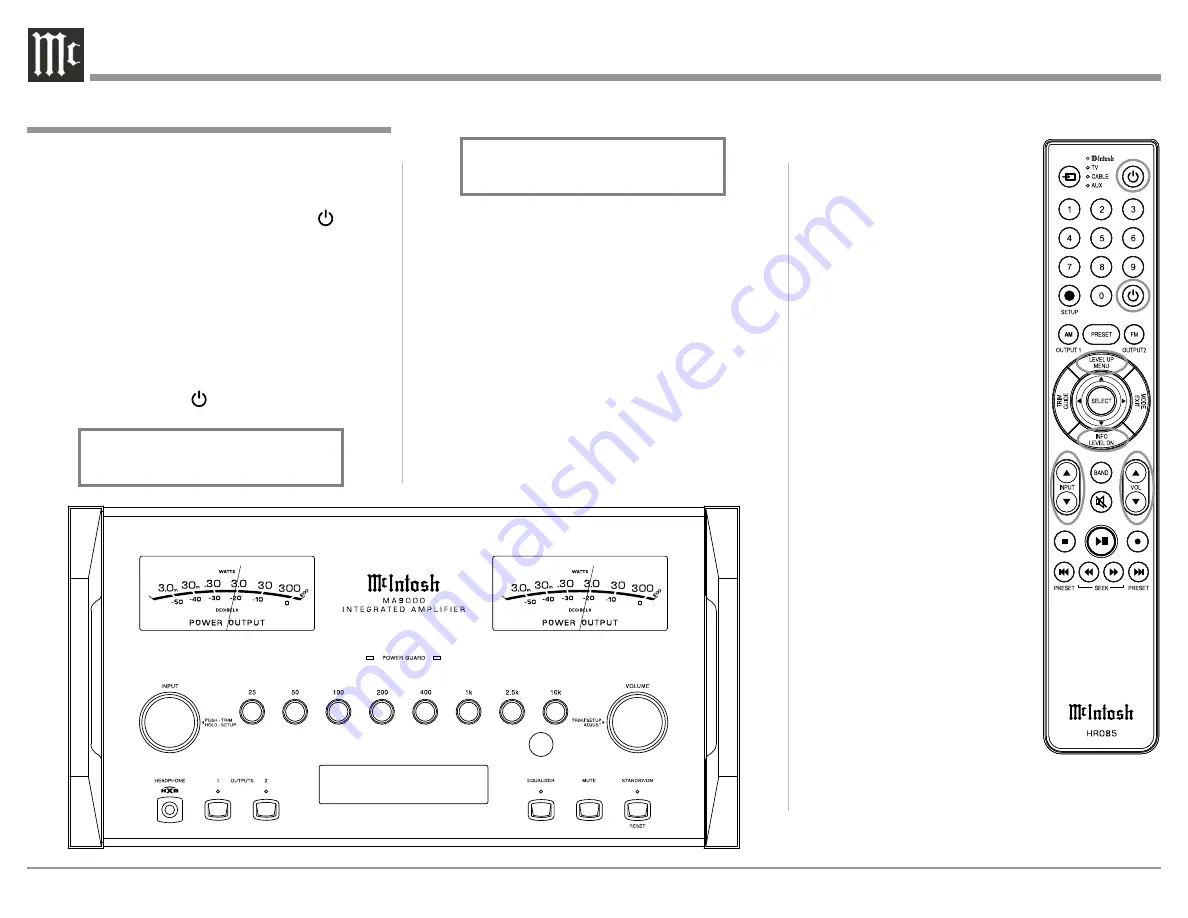
Source Selection
Rotate the INPUT Control to select the desired source
or press the INPUT Up
p
or Down
q
Push-button on
the Remote Control. Refer to figures 50 and 53.
Volume Control
Rotate the Front Panel VOLUME Control or use the
VOLume Up
p
or Down
q
Push-buttons on the Re-
mote Control for the desired listening level. Refer to
figures 50 and 53.
Power On and Off
The Red LED above the STANDBY/ON Push-button
lights to indicate the MA9000 is in Standby mode.
To switch ON the MA9000, Press the STANDBY/ON
Push-button on the Front Panel or press the (Power
- Green) Push-button on the Remote Control. The
MA9000 will go through a brief startup initialization
with the Front Panel Display indicating Power Guard
is active, last used source and volume setting. This is
followed by the volume setting indication starting at
zero and then increasing to the last used volume set-
ting. Refer to figures 50, 51, 52 and 53. To switch OFF
the MA9000, press the STANDBY/ON Push-button
on the Front Panel or the (Power - Red) Push-button
on the Remote Control.
Trim Functions
The MA9000 has various Trim
Selections with Adjustments. The
Trim Functions include Bal-
ance, Input Trim Level, Equal-
izer Mode, Phono Cartridge
Loading when a Phono Input is
selected (Resistance for MC and
Capacitance for MM), Mono/
Stereo, Meter Backlight, Display
Brightness and HXD Mode (when
Headphones are connected).
The Trim Settings are stored in
memory independently for each
Input Source Selected, except the
Meter Illumination which is the
same for all inputs.
Note: Selection and Adjustment of
all Trim Functions may be
performed by pressing the
Front Panel INPUT Trim
Control and then rotat-
ing it to select the desired
Trim Function. Then use the
VOLUME Adjust Control to
change the setting. Remote
Control TRIM Push-Button
together with the LEVEL UP/
Down Push-button may also
be used. Refer to figures 50
and 53.
After approximately 5 seconds
the Display returns to indicate
the Source Selection and Volume
Level.
How to Operate the MA9000
Figure 50
Figure 51
BAL 1 15%
Figure 52
COAX 1 30%
48kHz
Figure 53
USB 30%
DSD256


