23
Customer Helpline
0345 605 2063
Prepare
Step 4 - Setting the cutting height (continued)
IMPORTANT!
Ensure the power cord is disconnected from the mains supply and wait until
the cutting head has stopped rotating before adjusting the cutting height.
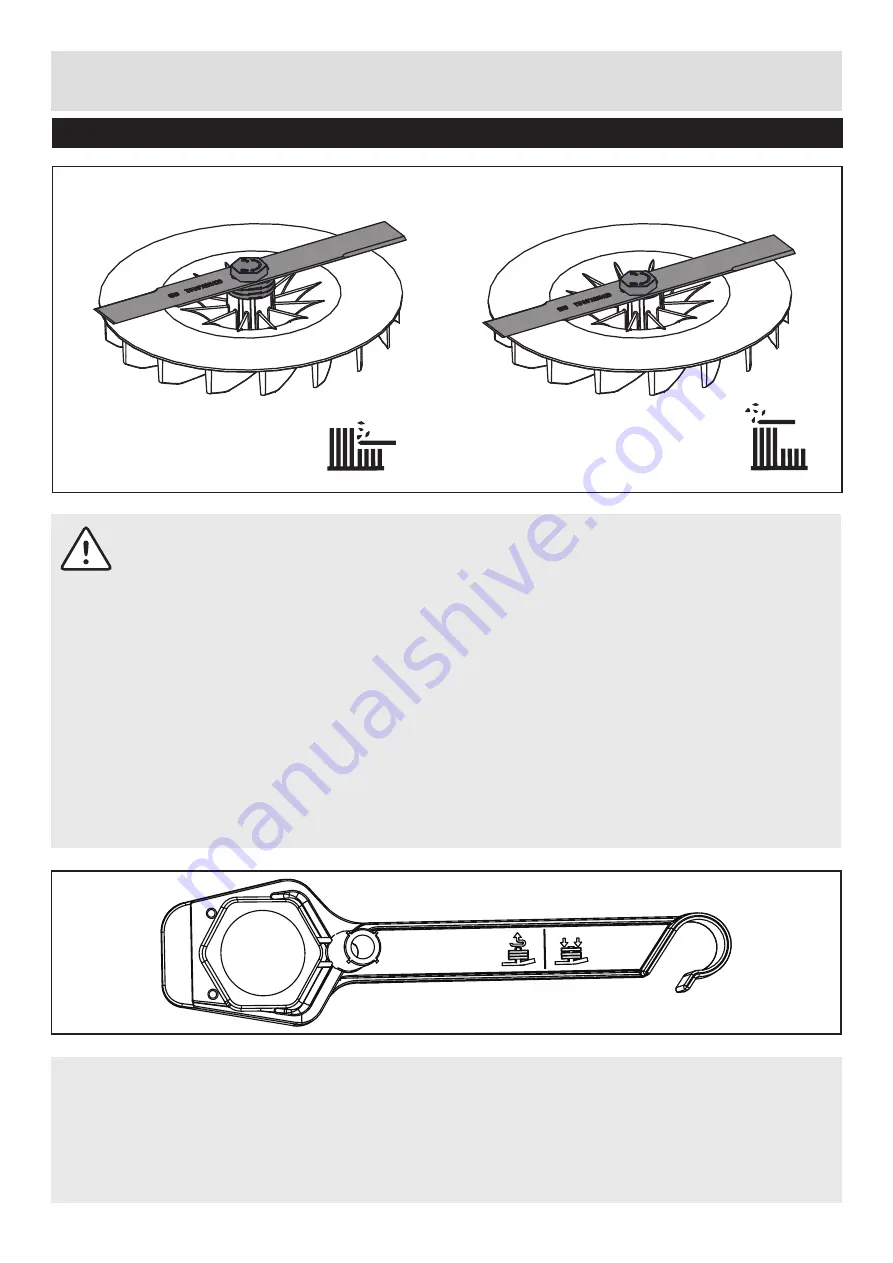
• There are 4 different cutting heights. Figure 7 shows the lowest cutting height, 3 spacers.
Figure 8 shows the highest cutting height, no spacers. Adding spacers reduces the
cutting height, removing spacers increases cutting height
• Disconnect from the main electricity supply and wait until impeller and the blade bolt have
stopped rotating.
• Turn your product upside down.
• To remove the blade and adjust the number of spacers, use the spanner to remove blade
bolt. The spacers and blade can now be removed and the number of spacers adjusted.
• Spacers that are not being used can be stored on the spanner to prevent loss.
• Refit the blade as described in Blade Maintenance.
When removing a spacer from its storage location on the spanner, gently twist it as you
remove it. When you replace a spacer back to this location just push it firmly into position.


