22
GEARBOX DISASSEMBLY:
All item numbers on this page refer to Figure 7, unless otherwise specified. The R270, R374, R376, R450 and R451
rammers use a common gearbox which is referred to as the 270 gearbox in this section. Remove the gearbox as
previously instructed.
COVER REMOVAL:
1. Remove the six (6) Flange Whiz Lock Screws
(#16).
2. Install two (2) of the screws into the two threaded
holes in the cover (protected by the Caplugs) and
turn them in equally to back out the cover. If the
cover should cock, a pry bar may be used to bring
the cover off straight. See Figure 3.
FIGURE 3
3. Remove and replace OĆRing or Gasket. (#15)
PINION REMOVAL:
1. Remove Retaining Ring (#8) from front cover side
of gearbox. If the retaining ring is pinched in its
groove, tap the pinion on the drum side. This will
relieve the pressure on the retaining ring.
2. Press out Pinion (#21).
3. Pry out Seal (#20) and replace.
4. Remove Retaining Ring (#9).
5. Press out Bearing (#7).
CRANK GEAR REMOVAL:
1. Slip a retaining ring pliers through the slot opening
in the Crank Gear (#6) and remove the Retaining
Ring (#9). See Figure 4.
FIGURE 4
2. Remove the Hex Head Cap Screw (#18) and Seal
Washer (#17) from front cover.
3. Use a 3/8 in (10mm) dia. steel rod to press crank
gear out of the cover.
4. Remove the small Retaining Ring (#14).
5. Remove the Connecting Rod (#10) from the crank
gear.
6. Use a bearing puller to remove the bearing (#7)
from the crank gear.
7. Remove the small Needle Bearing (#3) and the
large Needle Bearing (#5) with a blind hole bearing
puller.
BREATHER REMOVAL
1. Remove the Hex Head Cap Screw (#37) from the
top of the Breather Assembly (#38).
2. Pull off the Plain Washer (#36), Cap (#35) and
Filter (#34).
3. Use a pipe wrench to remove the Breather Tube
(#30).
Do not disassemble the breather
sub-assembly.
Summary of Contents for R270R
Page 29: ...27 FIGURE 7 270 450 451 GEARBOX ...
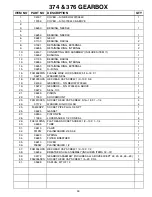
Page 31: ...29 FIGURE 8 374 376 GEARBOX ...
Page 33: ...31 FIGURE 9 270 450 451 LOWER SYSTEM ...
Page 35: ...33 FIGURE 10 374 376 LOWER SYSTEM ...
Page 37: ...35 FIGURE 11 270 450 451 HANDLE ...
Page 39: ...37 FIGURE 12 STANDARD HANDLE OIL INJECTED ONLY ...
Page 41: ...39 FIGURE 13 374 376 HANDLE ...
Page 43: ...41 FIGURE 14 LO PROFILE HANDLE 1 3 6 10 11 13 11 9 ...
Page 45: ...43 FIGURE 15 LO PROFILE HANDLE OIL INJECTED ONLY ...
Page 49: ...47 FIGURE 17 ROBIN ENGINE ...
Page 51: ...49 FIGURE 18 ROBIN OIL INJECTED ENGINE ...
Page 53: ...51 FIGURE 19 LO PROFILE ROBIN ENGINE ...
Page 55: ...53 FIGURE 20 AIRAMMER MOTOR 2 6 5 4 3 1 9 8 7 TO VALVE BLOCK TO MOTOR INLET ...

