background image


Mazda CX-9

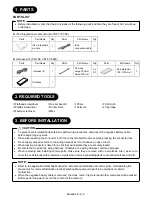
7


Information display removal 

1.  Remove the screws (3 locations). 

2.  Disconnect the information display connector and then remove 

the information display. 


Preparation for iPod integration module installation

1.  Affix the pad protectors to the iPod integration module as shown 

in the figure. 


2.  Affix the pad protectors to the iPod integration module as shown 

in the figure. 


3.  Connect the harness (F) and iPod connection cable to the iPod 

integration module. 


7. INSTALLATION AND WIRING

x

  To ensure proper affixing, be sure to degrease the area 

where the pad protector is affixed. 

CAUTION


Information display 

Screws 

Vehicle front 


iPod integration module 

Pad protector


Pad protector

iPod integration module


iPod integration module 

Harness (F)

iPod connection cable

x

  To ensure proper affixing, be sure to degrease the area 

where the pad protector is affixed. 

CAUTION

Summary of Contents for C9F4 V6 029

Page 1: ...not install the iPod integration module in any way other than described in the following instructions z If in any doubt please ask your Mazda dealer to install the accessory in order to prevent errors...

Page 2: ...rk x When disconnecting the connector hold the connector itself to remove while pressing the connector lock x Do not apply excessive force to the wiring harness as it could cause an open circuit x Whe...

Page 3: ...ector be sure to insert it straight along the guide The connector terminal may be bent if inserted at an angle CAUTION iPod On market product AVN iPod integration module Harness F iPod connection cabl...

Page 4: ...nel outward and detach clips A 4 locations and pin B 1 location 2 Remove the decoration panel Front console box mat removal 1 Pull the front console box mat outward and detach tabs A 6 locations then...

Page 5: ...nd the stay damper 2 Press the stopper in and remove it 3 Lower the glove compartment 4 Detach the clips from the dashboard and remove the glove compartment Indicator panel removal 1 Remove the select...

Page 6: ...sure that the wiring harness and antenna feeder are not caught between the navigation unit and dashboard If the wiring harness or the antenna feeder is caught between the navigation unit and dashboar...

Page 7: ...iPod integration module as shown in the figure 3 Connect the harness F and iPod connection cable to the iPod integration module 7 INSTALLATION AND WIRING x To ensure proper affixing be sure to degrea...

Page 8: ...Pod integration module be sure to route cables avoiding sharp edges and burrs of the vehicle s sheet metal x To ensure proper affixing be sure to degrease the area where the pad protector is affixed x...

Page 9: ...nt iPod connection cable Tie wrap large Vehicle wiring harness Vehicle front Tie redundant part iPod connection cable Vehicle wiring harness Vehicle front Remove connector cover when connecting iPod f...

Page 10: ...Otherwise the car navigation unit could be damaged Program reading Do not turn the power off x When the battery is disconnected the windows will not fully open and close automatically Perform the foll...

Reviews: