background image

HAZARD FLASHER CONTROL

The hazard flasher is located on the
steering column, just behind the
steering wheel. The hazard flashers
will operate when the ignition is in
any position or if the key is not in
the ignition.

Push in the flasher control and all
front and rear direction signals will
flash. Press the flasher control again
to turn them off. Use it when your
vehicle is disabled and is creating a
safety hazard for other motorists.

Note:

With extended use, the flasher may run down your battery.

FUEL PUMP SHUT-OFF SWITCH

This device stops the electric fuel pump from sending fuel to the engine
when your vehicle has had a substantial jolt.

After an accident, if the engine cranks but does not start, this switch
may have been activated.

2008 B-Series

(mbs)

Owners Guide (post-2002-fmt)
USA

(fus)

Roadside Emergencies

168

Summary of Contents for 2008 B2300 Truck

Page 1: ... jack Line in 32 Satellite radio information 35 Climate Controls 39 Heater only 39 Manual heating and air conditioning 40 Lights 42 Headlamps 42 Turn signal control 46 Bulb replacement 46 Driver Controls 53 Windshield wiper washer control 53 Steering wheel adjustment 54 Power windows 55 Mirrors 56 Speed control 57 Locks and Security 62 Keys 62 Locks 62 Anti theft system 66 Table of Contents 1 ...

Page 2: ...iler towing 135 Recreational towing 144 Driving 146 Starting 146 Brakes 151 Transmission operation 156 Roadside Emergencies 168 Hazard flasher switch 168 Fuel pump shut off switch 168 Fuses and relays 169 Changing tires 179 Lug nut torque 187 Overheating 188 Jump starting 189 Wrecker towing 195 Customer Assistance 196 Reporting safety defects U S only 206 Reporting safety defects Canada only 206 C...

Page 3: ...gine data 264 Accessories 268 Index 269 All rights reserved Reproduction by any means electronic or mechanical including photocopying recording or by any information storage and retrieval system or translation in whole or part is not permitted without written authorization from MNAO MNAO may change the contents without notice and without incurring obligation Copyright 2007 MNAO Table of Contents 3...

Page 4: ...NGRATULATIONS Congratulations on acquiring your new Mazda product Please take the time to get well acquainted with your vehicle by reading this handbook The more you know and understand about your vehicle the greater the safety and pleasure you will derive from driving it For more information on Mazda and its products visit the following website In the United States www mazdausa com In Canada www ...

Page 5: ...ee this symbol it is imperative that you consult the relevant section of this guide before touching or attempting adjustment of any kind Protecting the environment We must all play our part in protecting the environment Correct vehicle usage and the authorized disposal of waste cleaning and lubrication materials are significant steps towards this aim Information in this respect is highlighted in t...

Page 6: ...led data potentially including but not limited to information such as the use of restraint systems including seat belts by the driver and passengers information about the performance of various systems and modules in the vehicle and information related to engine throttle steering brake or other system status potentially including information related to how the driver operates the vehicle including...

Page 7: ...y type vehicles WARNING Utility vehicles have a significantly higher rollover rate than other types of vehicles Before you drive your vehicle please read this Owner s Manual carefully Your vehicle is not a passenger car As with other vehicles of this type failure to operate this vehicle correctly may result in loss of vehicle control vehicle rollover personal injury or death Using your vehicle wit...

Page 8: ...rbag Side Child Seat Lower Anchor Child Seat Tether Anchor Brake System Anti Lock Brake System Parking Brake System Brake Fluid Non Petroleum Based Parking Aid System Stability Control System Master Lighting Switch Hazard Warning Flasher Fog Lamps Front Fuse Compartment Fuel Pump Reset Windshield Wash Wipe Windshield Defrost Demist Rear Window Defrost Demist Introduction 8 ...

Page 9: ...Sparks Battery Acid Explosive Gas Fan Warning Power Steering Fluid Maintain Correct Fluid Level MAX MIN Service Engine Soon Engine Air Filter Passenger Compartment Air Filter Jack Check fuel cap Speed Control Low Tire Pressure Warning INFORMATION ABOUT THIS GUIDE The information found in this guide was accurate at the time of printing Mazda may change the contents without notice Introduction 9 ...

Page 10: ...strument panel dimmer control pg 43 Instrument cluster pg 12 Speed control pg 57 Hood release pg 222 Driver air bag pg 86 Parking brake release pg 153 Turn signal and wiper washer control pg 53 If equipped Instrument Cluster 10 ...

Page 11: ... control pg 162 Audio system pg 19 Passenger airbag indicator pg 91 Auxiliary power point pg 54 Climate control system pg 39 Cigar lighter pg 55 Auxiliary input jack pg 32 if equipped Instrument Cluster 11 ...

Page 12: ...ntenance I M testing Normally the Service engine soon light will stay on until the engine is cranked then turn itself off if no malfunctions are present However if after 15 seconds the Service engine soon light blinks eight times it means that the vehicle is not ready for I M testing See the Readiness for Inspection Maintenance I M testing in the Maintenance and Specifications chapter Solid illumi...

Page 13: ... light is functional it will momentarily illuminate when the ignition is turned to the ON position when the engine is not running or in a position between ON and START or by applying the parking brake when the ignition is turned to the ON position If the brake system warning light does not illuminate at this time seek service immediately from your authorized dealer Illumination after releasing the...

Page 14: ... and safety restraints chapter to activate deactivate the Belt Minder威 chime feature Low tire pressure warning Illuminates when your tire pressure is low If the light remains on at start up or while driving the tire pressure should be checked Refer to Inflating Your Tires in the Tires Wheels and Loading chapter When the ignition is first turned to ON the light will illuminate for 3 seconds to ensu...

Page 15: ...Door ajar Illuminates when the ignition is in the ON position and any door is open Overdrive off if equipped Illuminates when the overdrive function of the transmission has been turned off Refer to the Driving chapter If the light flashes steadily or does not come on have your vehicle serviced as soon as possible damage to the transmission could occur Four wheel drive low if equipped Illuminates w...

Page 16: ...r a burned out bulb High beams Illuminates when the high beam headlamps are turned on Key in ignition warning chime Sounds when the key is left in the ignition in the OFF LOCK or ACCESSORY position and the driver s door is opened Headlamps on warning chime Sounds when the headlamps or parking lamps are on the ignition is off the key is not in the ignition and the driver s door is opened Door ajar ...

Page 17: ...s the red section the engine is overheating Stop the vehicle as soon as safely possible switch off the engine and let the engine cool Refer to Engine coolant in the Maintenance and specifications chapter WARNING Never remove the coolant reservoir cap and or the radiator cap while the engine is running or hot this may result in serious burns Odometer Registers the total miles kilometers of the vehi...

Page 18: ...may damage the engine Fuel gauge Indicates approximately how much fuel is left in the fuel tank when the ignition is in the ON position The fuel gauge may vary slightly when the vehicle is in motion or on a grade Proper gauge indication requires the ignition to be in the OFF or ACCESSORY position during refueling otherwise correct fuel indication after refueling can be slow to update Also a minimu...

Page 19: ... and other devices not essential to the driving task when it is safe to do so Display preference You can select Clock mode which displays the time or Frequency mode which displays the current radio frequency to appear in the radio display Press CLK repeatedly to toggle between Clock and Frequency modes If clock mode is selected and a radio function is pressed i e SEEK TUNE Memory Presets the radio...

Page 20: ...IO to decrease increase the bass setting Treble Press AUDIO to decrease increase the treble setting Balance Press AUDIO to adjust the audio between the left and right speakers Hours Press AUDIO to decrease increase the hours Minute Press AUDIO to decrease increase the minutes 4 Tune Press to manually go down up the radio frequency and in audio mode to select various settings 5 Memory presets To se...

Page 21: ...ill come back to a nominal listening level when the ignition is turned back on AM FM stereo single CD MP3 Satellite Compatible system if equipped 1 CD eject Press to eject the CD MP3 2 CLK Clock Press CLK until SELECT HOUR or SELECT MINS is displayed Press MENU to adjust the hours minutes Press CLK to display the time when the ignition is off Entertainment Systems 21 ...

Page 22: ...playing song in the system s memory If you try to save something other than a song CANT SAVE will appear in the display When the chosen song is playing on any satellite radio channel the system will alert you with an audible prompt Press SEEK while SONG ALERT is in the display and the system will take you to the channel playing the desired song You can save up to 20 songs If you attempt to save a ...

Page 23: ...turn them off Satellite radio is available only with a valid SIRIUS radio subscription Check with your authorized dealer for availability AUTOSET Press MENU to set the strongest local radio stations for AM FM1 FM2 without losing your original manually set preset stations When the six strongest stations are filled the station stored in preset 1 will begin playing If there are less than six strong s...

Page 24: ...e to a station press and hold a preset button until sound returns To recall a previously set station press the desired memory preset button briefly You can save up to 18 stations six in AM six in FM1 and FM2 In satellite radio mode if equipped there are 18 available presets six each for SAT1 SAT2 and SAT3 To save satellite channels in your memory presets tune to the desired channel then press and ...

Page 25: ... hold to hear a brief sampling of MP3 tracks In MP3 directory mode press and hold to hear a brief sampling of all tracks in the current directory Press and hold again to stop In satellite radio mode if equipped press and release to view the Satellite text message Press and hold to hear a brief sampling of the next channels Press and hold again to stop Satellite radio is available only with a valid...

Page 26: ...me will come back on at a nominal listening level when the ignition switch is turned back on 16 CD Press to enter CD MP3 mode If a CD MP3 is already present in the system the disc will begin to play 17 CD slot Insert a CD MP3 label side up Premium and Audiophile In dash CD6 MP3 disc Satellite Compatible audio systems if equipped Entertainment Systems 26 ...

Page 27: ...ubscription Check with your authorized dealer for availability 4 EJ CD eject To eject an individual CD MP3 press the eject control and select the correct slot number by pressing the corresponding memory preset Press and hold to eject all loaded CDs 5 CLK Clock Press CLK until SELECT HOUR or SELECT MINS is displayed Press MENU to adjust the hours minutes Press CLK to display the time when the ignit...

Page 28: ...ng on any satellite radio channel the system will alert you with an audible prompt Press SEEK while SONG ALERT is in the display and the system will take you to the channel playing the desired song You can save up to 20 songs If you attempt to save a song when the system is full the display will read REPLACE SONG Press SEEK to access the saved songs and press MENU to cycle through the saved songs ...

Page 29: ...authorized dealer for availability AUTOSET Allows you to set the strongest local radio stations without losing your original manually set preset stations for AM FM1 FM2 Press MENU to access Use MENU to set When the six strongest stations are filled the station stored in preset 1 will begin playing If there are less than six strong stations the system will store the last one in the remaining preset...

Page 30: ... FF Fast forward Press to manually advance in a CD MP3 track 13 REW Rewind Press to manually reverse in a CD MP3 track 14 Memory presets To set a station Select frequency band AM FM tune to a station press and hold a preset button until sound returns To select a preset station press the desired memory preset You can save up to 18 stations six in AM six in FM1 and FM2 In satellite radio mode if equ...

Page 31: ...s and hold again to stop In MP3 mode Press and release to view the next 12 characters in the MP3 music name file name of the current MP3 track and directory Press and hold to hear a brief sampling of MP3 tracks In MP3 directory mode press and hold to hear a brief sampling of all tracks in the current directory Press again to stop In satellite radio mode if equipped press and release to view the Sa...

Page 32: ...our portable music device to the audio system Required equipment 1 Any portable music player designed to be used with headphones 2 An audio extension cable with stereo male 1 8 in 3 5 mm connectors at each end To play your portable music player using the auxiliary input jack 1 Begin with the vehicle parked and the radio turned off 2 Ensure that the battery in your portable music player is new or f...

Page 33: ...full volume and others will need to be set at a lower volume 3 If the music sounds distorted at lower listening levels turn the portable music player volume down If the problems persists replace or recharge the batteries in the portable music player 4 The portable music player must be controlled in the same manner when it is used with headphones as the AIJ does not provide control play pause etc o...

Page 34: ...r one and play while the weak station frequency is displayed CD CD player care Do Handle discs by their edges only Never touch the playing surface Inspect discs before playing Clean only with an approved CD cleaner Wipe discs from the center out Don t Expose discs to direct sunlight or heat sources for extended periods of time Clean using a circular motion CD units are designed to play commerciall...

Page 35: ...ellite radio channels For more information and a complete list of SIRIUS satellite radio channels visit www sirius com in the United States www sirius canada ca in Canada or call SIRIUS at 1 888 539 7474 Satellite radio reception factors To receive the satellite signal your vehicle has been equipped with a satellite radio antenna located on the roof of your vehicle The vehicle roof provides the be...

Page 36: ...h begins on the date of sale or lease of the vehicle Online media player providing access to all 65 SIRIUS music channels over the internet U S customers only For information on extended subscription terms contact SIRIUS at 1 888 539 7474 Note SIRIUS reserves the unrestricted right to change rearrange add or delete programming including canceling moving or adding particular channels and its prices...

Page 37: ...t See your authorized dealer for service INVALID CHNL Channel no longer available This previously available channel is no longer available Tune to another channel If the channel was one of your presets you may choose another channel for that preset button UNSUBSCRIBED Subscription not available for this channel Contact SIRIUS at 1 888 539 7474 to subscribe to the channel or tune to another channel...

Page 38: ...e SIRIUS satellite or SIRIUS tower to the vehicle antenna You are in a location that is blocking the SIRIUS signal i e tunnel under an overpass dense foliage etc The system is working properly When you move into an open area the signal should return UPDATING Update of channel programming in progress No action required The process may take up to three minutes CALL SIRIUS 1 888 539 7474 Satellite se...

Page 39: ...ibutes outside air through the windshield defroster vents Operating tips To reduce fog build up on the windshield during humid weather place the air flow selector in the position To reduce humidity build up inside the vehicle during cold or warm weather do not drive with the air flow selector in the OFF position Under normal weather conditions do not leave the air flow selector in OFF when the veh...

Page 40: ...l MAX A C Uses recirculated air to cool the vehicle Air flows from the instrument panel vents only Temperature of airflow not adjustable A C Uses outside air to cool the vehicle Air flows from the instrument panel vents only Distributes outside air through the instrument panel vents OFF Outside air is shut out and the fan will not operate Distributes outside air through the instrument panel vents ...

Page 41: ...ntake area at the base of the windshield To aid in side window defogging demisting in cold weather 1 Select 2 Adjust the temperature control to maintain comfort 3 Set the highest fan speed 4 Direct the outer instrument panel vents towards the side windows To increase airflow to the outer instrument panel vents close the vents located in the middle of the instrument panel WARNING Do not place objec...

Page 42: ...turned on when the headlamp control is in the or position and the high beams are not turned on Pull headlamp control towards you to turn foglamps on The foglamp indicator light on the headlamp control and in the instrument cluster will illuminate High beams After turning the headlamps on push the lever toward the instrument panel to activate Pull the lever towards you to deactivate Lights 42 ...

Page 43: ...r side marker lights and generally may not provide adequate lighting during these conditions Failure to activate your headlamps under these conditions may result in a collision PANEL DIMMER CONTROL Use to adjust the brightness of the instrument panel and all applicable switches in the vehicle during headlamp and parklamp operation Move the control up or down to adjust the intensity of the panel li...

Page 44: ...lly by doing the following 1 Park your vehicle on a level surface about 25 feet 7 6 meters away from a vertical plain surface 3 Check your headlamp alignment at night or in a dark area so that you can see the headlamp beam pattern 1 8 feet 2 4 meters 2 Center height of lamp to ground 3 25 feet 7 6 meters 4 Horizontal reference line 5 Center of headlamps 6 Center line of the vehicle 2 The center of...

Page 45: ...n to the horizontal line marked in step 2 a pair of vertical lines 5 must be marked at the center line of the headlamps on the wall or screen 7 On the wall or screen locate the high intensity area of the beam pattern The left edge of the high intensity area should be even with the vertical line corresponding to the headlamp under adjustment If the left edge of the high intensity area is not even w...

Page 46: ...e vented to equalize pressure When moist air enters the headlamp s through the vents there is a possibility that condensation can occur This condensation is normal and will clear within 45 minutes of headlamp operation Using the right bulbs Replacement bulbs are specified in the chart below Headlamp bulbs must be marked with an authorized D O T for North America and an E for Europe to ensure lamp ...

Page 47: ...p For bulb replacement see an authorized Mazda dealer Replacing exterior bulbs Check the operation of all the bulbs frequently Replacing headlamp bulbs NOTE The procedure can be difficult Your Mazda dealer has the proper tools training and parts to perform this task If you have difficulty with this visit your local Mazda dealer WARNING Handling Halogen Bulbs When a halogen bulb breaks it is danger...

Page 48: ...d bulb by gently pulling it straight back out of the lamp assembly Keep the retaining ring to retain the new bulb To install the new bulb Handle a halogen headlamp bulb carefully and keep out of children s reach Grasp the bulb only by its plastic base and do not touch the glass The oil from your hands could cause the bulb to break the next time the headlamps are operated Always wear safety glasses...

Page 49: ...tor into the plastic base until it snaps locking it into position 4 Turn the headlamps on and make sure they work properly If the headlamp was correctly aligned before you changed the bulb you should not need to align it again Replacing front park turn side marker bulbs 1 Make sure headlamp switch is in OFF position then open the hood 2 Remove the screw from lamp assembly 3 Disengage lamp assembly...

Page 50: ...are located in the same portion of the tail lamp assembly one just below the other Follow the same steps to replace either bulb 1 Open the tailgate to expose the lamp assemblies 2 Remove the four screws and the lamp assembly from vehicle 3 Rotate the bulb socket counterclockwise and remove from lamp assembly 4 Carefully pull the bulb straight out of the socket and push in the new bulb 5 Install th...

Page 51: ...ways keep halogen bulbs out of the reach of children NOTE If the bulb is accidentally touched it should be cleaned with rubbing alcohol before being used 1 Remove the bulb socket from the fog lamp by turning counterclockwise 2 Disconnect the electrical connector from the fog lamp bulb 3 Connect the electrical connector to the new fog lamp bulb 4 Install the bulb socket in the fog lamp turning cloc...

Page 52: ... bumper To change the license plate lamp bulbs 1 Reach behind the rear bumper to locate the bulb socket 2 Twist the socket counterclockwise and remove 3 Pull out the old bulb from socket and push in the new bulb 4 Install the bulb socket in lamp assembly by turning it clockwise Lights 52 ...

Page 53: ... seconds Courtesy wipe feature One extra wipe will happen a few seconds after washing the front window to clear any water that is dripping down from the top of the windshield caused by the washing Note Do not operate the washer when the washer reservoir is empty This may cause the washer pump to overheat Check the washer fluid level frequently Do not operate the wipers when the windshield is dry T...

Page 54: ...ccident Never adjust the steering wheel while the vehicle is moving CENTER CONSOLE IF EQUIPPED Your vehicle may be equipped with a variety of console features These include Utility compartment with cassette compact disc storage Cupholders Flip up armrest WARNING Use only soft cups in the cupholder Hard objects can injure you in a collision AUXILIARY POWER POINT 12VDC Power outlets are designed for...

Page 55: ...ot running Always keep the power point caps closed when not being used Cigar Cigarette lighter if equipped Do not plug optional electrical accessories into the cigarette lighter socket Do not hold the lighter in with your hand while it is heating this will damage the lighter element and socket The lighter will be released from its heating position when it is ready to be used Improper use of the li...

Page 56: ...tion to stop the window operation INTERIOR MIRROR The interior rear view mirror has two pivot points on the support arm which lets you adjust the mirror UP or DOWN and from SIDE to SIDE WARNING Do not adjust the mirror while the vehicle is in motion EXTERIOR MIRRORS Power mirror control if equipped To adjust your mirrors 1 Rotate the control clockwise to adjust the right mirror and rotate the cont...

Page 57: ...cle WARNING Do not shift the gearshift lever into N Neutral with the speed control on You may lose control of the vehicle or cause engine system damage Setting speed control The controls for using your speed control are located on the steering wheel for your convenience 1 Press the ON control and release it 2 Accelerate to the desired speed 3 Press the SET control and release it 4 Take your foot o...

Page 58: ...al to disengage the speed control the engine speed may briefly increase this is normal Resuming a set speed Press the RES resume control and release it This will automatically return the vehicle to the previously set speed Increasing speed while using speed control There are three ways to set a higher speed Press and hold the SET control until you get to the desired speed then release the control ...

Page 59: ...ee ways to turn off the speed control Depress the brake pedal or the clutch pedal if equipped This will not erase your vehicle s previously set speed Press the speed control OFF control Turn OFF the ignition Note When you turn off the speed control or the ignition your speed control set speed memory is erased Note Fully depressing the clutch pedal may cause a flare in engine RPM as the throttle is...

Page 60: ...tch operation refer to the Automatic Transmission Operation section of the Driving chapter BED EXTENDER IF EQUIPPED Your vehicle may be equipped with a bed extender designed to extend the pickup box for larger loads To extend the bed extender 1 Lower tailgate 2 Pull the lever on each side of the bed extender to release it from the pickup box 3 Lift the bed extender over onto the tailgate 4 Evenly ...

Page 61: ...an audible click 3 To deactivate turn the screw clockwise until the locking clip moves freely To remove the bed extender 1 Extend the bed extender 2 Pull the lever on each side of the bed extender to unlock it Make sure the locking clip screws are loose before removing the bed extender 3 Press the locking clips below the middle bar and lift the bed extender out of the channels on the D pillar To i...

Page 62: ... This device complies with part 15 of the FCC rules and with RS 210 of Industry Canada Operation is subject to the following two conditions 1 This device may not cause harmful interference and 2 This device must accept any interference received including interference that may cause undesired operation Changes or modifications not expressly approved by the party responsible for compliance could voi...

Page 63: ...oors The park lamps will flash once to confirm lock if any of the doors are not properly closed the lamps will not flash If is pressed a second time within three seconds the lamps will flash again and the horn will chirp to confirm all doors are locked and closed If either door is ajar the lamps will not flash and the horn will chirp twice Car finder Press twice within 3 seconds The horn will chir...

Page 64: ...the old battery Note Please refer to local regulations when disposing of transmitter batteries 4 Insert the new battery Refer to the diagram inside the remote entry transmitter for the correct orientation of the battery Press the battery down to ensure that the battery is fully seated in the battery housing cavity 5 Snap the two halves back together Note Replacement of the battery will not cause t...

Page 65: ...5 The doors will lock then unlock to confirm that the programming mode has been activated 6 Within 20 seconds press any button on the remote entry transmitter Note If more than 20 seconds have passed you will need to start the procedure over again 7 The doors will lock then unlock to confirm that this remote entry transmitter has been programmed 8 Repeat Step 6 to program each additional remote en...

Page 66: ...ealer The authorized dealer can program your spare keys to your vehicle or you can program the keys yourself Refer to Programming spare keys for instructions on how to program the coded key Note The SecuriLock passive anti theft system is not compatible with non Mazda aftermarket remote start systems Use of these systems may result in vehicle starting problems and a loss of security protection Not...

Page 67: ...st or stolen and you don t have an extra coded key you will need to have your vehicle towed to an authorized dealer The key codes need to be erased from your vehicle and new coded keys will need to be programmed Replacing coded keys can be very costly Store an extra programmed key away from the vehicle in a safe place to help prevent any inconveniences Please visit an authorized dealer to purchase...

Page 68: ...key from the ignition 7 Within twenty seconds of removing the previously programmed coded key insert the unprogrammed key new valet key into the ignition 8 Turn the ignition from the 3 OFF position to the 4 ON position Keep the ignition in the 4 ON position for at least one second 9 Your new unprogrammed key is now programmed If the key has been successfully programmed it will start the vehicle s ...

Page 69: ...ous internal injuries For maximum protection sit well back and upright The lap portion of the seat belt worn too high is dangerous In a collision this would concentrate the impact force directly on the abdominal area causing serious injury Wear the lap portion of the belt snugly and as low as possible WARNING The passenger sitting improperly out of position or with the seat back reclined too far c...

Page 70: ... detachable for cleaning Firmly grasp the bottom of the cup holder and pull up To re attach Slide the cupholder over the two pins located on the front of the 60 driver s seat Press down until it is firmly latched into place Passenger side rear access if equipped Pull up on the recliner handle The seat will lean forward Lift the release bar to move the seat forward to access the rear area of the ca...

Page 71: ...ng positions equipped with a combination lap shoulder belt SAFETY RESTRAINTS Personal Safety System The Personal Safety System provides an improved overall level of frontal crash protection to front seat occupants and is designed to help further reduce the risk of airbag related injuries The system is able to analyze different occupant classifications and conditions and crash severity before activ...

Page 72: ...g with the system Rather it means the Personal Safety System determined the accident conditions crash severity belt usage etc were not appropriate to activate these safety devices Front airbags and pretensioners are designed to activate only in frontal and near frontal collisions not rollovers side impacts or rear impacts unless the collision causes sufficient longitudinal deceleration Driver and ...

Page 73: ...perly restrained in the rear seating positions than in the front WARNING Air bags can kill or injure a child in a child seat NEVER place a rear facing child seat in front of an active air bag If you must use a forward facing child seat in the front seat move the seat all the way back WARNING Always transport children 12 years old and under in the back seat and always properly use appropriate child...

Page 74: ...ps reduce the risk of force related injuries to the occupant s chest by limiting the load on the occupant Refer to Energy management retractors section in this chapter Determining if the Personal Safety System is operational The Personal Safety System uses a warning light in the instrument cluster or a back up tone to indicate the condition of the system Refer to the Warning lights and chimes sect...

Page 75: ...ision WARNING Never adjust the driver s seat or seatback when the vehicles is moving Adjusting the driver s seat while the vehicle is moving is dangerous The driver could lose control of the vehicle and have an accident Adjust the driver s seat only when the vehicle is stopped WARNING It is extremely dangerous to ride in a cargo area inside or outside of a vehicle In a collision people riding in t...

Page 76: ...han one person WARNING On Cab Plus 4 vehicles do not open the rear door when the rear seat belt is still buckled Combination lap and shoulder belts 1 Insert the belt tongue into the proper buckle the buckle closest to the direction the tongue is coming from until you hear a snap and feel it latch Make sure the tongue is securely fastened in the buckle 2 To unfasten push the release button and remo...

Page 77: ...r jump seat shorten and fold the belt into the seat when not in use Energy Management Feature This vehicle has a seat belt system with an energy management feature at the front outboard seating positions to help further reduce the risk of injury in the event of a head on collision This energy management system has a retractor assembly that is designed to pay out webbing in a controlled manner This...

Page 78: ... automatic locking mode is not available on the driver seat belt When to use the automatic locking mode Any time a child safety seat is installed in a passenger front seat Refer to Safety Restraints for Children or Safety Seats for Children later in this chapter How to use the automatic locking mode Outboard front passenger seating position only for use with child safety seats Buckle the combinati...

Page 79: ...place the Belt and Retractor assembly could increase the risk of injury in collisions Seat belt pretensioner Your vehicle is equipped with seat belt pretensioners at the driver and front outboard passenger seating positions The seat belt pretensioner is a device which removes excess webbing from the seat belt system The seat belt pretensioner uses the same crash sensor system as the front airbag s...

Page 80: ...extensions manufactured by the same supplier as the seat belt Manufacturer identification is located at the end of the webbing on the label Also use the seat belt extension only if the seat belt is too short for you when fully extended When you are not using the extensions store them in another location so that no one will accidentally use them NOTE Do not use extensions to change the fit of the s...

Page 81: ...less of whether there was an occupant in the passenger seat or not WARNING Failure to inspect and if necessary replace the seat belt assembly under the above conditions could result in severe personal injuries in the event of a collision Refer to Interior in the Cleaning chapter Seat belt warning light and indicator chime The seat belt warning light illuminates in the instrument cluster and a chim...

Page 82: ... may activate the Belt Minder威 feature The warnings are the same for the driver and the front passenger If the Belt Minder威 warnings have expired warnings for approximately 5 minutes for one occupant driver or front passenger the other occupant can still activate the Belt Minder威 feature If Then The driver s and front passenger s seat belts are buckled before the ignition switch is turned to the O...

Page 83: ...od drivers 1 in 4 of us will be seriously injured in a crash during our lifetime I m not going far 3 of 4 fatal crashes occur within 25 miles of home Belts are uncomfortable Seat belts are designed to enhance comfort If you are uncomfortable try different positions for the seat belt upper anchorage and seatback which should be as upright as possible this can improve comfort I was in a hurry Prime ...

Page 84: ...en unbuckles the seat belt for that seating position the Belt Minder威 is disabled for the current ignition cycle The Belt Minder威 feature will enable during the same ignition cycle if the occupant buckles and remains buckled for approximately 30 seconds Confirmation is not given for the one time disable Deactivating activating the Belt Minder姞 feature The driver and front passenger Belt Minder威 ar...

Page 85: ...eat belt warning light turns off 3 For the seating position being disabled at a moderate speed buckle then unbuckle the seat belt 9 times ending in the unbuckled state Step 3 must be completed within 50 seconds after the seat belt warning light turns off After Step 3 the seat belt warning light will be turned on for three seconds 4 Within approximately 7 seconds of the light turning off buckle the...

Page 86: ...which include the inflators and airbags one or more impact and safing sensors the same indicator light RCM restraints control module and diagnostic unit used for the Personal safety system Front passenger sensing system Passenger airbag off indicator light The airbag supplemental restraints are an integral part of the Personal Safety System They are designed to be deployed in cases where the Perso...

Page 87: ... including the center if equipped you should make sure that the passenger airbag is off If the child safety seat is in the outboard seating position slide the seat all the way back WARNING Do not install a child seat in a center facing jump seat WARNING Rear facing child seats should NEVER be placed in front of an active airbag WARNING All occupants of the vehicle including the driver should alway...

Page 88: ...bag inflation area may cause those objects to be propelled by the airbag into your face and torso causing serious injury WARNING Do not attempt to service repair or modify the Airbag Supplemental Restraint System or its fuses See your authorized Mazda dealership WARNING Modifications to the front end of the vehicle including frame bumper front end body structure tow hooks and snow plows may effect...

Page 89: ...seating positions equipped with a combination lap shoulder belt WARNING To reduce the risk of injury make sure children sit where they can be properly restrained How does the airbag supplemental restraint system work The airbag SRS is designed to activate when the vehicle sustains sufficient longitudinal deceleration The fact that the airbags did not inflate in a collision does not mean that somet...

Page 90: ...njuries or internal injuries particularly to occupants who are not properly restrained or are otherwise out of position at the time of airbag deployment Thus it is extremely important that occupants be properly restrained as far away from the airbag module as possible while maintaining vehicle control WARNING Several airbag system components get hot after inflation Do not touch them after inflatio...

Page 91: ...sing system will turn off the front passenger s frontal air bag under certain conditions The driver s frontal air bag is not part of the front passenger sensing system The front passenger sensing system works with sensors that are part of the front passenger s seat and seat belt The sensors are designed to detect the presence of a properly seated occupant and determine if the front passenger s fro...

Page 92: ...nt or a booster seat is detected If the child restraint has been installed and the indicator is not lit then turn the vehicle off remove the child restraint from the vehicle and reinstall the restraint following the child restraint manufacturer s directions The front passenger sensing system is designed to enable may inflate the right front passenger s frontal air bag anytime the system senses tha...

Page 93: ...sits forward leans forward or sideways or puts one or both feet up the chance of injury during a crash is greatly increased WARNING Sitting improperly out of position or with the seat back reclined too far can take off weight from the seat cushion and affect the decision of the front passenger sensing system resulting in serious injury or death in a crash Always sit upright against your seatback w...

Page 94: ...r small to medium object with seat belt buckled Lit Disabled WARNING Any alteration modification to the front passenger seat may affect the performance of the front passenger sensing system SAFETY RESTRAINTS FOR CHILDREN See the following sections for directions on how to properly use safety restraints for children Also see Airbag supplemental restraint system SRS in this chapter for special instr...

Page 95: ...t in front of the child s face or neck the child should wear the lap and shoulder belt Moving the child closer to the center of the vehicle may help provide a good shoulder belt fit WARNING Do not leave children unreliable adults or pets unattended in your vehicle Leaving a child or an animal unattended in a parked vehicle is dangerous In hot weather temperatures inside a vehicle can become high e...

Page 96: ... the shoulder belt fit better and more comfortably for growing children When children should use booster seats Children need to use booster seats from the time they outgrow the toddler seat until they are big enough for the vehicle seat and lap shoulder belt to fit properly Generally this is when they weigh about 80 lb about 8 to 12 years old Booster seats should be used until you can answer YES t...

Page 97: ... backless booster seat may place your child s head top of ear level above the top of the seat In this case use a high backed booster seat Those with a high back If with a backless booster seat you cannot find a seating position that adequately supports your child s head a high back booster seat would be a better choice Both can be used in any vehicle in a seating position equipped with lap shoulde...

Page 98: ...ondition The importance of shoulder belts Using a booster without a shoulder belt increases the risk of a child s head hitting a hard surface in a collision For this reason you should never use a booster seat with a lap belt only It is best to use a booster seat with combination lap shoulder belts WARNING Follow all instructions provided by the manufacturer of the booster seat WARNING Never put th...

Page 99: ...securely fastened in the buckle WARNING Do not install a child seat in a center facing jump seat Keep the buckle release button pointing up and away from the safety seat with the tongue between the child seat and the release button to prevent accidental unbuckling Place seat back in upright position Put the seat belt in the automatic locking mode Refer to Automatic locking mode passenger side fron...

Page 100: ...belts front outboard passenger seat only 1 Position the child safety seat in a seat with a combination lap and shoulder belt WARNING If there is a tether on the child safety seat attach it to the tether anchor point Refer to Attaching child safety seats with tether straps in this chapter WARNING Rear facing child seats should NEVER be placed in front of an active airbag 2 Pull down on the shoulder...

Page 101: ...direction the tongue is coming from for that seating position until you hear and feel the latch engage Make sure the tongue is latched securely by pulling on it 5 To put the retractor in the automatic locking mode grasp the shoulder portion of the belt and pull downward until all of the belt is extracted and a click is heard 6 Allow the belt to retract The belt will click as it retracts to indicat...

Page 102: ...tractor is in the automatic locking mode you should not be able to pull more belt out If the retractor is not locked unbuckle the belt and repeat Steps two through nine 11 See Attaching child safety seats with tether straps in this chapter Check to make sure the child seat is properly secured before each use Attaching child safety seats with tether straps Most new forward facing child safety seats...

Page 103: ...ly if attached somewhere other than the correct tether anchor WARNING Never attach two child safety seat tethers to a single tether anchor In a crash on anchor may not be strong enough to hold two child safety seat attachments and may break causing serious injury or death 1 Position the child safety seat on the front seat cushion 2 Route the child safety seat tether strap over the back of the seat...

Page 104: ...her anchor is located on the rear lower portion of the passenger seat 4 Clip the tether strap to the anchor WARNING If the tether strap is clipped incorrectly the child safety seat may not be retained properly in the event of a collision Seating and Safety Restraints 104 ...

Page 105: ...not be retained properly in the event of a collision 5 Refer to the Installing child safety seats in combination lap and shoulder belt seating positions section of this chapter for further instructions to secure the child safety seat 6 Tighten the child safety seat tether strap according to the manufacturer s instructions WARNING If the safety seat is not anchored properly the risk of a child bein...

Page 106: ...Never overload or improperly load your vehicle and Make sure every passenger is properly restrained WARNING In a rollover crash an unbelted person is significantly more likely to die than a person wearing a seat belt All occupants must wear seat belts and children infants must use appropriate restraints to minimize the risk of injury or ejection Study your Owner s Manual and any supplements for sp...

Page 107: ...n WARNING Do not become overconfident in the ability of 4WD and AWD vehicles Although a 4WD or AWD vehicle may accelerate better than two wheel drive vehicle in low traction situations it won t stop any faster than two wheel drive vehicles Always drive at a safe speed How your vehicle differs from other vehicles SUV and trucks can differ from some other vehicles in a few noticeable ways Your vehic...

Page 108: ...le on the tire sidewall between tread shoulder and maximum section width For example Treadwear 200 Traction AA Temperature A These Tire Quality Grades are determined by standards that the United States Department of Transportation has set Tire Quality Grades apply to new pneumatic tires for use on passenger cars They do not apply to deep tread winter type snow tires space saver or temporary use sp...

Page 109: ...eration cornering hydroplaning or peak traction characteristics Temperature A B C The temperature grades are A the highest B and C representing the tire s resistance to the generation of heat and its ability to dissipate heat when tested under controlled conditions on a specified indoor laboratory test wheel Sustained high temperature can cause the material of the tire to degenerate and reduce tir...

Page 110: ...ability kPa Kilopascal a metric unit of air pressure PSI Pounds per square inch a standard unit of air pressure Cold inflation pressure The tire pressure when the vehicle has been stationary and out of direct sunlight for an hour or more and prior to the vehicle being driven for 1 mile 1 6 km Recommended inflation pressure The cold inflation pressure found on the Safety Compliance Certification La...

Page 111: ...king tread separation or ⴖblowoutⴖ with unexpected loss of vehicle control and increased risk of injury Under inflation increases sidewall flexing and rolling resistance resulting in heat buildup and internal damage to the tire It also may result in unnecessary tire stress irregular wear loss of vehicle control and accidents A tire can lose up to half of its air pressure and not appear to be flat ...

Page 112: ...rst and add the appropriate air pressure when you get to the pump It is normal for tires to heat up and the air pressure inside to go up as you drive Never bleed or reduce air pressure when tires are hot 2 Remove the cap from the valve on one tire then firmly press the tire gauge onto the valve and measure the pressure 3 Add enough air to reach the recommended air pressure Note If you overfill the...

Page 113: ... tires to wear abnormally Inspect all your tires including the spare frequently and replace them if one or more of the following conditions exist Tire wear When the tread is worn down to 1 16th of an inch 2 mm tires must be replaced to help prevent your vehicle from skidding and hydroplaning Built in treadwear indicators or wear bars which look like narrow strips of smooth rubber across the tread ...

Page 114: ... This information identifies and describes the fundamental characteristics of the tire and also provides a U S DOT Tire Identification Number for safety standard certification and in case of a recall This begins with the letters DOT and indicates that the tire meets all federal standards The next two numbers or letters are the plant code designating where it was manufactured the next two are the t...

Page 115: ...ING When mounting replacement tires and wheels you should not exceed the maximum pressure indicated on the sidewall of the tire to set the beads without additional precautions listed below If the beads do not seat at the maximum pressure indicated re lubricate and try again When inflating the tire for mounting pressures up to 20 psi greater than the maximum pressure on the tire sidewall the follow...

Page 116: ...nd etc do not rapidly spin the tires spinning the tires can tear the tire and cause an explosion A tire can explode in as little as three to five seconds WARNING Do not spin the wheels at over 35 mph 56 km h The tires may fail and injure a passenger or bystander Highway hazards No matter how carefully you drive there s always the possibility that you may eventually have a flat tire on the highway ...

Page 117: ...cian at a Mazda dealer Front wheel drive FWD vehicles and those with an independent rear suspension require alignment of all four wheels The tire should also be balanced periodically An unbalanced tire and wheel assembly may result in irregular tire wear NOTE When it is time to replace front tires with new ones this is an ideal time to perform an alignment New tires should be balanced at the time ...

Page 118: ...ont tires at top of diagram Rear Wheel Drive RWD vehicles Four Wheel Drive 4WD All Wheel Drive AWD vehicles front tires at top of diagram Sometimes irregular tire wear can be corrected by rotating the tires Tires Wheels and Loading 118 ...

Page 119: ...information identifies and describes the fundamental characteristics of the tire and also provides a U S DOT Tire Identification Number for safety standard certification and in case of a recall Information on P type tires P215 65R15 95H is an example of a tire size load index and speed rating The definitions of these items are listed below Note that the tire size load index and speed rating for yo...

Page 120: ...The tires on your vehicle may operate at different conditions for load and inflation pressure These speed ratings may need to be adjusted for the difference in conditions The ratings range from 81 mph 130 km h to 186 mph 299 km h These ratings are listed in the following chart Note You may not find this information on all tires because it is not required by federal law Letter rating Speed rating m...

Page 121: ...others 11 Maximum Load Indicates the maximum load in kilograms and pounds that can be carried by the tire Refer to the Safety Compliance Certification Label which is located on the B Pillar or the edge of the driver s door for the correct tire pressure for your vehicle 12 Treadwear Traction and Temperature Grades Treadwear The treadwear grade is a comparative rating based on the wear rate of the t...

Page 122: ...beless etc Additional information contained on the tire sidewall for LT type tires LT type tires have some additional information beyond those of P type tires these differences are described below 1 LT Indicates a tire designated by the Tire and Rim Association T RA that is intended for service on light trucks 2 Load Range Load Inflation Limits Indicates the tire s load carrying capabilities and i...

Page 123: ...n general the larger the number the wider the tire 3 80 Indicates the aspect ratio which gives the tire s ratio of height to width Numbers of 70 or lower indicate a short sidewall 4 D Indicates a diagonal type tire R Indicates a radial type tire 5 16 Indicates the wheel or rim diameter in inches If you change your wheel size you will have to purchase new tires to match the new wheel diameter Locat...

Page 124: ...enance and it is the driver s responsibility to maintain correct tire pressure even if under inflation has not reached the level to trigger illumination of the TPMS low tire pressure telltale Your vehicle has also been equipped with a TPMS malfunction indicator to indicate when the system is not operating properly The TPMS malfunction indicator is combined with the low tire pressure telltale When ...

Page 125: ... unless the tire is removed The pressure sensor is located opposite 180 degrees from the valve stem Care must be taken when changing the tire to avoid damaging the sensor It is recommended that you always have your tires serviced by an authorized dealer The tire pressure should be checked periodically at least monthly using an accurate tire gauge refer to Inflating your tires in this chapter Under...

Page 126: ...g System have the damaged road wheel tire repaired and remounted on your vehicle For additional information refer to Changing tires with TPMS in this section When you believe your system is not operating properly The main function of the Tire Pressure Monitoring System is to warn you when your tires need air It can also warn you in the event the system is no longer capable of functioning as intend...

Page 127: ...the B Pillar the vehicle must be driven for at least two minutes over 20 mph 32 km h before the light will turn OFF Spare tire in use Your temporary spare tire is in use Repair the damaged road wheel tire and reinstall it on the vehicle to restore system functionality For a description on how the system functions refer to When your temporary spare tire is installed in this section TPMS malfunction...

Page 128: ...32 km h for the light to turn OFF after you have filled your tires to the recommended inflation pressure How temperature affects your tire pressure The Tire Pressure Monitoring System TPMS monitors tire pressure in each pneumatic tire While driving in a normal manner a typical passenger tire inflation pressure may increase approximately 2 to 4 psi 14 to 28 kPa from a cold start situation If the ve...

Page 129: ...ay chip the wheels Use only SAE Class S chains Install chains securely verifying that the chains do not touch any wiring brake lines or fuel lines Drive cautiously Ensure you obtain the proper cables or chains for you vehicle Test fit the cables or chains before using them in snow and or ice If you hear the cables or chains rub or bang against the vehicle stop and retighten them If this does not w...

Page 130: ...ver s door vehicles exported outside the US and Canada may not have a Tire Label Look for THE COMBINED WEIGHT OF OCCUPANTS AND CARGO SHOULD NEVER EXCEED XXX kg OR XXX lb for maximum payload The payload listed on the Tire Label is the maximum payload for the vehicle as built by the assembly plant If any aftermarket or authorized dealer installed equipment has been installed on the vehicle the weigh...

Page 131: ...ght including cargo and optional equipment When towing trailer tongue load or king pin weight is also part of cargo weight GAW Gross Axle Weight is the total weight placed on each axle front and rear including vehicle curb weight and all payload Tires Wheels and Loading 131 ...

Page 132: ...the B Pillar or the edge of the driver s door The GVW must never exceed the GVWR WARNING Exceeding the Safety Compliance Certification Label vehicle weight rating limits could result in substandard vehicle handling or performance engine transmission and or structural damage serious damage to the vehicle loss of control and personal injury MFD BY FORD MOTOR CO IN U S A EXT PNT XX RC XX DSO WB BRK I...

Page 133: ...ailer or king pin weight of 15 25 fifth wheel trailer and driver only 150 lb 68 kg Consult your authorized dealer or the RV and Trailer Towing Guide provided by your authorized dealer for more detailed information Tongue Load or Fifth Wheel King Pin Weight refers to the amount of the weight that a trailer pushes down on a trailer hitch Examples For a 5 000 lb 2 268 kg conventional trailer multiply...

Page 134: ...ur trailer will be transferred to your vehicle Consult this manual to determine how this reduces the available cargo and luggage load capacity of your vehicle The following gives you a few examples on how to calculate the available amount of cargo and luggage load capacity Another example for your vehicle with 1400 lb 635 kg of cargo and luggage capacity You decide to go golfing Is there enough lo...

Page 135: ... pickup trucks and utility type vehicles WARNING For important information regarding safe operation of this type of vehicle see the Preparing to drive your vehicle section in the Driving chapter of this Owner s Manual WARNING Loaded vehicles may handle differently than unloaded vehicles Extra precautions such as slower speeds and increased stopping distance should be taken when driving a heavily l...

Page 136: ...00 3 175 3 260 1 478 50 4 64 For high altitude operation reduce GCW by 2 per 1 000 ft 300 meters elevation When towing on roads with steep grades or moderate but long sustained grades 5 miles 8 km or more or when ambient temperatures exceed 100 F 37 C vehicle speed should not exceed 45 mph 72 km h in both cases For definition of terms used in this table see Vehicle Loading earlier in this chapter ...

Page 137: ... km h in both cases For definition of terms used in this table see Vehicle loading earlier in this chapter To determine maximum trailer weight designed for your vehicle see Vehicle loading earlier in this chapter Maximum trailer weight is shown The combined weight of the completed towing vehicle including hitch passengers and cargo and the loaded trailer must not exceed the Gross Combined Weight R...

Page 138: ...t 300 meters elevation When towing on roads with steep grades or moderate but long sustained grades 5 miles 8 km or more or when ambient temperatures exceed 100 F 37 C vehicle speed should not exceed 45 mph 72 km h in both cases For definition of terms used in this table see Vehicle Loading earlier in this chapter To determine maximum trailer weight designed for your particular vehicle see Vehicle...

Page 139: ... terms used in this table see Vehicle loading earlier in this chapter To determine maximum trailer weight designed for your vehicle see Vehicle loading earlier in this chapter Maximum trailer weight is shown The combined weight of the completed towing vehicle including hitch passengers and cargo and the loaded trailer must not exceed the Gross Combined Weight Rating GCWR WARNING Do not exceed the ...

Page 140: ...underbody are properly sealed to prevent noxious gases or water from entering Safety chains Always connect the trailer s safety chains to the frame or hook retainers of the vehicle hitch To connect the trailer s safety chains cross the chains under the trailer tongue and allow slack for turning corners If you use a rental trailer follow the instructions that the rental agency gives to you Do not a...

Page 141: ...91 kg tongue weight capability The rated capacities as shown in this guide for trailer towing with the factory bumper are only valid when the trailer hitch ball is installed directly into the ball hole in the bumper Addition of bracketry to either lower the ball hitch position or extend the ball hitch rearward will significantly increase the loads on the bumper and its attachments This can result ...

Page 142: ...o faster than 70 mph 112 km h during the first 500 miles 800 km of towing a trailer and don t make full throttle starts Turn off the speed control The speed control may shut off automatically when you are towing on long steep grades Consult your local motor vehicle speed regulations for towing a trailer To eliminate excessive shifting use a lower gear This will also assist in transmission cooling ...

Page 143: ...Remember that regardless of the rear axle lube used do not tow a trailer for the first 500 miles 800 km of a new vehicle and that the first 500 miles 800 km of towing be done at no faster than 70 mph 112 km h with no full throttle starts After you have traveled 50 miles 80 km thoroughly check your hitch electrical connections and trailer wheel lug nuts To aid in engine transmission cooling and A C...

Page 144: ... towed Release the parking brake Move the gearshift to the neutral position Turn the key in the ignition to the OFF UNLOCKED position The maximum recommended speed is 55 mph 88 km h The maximum recommended distance is unlimited Put 4x4 switch in 2WD mode 4x4 only The vehicle must be towed in the forward position to ensure no damage is done to the internal transmission components For 4x4 vehicles w...

Page 145: ...eed of 35 mph 56 km h must be exceeded For 4x2 vehicles with an automatic transmission if a distance of 50 miles 80 km or a speed of 35 mph 56 km h must be exceeded you must disconnect the rear driveshaft It is recommended that the driveshaft be removed installed only by an authorized dealer See your authorized dealer for driveshaft removal installation Improper removal installation of the drivesh...

Page 146: ...the automatic transmission shift lever can be moved from the P Park position without the brake pedal depressed To avoid unwanted vehicle movement always set the parking brake Note On some vehicles when the key is in the OFF position the brake shift interlock feature will prevent the automatic transmission shift lever from being moved out of the P Park position without the brake pedal being depress...

Page 147: ...start your vehicle in a closed garage or in other enclosed areas Exhaust fumes can be toxic Always open the garage door before you start the engine See Guarding against exhaust fumes in this chapter for more instructions WARNING If you smell exhaust fumes inside your vehicle have your dealer inspect your vehicle immediately Do not drive if you smell exhaust fumes Important safety precautions When ...

Page 148: ...nsmission 1 Make sure the parking brake is set 2 Push the clutch pedal to the floor 3 Turn the key to 4 ON without turning the key to 5 START If there is difficulty in turning the key firmly rotate the steering wheel left and right until the key turns freely This condition may occur when front wheels are turned front wheel is against the curb 1 2 3 4 5 Driving 148 ...

Page 149: ...e engine starts Excessive cranking could damage the starter Note If the engine does not start within five seconds on the first try turn the key to OFF wait 10 seconds and try again If the engine still fails to start press the accelerator to the floor and try again this will allow the engine to crank with the fuel shut off in case the engine is flooded with fuel Guarding against exhaust fumes Carbo...

Page 150: ...anadian Standards Association CSA Use only an extension cord that can be used outdoors in cold temperatures and is clearly marked Suitable for Use with Outdoor Appliances Never use an indoor extension cord outdoors it could result in an electric shock or fire hazard Use a 16 gauge outdoor extension cord minimum Use as short an extension cord as possible Do not use multiple extension cords Instead ...

Page 151: ...a thermostat however maximum temperature is attained after approximately 3 hours of operation Block heater operation longer than 3 hours will not improve system performance and will unnecessarily use additional electricity Make sure system is unplugged and properly stowed before driving the vehicle While not in use make sure the protective cover seals the prongs of the engine block heater cord plu...

Page 152: ...ke applications and compensates for this tendency The wheels are prevented from locking even when the brakes are firmly applied The accompanying illustration depicts the advantage of an ABS equipped vehicle on bottom to a non ABS equipped vehicle on top during hard braking with loss of front braking traction WARNING The Anti Lock system does not decrease the time necessary to apply the brakes or a...

Page 153: ...ake whenever the vehicle is parked To set the parking brake press the parking brake pedal down until the pedal stops The BRAKE warning lamp in the instrument cluster illuminates and remains illuminated when the ignition is turned ON until the parking brake is released WARNING Always set the parking brake fully and make sure that the gearshift is securely latched in P Park automatic transmission or...

Page 154: ...teering pump fluid level below the MIN mark on the reservoir Some noise is normal during operation If the noise is excessive check for low power steering pump fluid level before seeking service by your authorized dealer Heavy or uneven steering efforts may be caused by low power steering pump fluid level Check for low power steering pump fluid level before seeking service by your authorized dealer...

Page 155: ...es with a higher center of gravity such as utility vehicles and trucks handle differently than vehicles with a lower center of gravity Utility vehicles and trucks are not designed for cornering at speeds as high as passenger cars any more than low slung sports cars are designed to perform satisfactorily under off road conditions Avoid sharp turns excessive speed or abrupt maneuvers in these vehicl...

Page 156: ... Park position without the brake pedal depressed To avoid unwanted vehicle movement always set the parking brake Note On some vehicles when the key is in the OFF position the brake shift interlock feature will prevent the automatic transmission shift lever from being moved out of the P Park position without the brake pedal being depressed 3 Start the vehicle If it is necessary to use the above pro...

Page 157: ...daptive Transmission Strategy allows the transmission to relearn these operating parameters This learning process could take several transmission upshifts and downshifts during this learning process slightly firmer shifts may occur After this learning process normal shift feel and shift scheduling will resume WARNING Hold the brake pedal down while you move the gearshift lever from P Park to anoth...

Page 158: ...ears one through five Overdrive can be deactivated by pressing the transmission control switch on the end of the gearshift lever This will illuminate the O D OFF lamp and activate Drive Drive not shown Drive is activated when the transmission control switch is pressed This position allows for all forward gears except overdrive O D OFF lamp is illuminated Provides engine braking Use when driving co...

Page 159: ...ransmission has a starter interlock that prevents cranking the engine unless the clutch pedal is fully depressed To start the vehicle 1 Make sure the parking brake is fully set 2 Press the clutch pedal to the floor then put the gearshift lever in the neutral position 3 Start the engine 4 Press the brake pedal and move the gearshift lever to the desired gear 1 First or R Reverse 5 Release the parki...

Page 160: ...Maximum downshift speeds Shift from Transfer case position if equipped 2WD and 4H 4L 5 Overdrive 4 55 mph 88 km h 22 mph 34 km h 4 3 45 mph 72 km h 18 mph 27 km h 3 2 35 mph 56 km h 14 mph 21 km h 2 1 20 mph 32 km h 8 mph 11 km h Reverse 1 Make sure that your vehicle is at a complete stop before you shift into R Reverse Failure to do so may damage the transmission 2 Move the gearshift lever into t...

Page 161: ...is not at normal operating temperature or damage to the transmission may occur Do not rock the vehicle for more than a minute or damage to the transmission and tires may occur or the engine may overheat FOUR WHEEL DRIVE 4WD OPERATION IF EQUIPPED WARNING For important information regarding safe operation of this type of vehicle see Preparing to drive your vehicle in this chapter Four wheel drive 4W...

Page 162: ...o provide maximum power to all four wheels Intended only for off road applications such as deep sand steep grades or pulling heavy objects 4L 4WD Low will not engage while the vehicle is moving this is normal and should be no reason for concern Refer to Shifting to from 4L 4WD Low for proper operation Shifting between 2H 2WD High and 4H 4WD High Move the 4WD control between 2H and 4H at a stop or ...

Page 163: ...that make your vehicle so versatile also make it handle differently than an ordinary passenger car Maintain steering wheel control at all times especially in rough terrain Since sudden changes in terrain can result in abrupt steering wheel motion make sure you grip the steering wheel from the outside Do not grip the spokes Drive cautiously to avoid vehicle damage from concealed objects such as roc...

Page 164: ... as utility and four wheel drive vehicles handle differently than vehicles with a lower center of gravity Utility and four wheel drive vehicles are not designed for cornering at speeds as high as passenger cars any more than low slung sports cars are designed to perform satisfactorily under off road conditions Avoid sharp turns excessive speed and abrupt maneuvers in these vehicles Failure to driv...

Page 165: ... drive vehicles are not designed for cornering at speeds as high as passenger cars any more than low slung sports cars are designed to perform satisfactorily under off road conditions Avoid sharp turns excessive speed and abrupt maneuvers in these vehicles Failure to drive cautiously could result in an increased risk of loss of vehicle control vehicle rollover personal injury and death If the vehi...

Page 166: ...t to be checked or changed unless a leak is suspected or repair is required Driving on hilly or sloping terrain When driving on a hill avoid driving crosswise or turning on steep slopes You could lose traction and slip sideways Drive straight up straight down or avoid the hill completely Know the conditions on the other side of a hill before driving over the crest When climbing a steep hill start ...

Page 167: ...gears DRIVING THROUGH WATER If driving through deep or standing water is unavoidable proceed very slowly especially when the depth is not known Never drive through water that is higher than the bottom of the wheel rims for cars or the bottom of the hubs for trucks When driving through water traction or brake capability may be limited Also water may enter your engine s air intake and severely damag...

Page 168: ...gnals will flash Press the flasher control again to turn them off Use it when your vehicle is disabled and is creating a safety hazard for other motorists Note With extended use the flasher may run down your battery FUEL PUMP SHUT OFF SWITCH This device stops the electric fuel pump from sending fuel to the engine when your vehicle has had a substantial jolt After an accident if the engine cranks b...

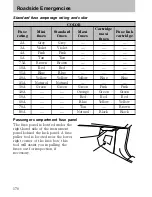
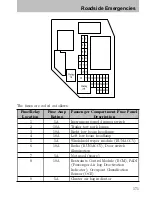
Page 169: ...a few seconds and return the key to OFF 6 Make another check for leaks FUSES AND RELAYS Fuses If electrical components in the vehicle are not working a fuse may have blown Blown fuses are identified by a broken wire within the fuse Check the appropriate fuses before replacing any electrical components Note Always replace a fuse with one that has the specified amperage rating Using a fuse with a hi...

Page 170: ...Blue 25A Natural Natural 30A Green Green Green Pink Pink 40A Orange Green Green 50A Red Red Red 60A Blue Yellow Yellow 70A Tan Brown 80A Natural Black Black Passenger compartment fuse panel The fuse panel is located under the right hand side of the instrument panel behind the kick panel A fuse puller tool is located near the lower right corner of the fuse box this tool will assist you in pulling t...

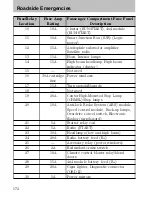
Page 171: ...railer tow park lamps 3 10A Right low beam headlamp 4 10A Left low beam headlamp 5 5A Windshield wiper module RUN ACCY 6 10A Radio RUN ACCY Door switch illumination 7 5A Not used spare 8 10A Restraints Control Module RCM PADI Passenger Air bag Deactivation Indicator Occupant Classification Sensor OCS 9 5A Cluster air bag indicator Roadside Emergencies 171 ...

Page 172: ...Turn signals Hazards 18 Not used 19 20A Center High Mounted Stop Lamp CHMSL Stop lamps 20 10A Anti lock Brake System ABS module Speed control module Back up lamps Overdrive cancel switch Electronic flasher turn hazard 21 5A Starter relay coil 22 5A Radio START 23 30A Headlamps low and high beam 24 20A Radio battery feed B 25 Accessory relay power windows 26 2A Redundant cruise switch 27 10A Climat...

Page 173: ...bution box is located in the engine compartment The power distribution box contains high current fuses that protect your vehicle s main electrical systems from overloads WARNING Always disconnect the battery before servicing fuses WARNING To reduce risk of electrical shock always replace the cover to the Power Distribution Box before reconnecting the battery or refilling fluid reservoirs If the ba...

Page 174: ...40A Passenger compartment fuse panel 2 Not used 3 40A Passenger compartment fuse panel 4 Not used 5 50A Passenger compartment fuse panel 6 Not used 7 30A Starter solenoid 8 Not used 9 40A Ignition switch 10 Not used 11 30A Powertrain Control Module PCM relay 12 Not used 13 30A Blower motor climate control 14 Not used Roadside Emergencies 174 ...

Page 175: ...l pump motor Fuel injectors 24 Not used 25 10A A C clutch solenoid 26 Not used 27 Not used 28 Not used 29 30A Wipers washer 30 Not used 31 Not used 32 Not used 33 30A Anti lock Brake System ABS module 34 Not used 35 Not used 36 Not used 37 Not used 38 7 5A Trailer tow right turn 39 15A PCM power 40 Not used 41 10A Automatic transmission 42 7 5A Trailer tow left turn 43 20A Engine fan relay coil A ...

Page 176: ...tor 45A Not used 45B Not used 46A Fuel pump relay Fuel injectors relay 46B Not used 47 Engine fan relay 48 Starter relay 49 Not used 50 Not used 51 Not used 52 Not used 53 Not used 54 PCM relay 55 Blower relay 56A A C clutch solenoid relay 56B Not used Mini Fuses Maxi Fuses Roadside Emergencies 176 ...

Page 177: ...1 40A Passenger compartment fuse panel 2 Not used 3 40A Passenger compartment fuse panel 4 Not used 5 50A Passenger compartment fuse panel 6 Not used 7 30A Starter solenoid 8 Not used 9 40A Ignition switch 10 Not used 11 30A Powertrain Control Module PCM relay fuse 12 Not used 13 30A Blower motor climate control 14 Not used Roadside Emergencies 177 ...

Page 178: ... Fuel injectors 24 Not used 25 10A A C clutch solenoid 26 Not used 27 20A 4x4 module 28 Not used 29 30A Wipers washer 30 Not used 31 15A Foglamps 32 Not used 33 30A Anti lock Brake System ABS module 34 Not used 35 Not used 36 Not used 37 Not used 38 7 5A Trailer tow right turn 39 15A PCM power 40 Not used 41 10A Automatic transmission 42 7 5A Trailer tow left turn 43 20A A C relay coil Engine sens...

Page 179: ... wheel firmly slowly move to a safe place on the side of the road Note The tire pressure monitoring system TPMS indicator light will illuminate when the spare is in use To restore the full functionality of the monitoring system all road wheels equipped with tire pressure monitoring sensors must be mounted on the vehicle Have a flat serviced by an authorized dealer in order to prevent damage to the...

Page 180: ...re tire and or wheel that is different in brand size or appearance from the road tires and wheels and can be one of three types 1 T type mini spare This spare tire begins with the letter T for tire size and may have Temporary Use Only molded in the sidewall 2 Full size dissimilar spare with label on wheel This spare tire has a label on the wheel that states THIS TIRE AND WHEEL FOR TEMPORARY USE ON...

Page 181: ...ial car washing equipment Use snow chains on the end of the vehicle with the dissimilar spare tire wheel The usage of a full size dissimilar spare tire wheel can lead to impairment of the following Handling stability and braking performance Comfort and noise Ground clearance and parking at curbs Winter weather driving capability Wet weather driving capability All Wheel driving capability if applic...

Page 182: ... order to prevent damage to the TPMS sensor refer to Tire Pressure Monitoring System TPMS in the Tires Wheel and Loading chapter Replace the spare tire with a road tire as soon as possible The spare tire and tools for your vehicle are stowed in the following locations Tool Location Spare tire Under the vehicle just forward of the rear bumper Jack jack handle wheel nut wrench Regular Cab behind sea...

Page 183: ...n To assemble slide parts together To disconnect depress button and pull apart one wheel nut wrench Depress button and slide together 2 If equipped unlock and remove the spare tire carrier lock from the rear access hole located just above the rear bumper and below the tailgate Roadside Emergencies 183 ...

Page 184: ... vehicle from moving or slipping off the jack even if the vehicle is in P Park automatic transmission or R Reverse manual transmission WARNING To help prevent the vehicle from moving when you change a tire be sure the parking brake is set then block in both directions the wheel that is diagonally opposite other side and end of the vehicle to the tire being changed WARNING If the vehicle slips off ...

Page 185: ...g guides and turn the jack handle clockwise until the tire is a maximum of 1 inch 25 mm off the ground WARNING To lessen the risk of personal injury do not put any part of your body under the vehicle while changing a tire Do not start the engine when your vehicle is on the jack The jack is only meant for changing the tire WARNING Do not let anyone stay in the vehicle when you are using the jack ha...

Page 186: ...ub Do not fully tighten the lug nuts until the wheel has been lowered 7 Lower the wheel by turning the jack handle counterclockwise 8 Remove the jack and fully tighten the lug nuts in the order shown Refer to Wheel lug nut torque specifications later in this chapter for the proper lug nut torque specification 9 Stow the flat tire Refer to Stowing the spare tire 10 Stow the jack and lug wrench Make...

Page 187: ...es flat against the frame assembly Push against the tire to make sure it is tightly seated under the vehicle Loosen and retighten if necessary Failure to properly stow the spare tire may result in failure of the winch cable and loss of the spare tire 5 Repeat this tightness check procedure when servicing the spare tire pressure every six months per Service Maintenance Section or at any time that t...

Page 188: ...y grease Apply grease only to the wheel pilot hole surface by smearing a dime 1 square cm sized glob of grease around the wheel pilot surface 1 with end of finger DO NOT apply grease to lugnut stud holes or wheel to brake surfaces OVERHEATING If the temperature gauge indicates overheating and you experience power loss you hear a loud knocking or pinging noise the engine is probably too hot If this...

Page 189: ...en the engine and radiator are hot See Adding coolant in the Maintenance and Specifications section If you find no problems the engine is cool and no leaks are obvious carefully add coolant as required Note If the engine continues to overheat or frequently overheats have the cooling system inspected The engine could be seriously damaged unless repairs are made JUMP STARTING WARNING The gases aroun...

Page 190: ...d vehicle making sure the two vehicles do not touch Set the parking brake on both vehicles and stay clear of the engine cooling fan and other moving parts 4 Check all battery terminals and remove any excessive corrosion before you attach the battery cables Ensure that vent caps are tight and level 5 Turn the heater fan on in both vehicles to protect from any electrical surges Turn all other access...

Page 191: ...2 Connect the other end of the positive cable to the positive terminal of the assisting battery 3 Connect the negative cable to the negative terminal of the assisting battery Roadside Emergencies 191 ...

Page 192: ... of the battery to be jumped A spark may cause an explosion of the gases that surround the battery 5 Ensure that the cables are clear of fan blades belts moving parts of both engines or any fuel delivery system parts Jump starting 1 Start the engine of the booster vehicle and run the engine at moderately increased speed 2 Start the engine of the disabled vehicle 3 Once the disabled vehicle has bee...

Page 193: ...hey were connected 1 Remove the jumper cable from the ground metal surface Note In the illustrations lightning bolts are used to designate the assisting boosting battery 2 Remove the jumper cable on the negative connection of the booster vehicle s battery Roadside Emergencies 193 ...

Page 194: ...tery 4 Remove the jumper cable from the positive terminal of the disabled vehicle s battery After the disabled vehicle has been started and the jumper cables removed allow it to idle for several minutes so the engine computer can relearn its idle conditions Roadside Emergencies 194 ...

Page 195: ... equipment Do not tow with a slingbelt Mazda has not approved a slingbelt towing procedure On 4x2 vehicles it is acceptable to tow the vehicle with the front wheels on the ground and the rear wheels off the ground On 4x4 vehicles it is recommended that your vehicle be towed with a wheel lift and dollies or flatbed equipment with all the wheels off the ground If the vehicle is towed by other means ...

Page 196: ...a North American Operations If for any reason you feel the need for further assistance after contacting your authorized dealer management you can reach Mazda North American Operations by one of the following ways Log on at www mazdaUSA com Answers to many questions including how to locate or contact a local Authorized Mazda Dealership in the U S can be found here By email at www mazdaUSA com Click...

Page 197: ...f authorized dealer management If the Service Manager has already reviewed your concerns contact the owner of the authorized dealer or its General Manager STEP 2 Call the Mazda Regional Office If you feel that you still require assistance ask the authorized dealer Service Manager to arrange for you to meet the local Mazda Service Representative If more expedient contact Mazda Canada Inc Regional O...

Page 198: ...AMVAP will advise you about how your concern may be reviewed and resolved by an independent third party through binding arbitration Your complete satisfaction is the goal of Mazda Canada Inc and our authorized dealers Mazda s participation in CAMVAP makes a valuable contribution to our achieving that goal There is no charge for using CAMVAP CAMVAP results are fast fair and final as the award is bi...

Page 199: ...Region 8171 Ackroyd Road Suite 2000 Richmond B C V6X 3K1 604 303 5670 Alberta British Columbia Manitoba Saskatchewan Yukon Mazda Canada Inc Central Region 55 Vogell Road Richmond Hill Ontario L4B 3K5 1 800 263 4680 Ontario Mazda Canada Inc Quebec Region Atlantic Region 6111 Route Trans Canadienne Pointe Claire Quebec H9R 5A5 514 694 6390 Quebec New Brunswick Nova Scotia Prince Edward Island Newfou...

Page 200: ... Mazda representative Indicated on the next page Please help us by providing the following information 1 Your name address and telephone number 2 Year and model of vehicle 3 Vehicle Identification Number 17 digits noted on your registration or title or located on the upper driver s side corner of the dash 4 Purchase date and current mileage 5 Your authorized dealer s name and location 6 Your quest...

Page 201: ...hs of ownership of a new vehicle or the first 18 000 miles 29 000 km whichever occurs first 1 Two or more repair attempts are made on the same nonconformity likely to cause death or serious bodily injury OR 2 Four or more repair attempts are made on the same nonconformity a defect or condition that substantially impairs the use value or safety of the vehicle OR 3 The vehicle is out of service for ...

Page 202: ...AIPAN Pacific International Marianas Inc d b a Midway Motors P O Box 887 Saipan MP 96950 TEL 670 234 7524 Triple J Saipan Inc d b a Triple J Motors Beach Road Chalan LauLau Saipan MP 96950 TEL 670 235 4868 AMERICAN SAMOA Polynesia Motors Inc P O Box 1120 Pago Pago American Samoa 96799 TEL 684 699 1854 WARRANTIES FOR YOUR MAZDA New Vehicle Limited Warranty Safety Restraint System Limited Warranty A...

Page 203: ... Vehicle Safety requirements Special Note The above is applicable for permanent import export situations and not related to travelers on vacation You may have the following problems if you do take your vehicle outside of the United States Recommended fuel may be unavailable Any kind of leaded fuel or low octane fuel will affect vehicle performance and damage the emission controls and engine Proper...

Page 204: ...ion ADD ON NON GENUINE PARTS AND ACCESSORIES Non genuine parts and accessories for Mazda vehicles can be found in stores These may fit your vehicle but they are not approved by the manufacturer for use with Mazda vehicles When you install non genuine parts or accessories they could affect your vehicle s performance or safety system the manufacturer s warranty doesn t cover this Before you install ...

Page 205: ... to do some of their own maintenance and repair When requesting any of our publications through an Authorized Mazda Dealer refer to the chart below If they don t have what you need in stock they can order it for you PUBLICATION ORDER NUMBER PUBLICATION DESCRIPTION 9999 95 022B 06 WORKSHOP MANUAL 9999 95 020G 06 WIRING DIAGRAM 9999 95 023C 06 OWNER S MANUAL WORKSHOP MANUAL Covers recommended mainte...

Page 206: ...NHTSA cannot become involved in individual problems between you your dealer or Mazda Corporation To contact NHTSA you may call the Vehicle Safety Hotline toll free at 1 888 327 4236 TTY 1 800 424 9153 go to http www safercar gov or write to Administrator NHTSA 400 Seventh Street SW Washington D C 20590 You can also obtain other information about motor vehicle safety from http www safercar gov REPO...

Page 207: ...use damage to the vehicle s paintwork and trim over time Remove any exterior accessories such as antennas before entering a car wash Suntan lotions and insect repellents can damage any painted surface if these substances come in contact with your vehicle wash off as soon as possible WAXING Applying a premium paint sealant to your vehicle every six months will assist in reducing minor scratches and...

Page 208: ...inish over time Do not use hydrofluoric acid based or high caustic based wheel cleaners steel wool fuels or strong household detergent To remove tar and grease use Extra Strength Tar and Road Oil Remover 0000 77 410E 01 available from your authorized Mazda dealer ENGINE Engines are more efficient when they are clean because grease and dirt buildup keep the engine warmer than normal When washing Ta...

Page 209: ... 2 3L Engine 3 0L Engine 2 3L 16 VALVE Cleaning 209 ...

Page 210: ... regularly If the wipers do not wipe properly substances on the vehicle s glass or the wiper blades may be the cause These may include hot wax treatments used by commercial car washes water repellant coatings tree sap or other organic contamination these contaminants may cause squeaking or chatter noise from the blades and streaking and smearing of the windshield To clean these items follow these ...

Page 211: ...ents or strong detergents when cleaning the steering wheel instrument panel or interior trim areas to avoid contamination of the airbag systems Be certain to wash or wipe your hands clean if you have been in contact with certain products such as insect repellent and suntan lotion in order to avoid possible damage to the interior painted surfaces INTERIOR For fabric carpets cloth seats and seat bel...

Page 212: ...protect its finishes These quality products have been specifically engineered to fulfill your automotive needs they are custom designed to complement the style and appearance of your vehicle Each product is made from high quality materials that meet or exceed rigid specifications For best results use these products or products of equivalent quality These products are available at your authorized M...

Page 213: ... performed as prescribed Claims against the warranty resulting from lack of maintenance as opposed to defective materials or authorized Mazda workmanship will not be honored Any auto repair shop using parts equivalent to your Mazda s original equipment may perform maintenance But we recommend that it always be done by an authorized Mazda Dealer using genuine Mazda parts SCHEDULED MAINTENANCE Sched...

Page 214: ... R R R R R R R Oil filter R R R R R R R R R R R R PCV valve 3 AIR CLEANER Air cleaner filter R R IGNITION SYSTEM Spark plugs 4 COOLING SYSTEM Engine Coolant yellow Replace at first 100 000 miles 160 000 km or 72 months after that every 50 000 miles 80 000 km or 36 months Coolant condition and protection hoses and clamps annually prior to cold weather every 12 months I I I I CHASSIS AND BODY Wheel ...

Page 215: ...Replace every 150 000 miles 240 000 km Rear axle lubricant Does not require replacement unless rear axle submerged in water Accessory drive belts Fuel filter 5 R R Steering linkage ball joints suspension and driveshaft I I I I 1 The wheel lug nuts must be retightened to the proper specifications at 500 miles 800 km of new vehicle operation at any wheel change or at any other time the wheel lug nut...

Page 216: ...il filter R R R R R R R R R R R R PCV valve 3 AIR CLEANER Air cleaner filter R R IGNITION SYSTEM Spark plugs 4 R COOLING SYSTEM Engine Coolant yellow Replace at first 100 000 miles 160 000 km or 72 months after that every 50 000 miles 80 000 km or 36 months Coolant condition and protection hoses and clamps annually prior to cold weather every 12 months I I I I CHASSIS AND BODY Wheel lug nut torque...

Page 217: ...I Fuel filter 5 R R Steering linkage ball joints suspension and driveshaft I I I I 1 The wheel lug nuts must be retightened to the proper specifications at 500 miles 800 km of new vehicle operation at any wheel change or at any other time the wheel lug nuts have been loosened Refer to Wheel Lug Nut Torque Specification in the Tires Wheels and Loading chapter for the proper lug nut torque specifica...

Page 218: ...t NOTE Idling the engine for extended periods will accumulate more hours of use on your vehicle than is actually indicated by the mileage odometer Consequently the odometer reading can be often misleading when determining the right time to change your engine oil and filter If you are using your vehicle in a manner which allows it to remain stationary while the engine is running for long periods do...

Page 219: ...iles or 3 months 5 000 miles 15 000 miles 30 000 miles 60 000 miles As required As required As required 30 000 miles 60 000 miles Towing a trailer or using a camper or car top carrier X X X X Extensive idling or low speed driving for long distances as in heavy commercial use such as delivery taxi or patrol car X X X X X X X Operating in dusty conditions such as unpaved or dusty roads X X X X Off r...

Page 220: ...on a smooth level road When stopping listen and check for strange sounds pulling to one side increased brake pedal travel or hard to push brake pedal If any slipping or changes in the operation of your transmission occur check the transmission fluid level Check automatic transmission Park function Check parking brake At least monthly Check function of all interior and exterior lights Check tires f...

Page 221: ... RECOMMENDATIONS To help you service your vehicle we provide scheduled maintenance information which makes tracking routine service easy If your vehicle requires professional service your authorized dealer can provide necessary parts and service Check your Warranty Information to find out which parts and services are covered Use only recommended fuels lubricants fluids and service parts conforming...

Page 222: ...ress the clutch and place the gearshift in N Neutral 2 Block the wheels WARNING To reduce the risk of vehicle damage and or personal burn injuries do not start your engine with the air cleaner removed and do not remove it while the engine is running OPENING THE HOOD 1 Inside the vehicle pull the hood release handle located under the bottom of the instrument panel near the steering column 2 Go to t...

Page 223: ...oolant reservoir 3 Engine oil dipstick 4 Transmission fluid dipstick automatic transmission 5 Engine oil filler cap 6 Brake fluid reservoir 7 Power distribution box 8 Clutch fluid reservoir manual transmission 9 Battery 10 Power steering fluid reservoir 11 Air filter assembly Maintenance and Specifications 223 ...

Page 224: ...e oil filler cap 4 Transmission fluid dipstick automatic transmission 5 Engine oil dipstick 6 Brake fluid reservoir 7 Power distribution box 8 Clutch fluid reservoir manual transmission 9 Battery 10 Power steering fluid reservoir 11 Air filter assembly Maintenance and Specifications 224 ...

Page 225: ...tomatic transmission 3 Engine oil filler cap 4 Engine oil dipstick 5 Brake fluid reservoir 6 Power distribution box 7 Clutch fluid reservoir manual transmission 8 Battery 9 Power steering fluid reservoir 10 Air filter assembly 11 Engine coolant reservoir Maintenance and Specifications 225 ...

Page 226: ...peratures below 40 F 4 5 C use washer fluid with antifreeze protection Failure to use washer fluid with antifreeze protection in cold weather could result in impaired windshield vision and increase the risk of injury or accident Note Do not put washer fluid in the engine coolant reservoir Washer fluid placed in the cooling system may harm engine and cooling system components WINDSHIELD WIPER BLADE...

Page 227: ...g the life of the wiper blades it is highly recommended to scrape off the ice on the windshield before turning on the wipers The layer of ice has many sharp edges and can damage the micro edge of the wiper rubber element ENGINE OIL Checking the engine oil Refer to scheduled maintenance for the appropriate intervals for checking the engine oil 1 Make sure the vehicle is on level ground 2 Turn the e...

Page 228: ... 2 3L I4 engine 3 0L V6 engine MAX MIN Maintenance and Specifications 228 ...

Page 229: ...een the two holes or between the MIN and MAX marks depending on application the oil level is acceptable DO NOT ADD OIL If the oil level is below the lower hole or the MIN mark add enough oil to raise the level between the two holes or between the MIN MAX range 2 3L I4 engine SAE 5W 20 Maintenance and Specifications 229 ...

Page 230: ...gine SAE 5W 20 4 0L SOHC V6 engine SAE 5W 30 Oil levels above the MAX mark or upper hole may cause engine damage Some oil must be removed from the engine by an authorized dealer Maintenance and Specifications 230 ...

Page 231: ...it is fully seated 5 Fully install the engine oil filler cap by turning the filler cap 1 4 turn until it stops To avoid possible oil loss DO NOT operate the vehicle with the engine oil level dipstick and or the engine oil filler cap removed Engine Oil Recommendations 2 3L 3 0L Engines Look for this certification trademark SAE 5W 20 engine oil is recommended Only use oils Certified For Gasoline Eng...

Page 232: ...erican Petroleum Institute API An oil with this trademark symbol conforms to the current engine and emission system protection standards and fuel economy requirements of the International Lubricant Standardization and Approval Committee ILSAC comprised of U S and Japanese automobile manufacturers Use an equivalent Mazda Specification Do not use supplemental engine oil additives oil treatments or e...

Page 233: ...Your vehicle is equipped with a Mazda maintenance free battery which normally does not require additional water during its life of service If your battery has a cover shield make sure it is reinstalled after the battery has been cleaned or replaced For longer trouble free operation keep the top of the battery clean and dry Also make certain the battery cables are always tightly fastened to the bat...

Page 234: ...s or clothing Shield your eyes when working near the battery to protect against possible splashing of acid solution In case of acid contact with skin or eyes flush immediately with water for a minimum of 15 minutes and get prompt medical attention If acid is swallowed call a physician immediately WARNING Battery posts terminals and related accessories contain lead and lead compounds Wash hands aft...

Page 235: ...to its optimum shift feel If the battery has been disconnected or a new battery has been installed the clock and the preset radio stations must be reset once the battery is reconnected Always dispose of automotive batteries in a responsible manner Follow your local authorized standards for disposal Call your local authorized recycling center to find out more about recycling automotive batteries EN...

Page 236: ...gine coolant must be maintained at the correct fluid level and concentration to work properly If the engine coolant fluid level and concentration is not maintained correctly damage to the engine and cooling system may result 2 3L engine Maintenance and Specifications 236 ...

Page 237: ...ntenance for service interval schedules Be sure to read and understand Precautions when servicing your vehicle in this chapter If the engine coolant has not been checked at the recommended interval the engine coolant reservoir may become low or empty If the reservoir is low or empty add engine coolant to the reservoir Refer to Adding engine coolant in this chapter WARNING Automotive fluids are not...

Page 238: ...ant your vehicle requires contact your local authorized dealer WARNING Do not put engine coolant in the windshield washer fluid reservoir If engine coolant is sprayed onto the windshield it could make it difficult to see through the windshield When adding coolant make sure it is a 50 50 mixture of engine coolant and distilled water Add the mixture to the coolant reservoir when the engine is cool u...

Page 239: ...ine is cool wrap a thick cloth around the cap Slowly turn cap counterclockwise until pressure begins to release 3 Step back while the pressure releases 4 When you are sure that all the pressure has been released use the cloth to turn it counterclockwise and remove the cap 5 Fill the coolant reservoir slowly with the proper coolant mixture see above to within the COLD FILL RANGE or the FULL COLD le...

Page 240: ... and capacities in this chapter Fill your engine coolant reservoir as outlined in Adding engine coolant in this section Severe climates If you drive in extremely cold climates less than 34 F 36 C It may be necessary to increase the coolant concentration above 50 NEVER increase the coolant concentration above 60 Increased engine coolant concentrations above 60 will decrease the overheat protection ...

Page 241: ...rized Mazda part The customer warranty may be void for any damage to the fuel system if an authorized Mazda fuel filter is not used WHAT YOU SHOULD KNOW ABOUT AUTOMOTIVE FUELS Important safety precautions WARNING Do not overfill the fuel tank The pressure in an overfilled tank may cause leakage and lead to fuel spray and fire WARNING The fuel system may be under pressure If the fuel filler cap is ...

Page 242: ...with water for 15 minutes and seek medical attention Failure to seek proper medical attention could lead to permanent injury Fuels can also be harmful if absorbed through the skin If fuel is splashed on the skin and or clothing promptly remove contaminated clothing and wash skin thoroughly with soap and water Repeated or prolonged skin contact with fuel liquid or vapor causes skin irritation Be pa...

Page 243: ... cap counterclockwise 1 4 of a turn to remove it 3 Pull to remove the cap from the fuel filler pipe 4 To install the cap align the tabs on the cap with the notches on the filler pipe 5 Turn the filler cap clockwise 1 4 of a turn until it clicks at least once If the check fuel cap lamp or a check fuel cap message comes on the fuel filler cap may not be properly installed The lamp or message can com...

Page 244: ...ision which may result in personal injury Choosing the right fuel Use only UNLEADED fuel or UNLEADED fuel blended with a maximum of 10 ethanol Your vehicle was not designed to run on E85 fuels that are blended with a maximum of 85 ethanol The use of leaded fuel is prohibited by law and could damage your vehicle Do not use fuel containing methanol It can damage critical fuel system components Your ...

Page 245: ... necessary to add any aftermarket products to your fuel tank if you continue to use high quality fuel of the recommended octane rating These products have not been approved for your engine and could cause damage to the fuel system Repairs to correct the effects of using an aftermarket product in your fuel may not be covered by your warranty Many of the world s automakers approved the World Wide Fu...

Page 246: ...ual to the rated refill capacity of the fuel tank as listed in the Maintenance product specifications and capacities section of this chapter The advertised capacity is the amount of the indicated capacity and the empty reserve combined Indicated capacity is the difference in the amount of fuel in a full tank and a tank when the fuel gauge indicates empty Empty reserve is the small amount of fuel r...

Page 247: ...calculations in order to determine fuel economy Calculation 1 Divide total miles traveled by total gallons used Calculation 2 Multiply liters used by 100 then divide by total kilometers traveled Keep a record for at least one month and record the type of driving city or highway This will provide an accurate estimate of the vehicle s fuel economy under current driving conditions Additionally keepin...

Page 248: ...aintenance Keep tires properly inflated and use only recommended size Operating a vehicle with the wheels out of alignment will reduce fuel economy Use recommended engine oil Refer to the Maintenance product specifications and capacities section of this chapter Perform all regularly scheduled maintenance items Follow the recommended maintenance schedule and owner maintenance checks found in schedu...

Page 249: ...on the method of operation and conditions EMISSION CONTROL SYSTEM Your vehicle is equipped with various emission control components and a catalytic converter which will enable your vehicle to comply with applicable exhaust emission standards To make sure that the catalytic converter and other emission control components continue to work properly Use only the specified fuel listed Avoid running out...

Page 250: ...e Vehicle Emission Control Information Decal located on or near the engine This decal identifies engine displacement and gives some tune up specifications Please consult your Warranty Information for complete emission warranty information On board diagnostics OBD II Your vehicle is equipped with a computer that monitors the engine s emission control system This system is commonly known as the On B...

Page 251: ...ould prevent you from getting a vehicle registration Your vehicle may not pass the I M test if the indicator is on or not working properly bulb is burned out or if the OBD II system has determined that some of the emission control systems have not been properly checked In this case the vehicle is considered not ready for I M testing If the indicator is on or the bulb does not work the vehicle may ...

Page 252: ...arting the engine Then start the engine and complete the above driving cycle The engine must warm up to its normal operating temperature Once started do not turn off the engine until the above driving cycle is complete If the vehicle is still not ready for I M testing the above driving cycle will have to be repeated POWER STEERING FLUID 2 3L I4 engine 3 0L V6 engine Maintenance and Specifications ...

Page 253: ...ile the engine idles turn the steering wheel left and right several times 3 Turn the engine off 4 Check the fluid level in the reservoir It should be between the MIN and MAX lines Do not add fluid if the level is within this range 5 If the fluid is low add fluid in small amounts until it reaches between the MIN and MAX lines Refer to Maintenance product specifications and capacities in this chapte...

Page 254: ...eservoir should remain constant If the fluid level drops refill the fluid level to the step in the reservoir Use only a DOT 3 brake fluid designed to meet Mazda specification Refer to Maintenance product specifications and capacities in this chapter WARNING Carefully read cautionary information on product label For MEDICAL EMERGENCY INFORMATION contact a physician or Poison Control Center immediat...

Page 255: ...ver slowly through all of the gear ranges 5 Shift to P Park and leave the engine running 6 Remove the dipstick wipe clean with a dry lint free rag 7 Install and fully seat the dipstick into the filler tube 8 Remove the dipstick and inspect the fluid level Level should be in the cross hatched area 9 If necessary add fluid in 1 2 pint 250ml increments through the filler tube until the level is corre...

Page 256: ... internal transmission damage If an overfill condition occurs excess fluid should be removed by an authorized dealer Checking and adding manual transmission fluid if equipped 1 Park the vehicle on a level surface 2 Engage the parking brake fully put in first gear 3 Ensure that the vehicle cannot move 4 Clean the filler plug 5 Remove the filler plug and inspect the fluid level Maintenance and Speci...

Page 257: ...1 Park the vehicle on a level surface 2 Engage the parking brake fully put in first gear 3 Ensure the vehicle cannot move 4 Clean the filler plug 5 Remove the filler plug and inspect the fluid level 6 Fluid level should be at the bottom of the opening 7 Add enough fluid through the filler opening so that the fluid level is at the bottom of the opening 8 Install and tighten the fill plug securely U...

Page 258: ...be at the bottom of the opening 7 Add enough fluid through the filler opening so that the fluid level is at the bottom of the opening 8 Install and tighten the fill plug securely Use only fluid that meets Mazda specifications Refer to the Maintenance product specifications and capacities section in this chapter AIR FILTER Refer to scheduled maintenance for the appropriate intervals for changing th...

Page 259: ... and to ensure good sealing 6 Install a new air filter element Be careful not to crimp the filter element edges between the air filter housing and cover This could cause filter damage and allow unfiltered air to enter the engine if not properly seated 7 Replace the air filter housing cover and secure the clamps 8 Replace the air inlet tube and secure the clamp Note Failure to use the correct air f...

Page 260: ...id Between MIN and MAX on reservoir 1 Door weather strips All Silicone Lubricant Hinges door checks latches striker plates fuel filler door hinge and seat tracks All Multi Purpose Grease Transmission steering parking brake linkages and pivots brake and clutch pedal shaft clutch pilot bearing and input shaft spline manual transmission All Premium Long Life Grease Maintenance and Specifications 260 ...

Page 261: ... 15 1 quarts 14 3L 3 0L V6 engine with automatic transmission 14 8 quarts 14 0L 4 0L V6 engine with manual transmission 13 7 quarts 13 0L 4 0L V6 engine with automatic transmission 13 2 quarts 12 5L Engine oil 2 3L I4 engine SAE 5W 20 Motor Oil 4 0 quarts 3 8L 3 0L V6 engine 4 5 quarts 4 3L 4 0L V6 engine SAE 5W 30 Motor Oil 5 0 quarts 4 7L Power steering fluid All MERCON威 V ATF Fill between MAX M...

Page 262: ...with 2 3L I4 engine MERCON威 V ATF 4 9 9 quarts 9 4L 5 4x2 vehicles with 3 0L or 4 0L engines 10 0 quarts 9 5L 5 4x4 vehicles with 3 0L or 4 0L engines 10 3 quarts 9 8L 5 Front axle fluid 4X4 4x4 Vehicles SAE 80W 90 Premium Rear Axle Lubricant 3 6 pints 1 7L Rear axle fluid All SAE 80W 90 Premium Rear Axle Lubricant 5 0 5 3 pints 2 4 2 5L 6 Windshield washer fluid All Ultra clear Windshield Washer ...

Page 263: ...the bottom of the filler hole with the vehicle on a level surface 4 Automatic transmissions that require MERCON威 V should only use MERCON威 V fluid or fluid that is specified dual usage MERCON威 MERCON威 V Refer to scheduled maintenance to determine the correct service interval Use of any fluid other than the recommended fluid may cause transmission damage 5 Indicates only approximate dry fill capaci...

Page 264: ...Firing order 1 3 4 2 1 4 2 5 3 6 1 4 2 5 3 6 Spark plug gap 0 049 0 053 inch 1 25 1 35mm 0 051 0 057 inch 1 29 1 45mm 0 052 0 056 inch 1 32 1 42mm Ignition system EDIS EDIS EDIS Compression ratio 9 7 1 9 6 1 9 7 1 Engine drivebelt routing 2 3L I4 Engine without A C with A C similar 3 0L V6 Engine without A C Maintenance and Specifications 264 ...

Page 265: ... 3 0L V6 Engine with A C 4 0L V6 Engine Maintenance and Specifications 265 ...

Page 266: ...e instrument panel Please note that in the graphic XXXX is representative of your vehicle identification number MFD BY FORD MOTOR CO IN U S A EXT PNT XX RC XX DSO WB BRK INT TR TP PS R AXLE TR SPR XXXXX XXX X XX X XX X XX XXX XXXXXXXXXXXXX XXX XXXX XXXXXXX XX THIS VEHICLE CONFORMS TO ALL APPLICABLE FEDERAL MOTOR VEHICLE SAFETY AND THEFT PREVENTION STANDARDS IN EFFECT ON THE DATE OF MANUFACTURE SHO...

Page 267: ... Description Code Five speed automatic 5R44E 5R55E D Five speed manual HD J Five speed manual R1 R MFD BY FORD MOTOR CO IN U S A EXT PNT XX RC XX DSO WB BRK INT TR TP PS R AXLE TR SPR XXXXX XXX X XX X XX X XX XXX XXXXXXXXXXXXX XXX XXXX XXXXXXX XX THIS VEHICLE CONFORMS TO ALL APPLICABLE FEDERAL MOTOR VEHICLE SAFETY AND THEFT PREVENTION STANDARDS IN EFFECT ON THE DATE OF MANUFACTURE SHOWN ABOVE VIN ...

Page 268: ...rious accident If a passenger is unable to use the device pull off the right of way to a safe area before use If use of a cell phone is necessary despite this warning use a hands free system to at least allow the hands free to drive the vehicle Never use a cell phone or other electrical device while the vehicle is moving and instead concentrate on the full time job of driving In addition the gasol...

Page 269: ...ating emergencies 233 jumping a disabled battery 189 maintenance free 233 servicing 233 Belt Minder威 82 Booster seats 96 Brakes 151 anti lock 151 152 anti lock brake system ABS warning light 153 fluid checking and adding 254 fluid specifications 260 lubricant specifications 260 parking 153 shift interlock 156 Break in period 5 Bulbs 46 C Cargo cage 60 Cell phone warning 268 Changing a tire 179 Chi...

Page 270: ...shers 168 Emission control system 249 Engine 264 cleaning 208 coolant 235 idle speed control 233 lubrication specifications 260 service points 223 225 starting after a collision 168 Engine block heater 150 Engine oil 227 checking and adding 227 dipstick 227 filter specifications 231 recommendations 231 specifications 260 Event data recording 6 Exhaust fumes 149 F Foglamps 42 Four Wheel Drive vehic...

Page 271: ...seats 99 Inspection maintenance I M testing 251 Instrument panel cleaning 211 cluster 12 lighting up panel and interior 43 location of components 12 J Jack 179 positioning 179 storage 179 182 Jump starting your vehicle 189 K Keys 62 67 positions of the ignition 146 L Lamps bulb replacement specifications chart 46 daytime running light 43 fog lamps 42 headlamps 42 headlamps flash to pass 43 instrum...

Page 272: ...d entry 65 locking unlocking doors 63 panic alarm 63 replacing the batteries 64 S Safety defects reporting 206 Safety restraints 71 75 79 Belt Minder威 82 extension assembly 80 for adults 76 79 for children 94 95 Occupant Classification Sensor 73 seat belt maintenance 80 warning light and chime 81 Safety restraints tether anchors 102 Safety seats for children 99 Safety Compliance Certification Labe...

Page 273: ...tires and chains 129 spare tire 180 terminology 110 tire grades 109 treadwear 109 113 Towing 135 recreational towing 144 trailer towing 135 wrecker 195 Traction lok rear axle 155 Transfer case fluid checking 257 Transmission automatic operation 156 brake shift interlock BSI 156 fluid checking and adding manual 256 lubricant specifications 260 manual operation 159 Turn signal 46 V Vehicle Identific...

Page 274: ...274 ...

Page 275: ...275 ...

Page 276: ...276 ...

Page 277: ...277 ...

Page 278: ...278 ...

Page 279: ...279 ...

Page 280: ...280 ...

Reviews: