background image

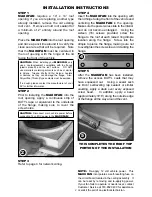
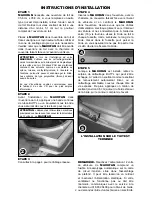
STEP 6

The interior Garnish Trim Ring must be trimmed to fit your particular RV roof thickness.   To 

accomplish this, measure the distance from the vehicle ceiling surface to each corner of the 

MAXXFAN

 Control Plate.

Most RV roofs have some slope, so measuring each corner is necessary.   The Garnish ring 

should be cut 1/4” to 1/2” longer than the dimensions measured at each corner.
In Picture #6 to the right, the installation measures 3 and 1/2” from the ceiling (this is an example 

only) to the Control Plate.   After adding 1/2” as in this example, using a ruler, place a mark at 

4” on each corner of each side of the Garnish Ring (refer to 6A below).   Once marked, draw a 

line connecting all 4” markers on the outside of the Garnish ring and trim accordingly (refer to 

6B to the right).

STEP 7

Complete the installation by placing any excess 

wiring to the inside of the roof opening and sliding 

the Garnish Ring into position.   Fasten in place by 

using the four painted flat head screws provided.

NOTE: 

DO NOT probe or tamper with the thermostat 

sensor or IR sensor shown in illustration #6 above.

MEASUREMENTS STATED 

IN STEP 6 ARE USED AS AN 

EXAMPLE FOR ILLUSTRATION 

PURPOSES ONLY

7

CONGRATULATIONS!!!

You have successfully completed the 

installation of your new 

MAXXFAN

.

If you have questions, please visit

Airxcel.com or call us at 316-832-3400.

6A

GARNISH RING

6B

GARNISH

RING

6

IR RECEIVER

3 1/2”

CEILING

3

Summary of Contents for MAXXFAN Plus 4700N

Page 1: ...roof opening of 14 by 14 inches To determine if your roof opening is correctly sized simply remove the interior ceiling garnish trim ring of your existing roof vent and measure the ceiling opening or...

Page 2: ...efore connecting 12 volt DC power to the MAXXFAN STEP 3 Refer to page 4 for network wiring STEP 4 Insert the MAXXFAN into the opening with the lid hinge facing the front of the vehicle and centering t...

Page 3: ...h side of the Garnish Ring refer to 6A below Once marked draw a line connecting all 4 markers on the outside of the Garnish ring and trim accordingly refer to 6B to the right STEP 7 Complete the insta...

Page 4: ...ACTIVITY STATUS Solid Green Device is connected to network and communicating properly OFF Device has no power or has completely failed Solid Red Device has gone offline and is not connected to networ...

Page 5: ...te fan with screen removed When removing screen for cleaning turn the MAXXFAN OFF and remove the vehicle 12 volt power to the MAXXFAN When cleaning your MAXXFAN use only a mild detergent solution RAIN...

Page 6: ...you supply is for AIRXCEL MAXXAIR s internal use and will not be shared or sold to others The Serial Number for your MAXXFAN is located on the back page of this booklet and on the fan control plate u...

Page 7: ...This Page Intentionally Left Blank Cette page est laiss e volontairement blanche...

Page 8: ...dans une ouverture de toit de VR standard de 35 6 cm x 35 6 cm Pour d terminer si l ouverture du toit est de la bonne taille retirez simplement la couronne d corative au plafond int rieur de votre ven...

Page 9: ...du v hicule avant de connecter l alimentation de 12 volts c c au MAXXFAN TAPE 3 Consultez la page 4 pour le c blage r seau TAPE 4 Ins rez le MAXXFAN dans l ouverture avec la charni re du couvercle fai...

Page 10: ...t de la couronne d corative consultez 6A ci dessous Une fois marqu dessinez une ligne qui connecte toutes les marques de 10 2 cm l ext rieur de la couronne d corative et coupez en cons quence consulte...

Page 11: ...Le dispositif est connect au r seau et communique de fa on appropri e OFF ARR T TEINT Le dispositif n est pas sous tension ou a subi un chec complet Rouge fixe Le dispositif n est plus en ligne et n e...

Page 12: ...Lorsque vous retirez le moustiquaire pour le nettoyer d sactivez le MAXXFAN et retirez l alimentation de 12 volts du v hicule au MAXXFAN Lorsque vous nettoyez le MAXXFAN utilisez seulement une soluti...

Page 13: ...ez est destin e l usage interne d AIRXCEL MAXXAIR et ne sera pas partag e ou vendue des tiers Le num ro de s rie de votre MAXXFAN se trouve la derni re page de ce livret et sur la plaque de r glage du...

Page 14: ...14 This Page Intentionally Left Blank Cette page est laiss e volontairement blanche...

Page 15: ...This Page Intentionally Left Blank Cette page est laiss e volontairement blanche 15...

Page 16: ...or additional product information please visit www AIRXCEL com AIRXCEL INC RV Products Division MAXXAIR 3050 N St Francis St Wichita KS 67219 316 832 3400 reinventing comfort PLACE CONSUMER LABEL HERE...

Reviews: