background image

REMOTE CONTROL OPERATING GUIDE

WIRELESS REMOTE CONTROL FOR

MAXXFAN

®


Deluxe

 MODELS

7000KI • 7500KI • 7000KI40 • 7500KI40

FAN ON & POWER OFF

 - 

Press this button:

•  To start the fan

•  To turn the fan off

•  To exit Auto Mode

VENT LID POSITION

 - 

Press this button to open or close the vent 

lid

• While the fan is running in Manual Mode press once to close the vent lid 

and enter “Ceiling Fan” Mode.

NOTE:

 This button is not active in Auto Mode.  If the fan loses 12volt 

RV power or power is removed from the fan, use the knob located at the 

ceiling to manually open or close the vent lid if desired.

AIR EXHAUST / INTAKE

 - 

Press this button to reverse the fan from 

intake or exhaust

NOTE:

 In Auto Mode, the fan direction is automatically positioned to 

Exhaust, but may be overridden and changed to Intake by depressing this 

key.

FAN AUTO MODE

 - 

Press this button to enter Auto Mode

• Auto Mode allows the fan lid to automatically open and the fan motor to 

operate as dictated by the thermostat set point temperature. Once the 

cabin temperature cools and reaches the set point temperature, the fan lid 

will close and the fan motor will shut off.

• Pressing this button while in Auto Mode will shut off Auto Mode, close the vent 

lid and shut off the fan motor.

THERMOSTAT SET TEMPERATURE

TEMP +

 ~ Press this button to increase the Set Temperature for Auto Mode.

TEMP -

 ~ Press this button to decrease the Set Temperature for Auto Mode.

NOTE:

 The thermostat temperature range is from -2°C to 37°C. To change from Celsius to Fahrenheit on 

the temperature display, press and hold both set temperature keys simultaneously.

FAN SPEED

Fan Speed +

 ~ Press this 

button to increase the fan 

speed. The fan has ten 

speeds.

Fan Speed -

 ~ Press this 

button to decrease the fan 

speed. The fan has ten 

speeds.

NOTE:

 When the fan speed 

reaches either the maximum 

or minimum speed, the fan 

will respond with 2 quick 

beep sounds to indicate this.

LOW BATTERY 

INDICATOR

• When the battery is at full 

charge, three black power 

bars are displayed.

• One or zero power bars displayed indicates the batteries need replacement.

TRANSMISSION SIGNAL

• This symbol is displayed on the screen when any button is pressed to indicate the signal was transmitted 

to the fan.

• A beep sound from the ceiling unit indicates the signal from the remote control was received by the fan.

SET

TEMPERATURE

TRANSMIT

LOW BATTERY

INDICATOR

AIR DIRECTION

INDICATOR

CEILING FAN MODE

FAN SPEED

VENT LID

POSITION

FAN OFF

INDICATOR

VENT LID IN

AUTO MODE

FAN ON

INDICATOR

ROOM

TEMPERATURE

AUTO MODE

INDICATOR

ON/OFF

VENT

OPN/CLS

AIR

IN/OUT

AUTO

ON/OFF

TEMP+

TEMP-

SPEED+

SPEED-

Remove protective 

film from Display 

Screen

7

“More information https://www.caravansplus.com.au"

Summary of Contents for MAXXFAN Deluxe Series

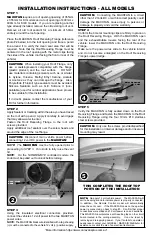
Page 1: ...for a minimum roof thickness of 25mm to a maximum of 90mm If your roof thickness is less than 25mm build additional thickness at the ceiling opening using wood or other suitable material Longer Ganish Rings are available to allow installation in caravans with thicker roof sections The MAXXFAN is designed for a nominal 12 Volt DC system and requires a circuit capable of supplying a minimum of 5 amp...

Page 2: ... Also Polysulfide Thiokol type sealants must be avoided Silicone Sealants such as G E Silicone II non paintable used for outdoor applications have proven to be suitable for this installation If in doubt please contact the manufacturer of your RV for further information STEP 2 Apply Sealant or Caulking within the area you have traced on the roof with a pencil Apply it carefully to avoid gaps that m...

Page 3: ... 6mm to 12 5mm longer than the dimensions measured at each corner In Picture 6 below the installation measures 90mm from the ceiling this is an example only to the Control Plate After adding 12mm as in this example using a ruler place a mark at 102mm on each corner of each side of the Garnish Ring refer to 6A right Once marked draw a line connecting all 102 mm marks on the outside of the Garnish r...

Page 4: ...the screen removed CAUTIONS AND CARE OF YOUR MAXXFAN This product has been manufactured using prime UV stabilized Polymers for maximum toughness and durability However the use of caustic or solvent based chemicals can cause cracking and product failure PLEASE CLEAN ALL PARTS WITH MILD SOAP AND WATER ONLY Do not use Petroleum Containing Additives or Solvent Based Products on any of the MAXXFAN s co...

Page 5: ...EYPAD CONTROLS Use Keys on Keypad to control MAXXFAN functions see descriptions on next page INSECT SCREEN RETAINER KNOB Rotate all 4 knobs 1 2 turn to remove screen Caution Never operate fan with screen removed THERMOSTAT TEMPERATURE SENSOR CEILING FAN MODE With the fan motor running close the Vent Lid to enter Ceiling Fan Mode The fan motor will continue to run and circulate air within the RV ca...

Page 6: ...LED will light to indicate the MAXXFAN is in Auto Mode To adjust follow instructions below If no previous thermostat temperature was entered or you wish to change a previous set temperature press the HOLD TO SET key for more than 3 seconds and you will hear one long beep and the thermostat will be reset to 26 C To further adjust the set temperature if desired use the or Arrow keys to adjust at 0 5...

Page 7: ...MOSTAT SET TEMPERATURE TEMP Press this button to increase the Set Temperature for Auto Mode TEMP Press this button to decrease the Set Temperature for Auto Mode NOTE The thermostat temperature range is from 2 C to 37 C To change from Celsius to Fahrenheit on the temperature display press and hold both set temperature keys simultaneously FAN SPEED Fan Speed Press this button to increase the fan spe...

Page 8: ...stry and outperforms all competitive models by delivering more cooling at a higher rate of airflow THE ORIGINAL VENT COVER Protects your Caravan s interior from rain to provide constant airflow preventing heat build up and allowing musty air smoke and cooking odors to escape WATER HEATERS More options and more convenience with Suburban s durable porcelain lined steel tank water heaters Fast recove...

Reviews: