4
After the unit is assembled and powered up, verify that the unit has the proper software.
This is accomplished when the unit reaches the calibration screen. If the words "Touch
Screen to Calibrate" appear, follow the software update procedure below. If the words
"If Calibration is Required, Please Touch Screen Now" appear, the unit has the latest
software and you can skip to Section 1.3 (Registration).
1. Remove the covering from the MyRide frame so that the monitor can be seen.
NOTE:
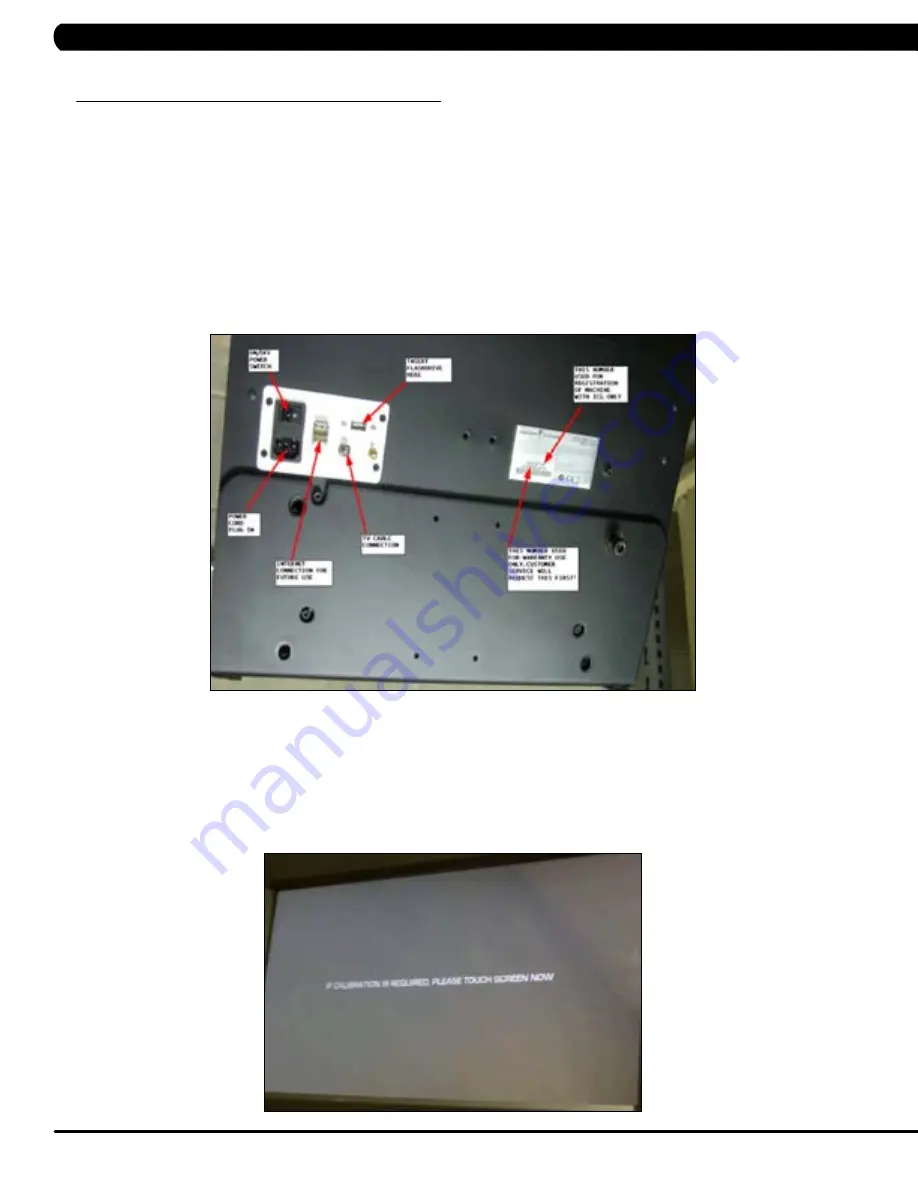
Record both numbers on the registration sheet
located in the packing material (see Figure A for locations).
2. Insert the USB flash drive into the USB slot on the back of the unit (see Figure A for location) and power up the MyRide.
3. The unit will power up and go to the update screen after it flashes a sliding bar. Follow the on screen instructions when the monitor asks
that the USB flash drive be removed.
4. After the monitor reboots, it will ask you "If Calibration is Required, Please Touch Screen Now" (Figure B). Touch the screen letters above
to change to the calibration screen (this screen will be white with flashing circles).
NOTE:
You must touch the screen for calibration within 10
seconds. If you fail to do so, you will have to power down and reboot the unit as you will not have touch screen function and the unit will not
operate correctly.
5. Touch and hold your finger on the flashing red circles until they switch to yellow. Release when the light is yellow and follow the red light
around the screen repeating the touch and hold until each red circle turns yellow. The normal order is lower left corner, lower right corner,
upper right corner, then upper left corner.
NOTE:
If the screen does not change to the white screen with the flashing red circle at the lower left,
check the connection of the USB cable at the monitor and computer. Repeat Steps 4-5 after checking the cable connection.
1.2 SeTUP & SOFTWARe UPGRAde iNSTRUCTiONS
MyRide ASSeMBly GUide
FiGURe B
FiGURe A


