background image


Product Browse 

Summary of Contents for MG-PL Series

Page 1: ...1 MG PL Series Service Manual...

Page 2: ...2 Product Browse...

Page 3: ...3...

Page 4: ...4...

Page 5: ...5...

Page 6: ...6...

Page 7: ...7...

Page 8: ...8...

Page 9: ...17 CHAPTER 3 MAINTENANCE TROUBLESHOOTING 3 1 Plate Loaded Free Weight Benches Maintenance 18 3 2 Troubleshooting 18 CHAPTER 4 PART REPLACEMENT GUIDE 4 1 Plastic Bushing Replacement 19 4 2 Swing Arm Re...

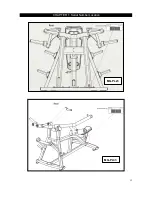
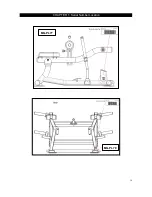
Page 10: ...10 CHAPTER 1 Serial Number Location 1 1 Serial Number Location MG PL12 MG PL13...

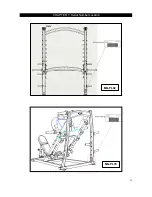
Page 11: ...11 CHAPTER 1 Serial Number Location MG PL14 MG PL15...

Page 12: ...12 CHAPTER 1 Serial Number Location MG PL23 MG PL33...

Page 13: ...13 CHAPTER 1 Serial Number Location MG PL34 MG PL50...

Page 14: ...14 CHAPTER 1 Serial Number Location MG PL62 MG PL70...

Page 15: ...15 CHAPTER 1 Serial Number Location MG PL71 MG PL76...

Page 16: ...16 CHAPTER 1 Serial Number Location MG PL77 MG PL79...

Page 17: ...17 CHAPTER 2 Assembly Instruction 2 1 TOOLS REQUIRED FOR ASSEMBLY Note For additional assembly information please refer to the Assembly Guide...

Page 18: ...dust dirt and sweat 2 With a clean dry 100 lint free cloth and a recommended cleaning solution wipe down all pads and hand grips Monthly PM 1 Clean and grease all pull pins Monthly Cleaning 1 Wipe do...

Page 19: ...19 CHAPTER 4 Part Replacement Guide 4 1 PLASTIC BUSHING REPLACEMENT 1 Loosen the screw at the end of the bar 2 Replace the plastic bushing and lock the screw...

Page 20: ...20 CHAPTER 4 Part Replacement Guide 4 2 SWING ARM REPLACEMENT 1 Loosen the screw on the swing arm 2 Replace the swing arm and secure it with a bolt...

Page 21: ...21 CHAPTER 4 Part Replacement Guide 4 3 PAD REPLACEMENT 1 Loosen the screw and remove the pad 2 Replace new pad and lock it with bolts...

Page 22: ...PTER 4 Part Replacement Guide 4 4 LEG ADJUSTMENT COVER REPLACEMENT 1 Remove the plastic end cap and interval ring 2 Replace the new leg adjustment cover 3 Assembly the interval ring and the plastic en...

Page 23: ...Replacement Guide 4 5 HAND GRIP FOAM REPLACEMENT 1 Loosen the screws on the end cap and then remove the end cap 2 Cut off the original foam and position replacement foam on the hand grip 3 Fix the en...

Page 24: ...24 CHAPTER 4 Part Replacement Guide 4 6 BUSHING REPLACEMENT 1 Loosen the screws and remove the pull pin 2 Remove the top cap and take off the bushing 3 Position the new bushing and fix it...

Reviews: