SILICON
SILICON
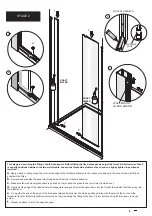
100mm
SILICON
SILICON
a
b
c
d
d
e
SILICON
SILICON
100mm
SILICON
SILICON
SILICON
SILICON
SILICON
SILICON
STAGE 7
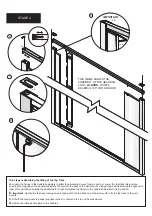
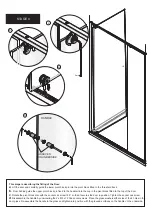
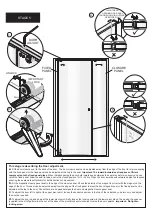
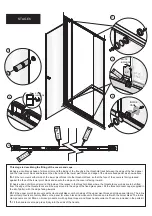
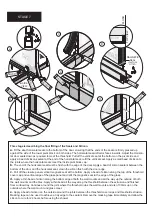
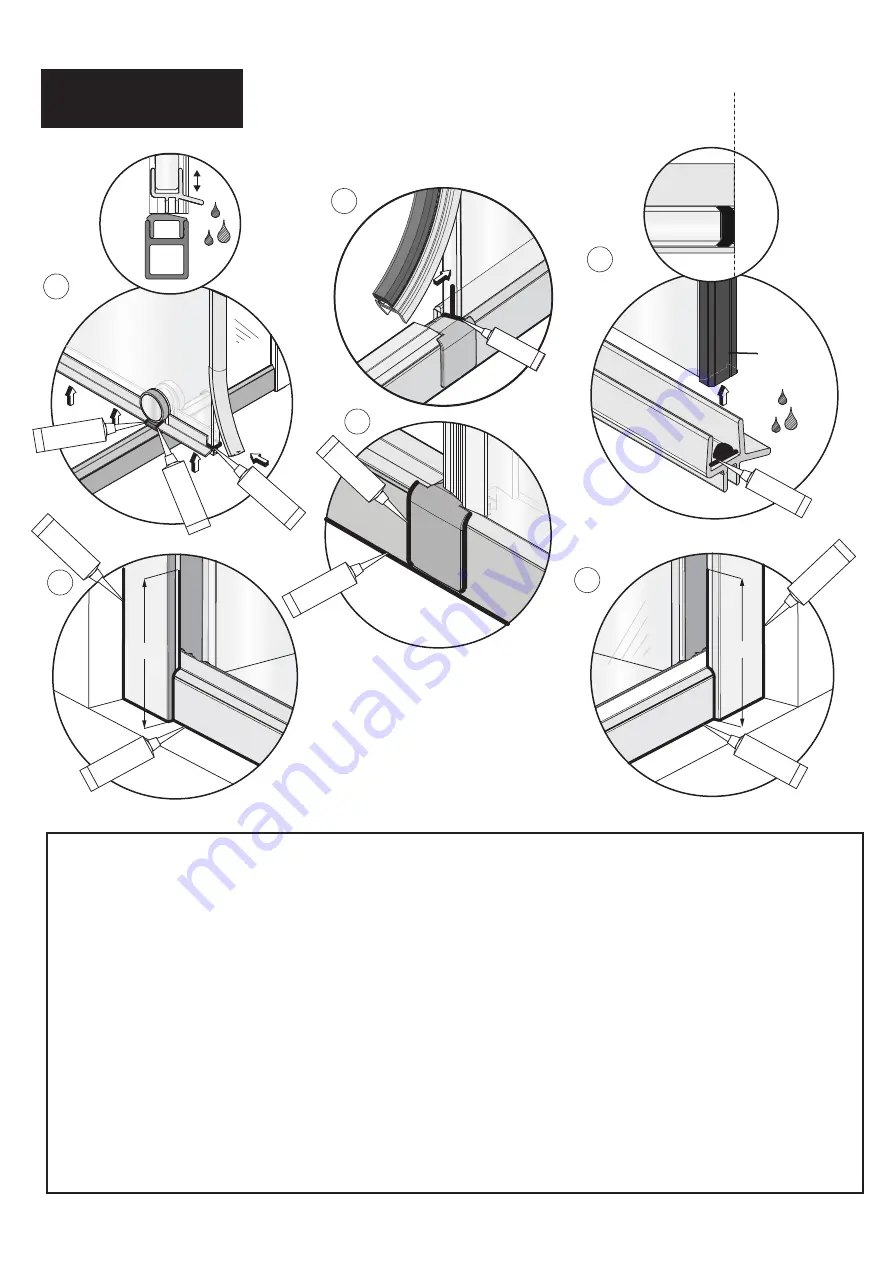
This stage is describing the final fitting of the Seals and Silicon
a.
Fit the door horizontal seals to the bottom of the door, ensuring that the ends of the seal are firmly pressed up
against the side of the lower pivot block on both sides. The horizontal seal deflector faces inwards. Adjust the Horizon-
tal door seals down as required to meet the threshold. Pull off the vertical seal at the bottom on the pivot side and
apply a bead of silicon sealant at the end of the horizontal seal, refit the vertical seal. Apply a small bead of silicon to
the joints where the horizontal seals meet the inside pivot block cap.
b.
The end of the horizontal seal must be flush with the edge of the door. Apply a bead of silicon sealant between the
bottom of the door and the horizontal seal, clean the silicon flush with the door edge.
c.
Pull off the closure panel vertical magnetic seal at the bottom. Apply a bead of silicon along the top of the threshold
cover cap and vertical edge of the glass panel and refit the magnetic seal to the edge of the glass.
d.
Apply a thin bead of silicon along the bottom edge of both the wall mounts and all the way up the outside of both
the wall mounts and the tiles. Apply a thin bead all the way along the threshold between the extrusion and finished
floor surface/tray. Continue around the joint where the threshold joins the wall mounts and also 100mm up on the
outside where the wall mount and glass meet.
e.
Apply a bead of silicon on the outside around the joints between the threshold cover caps and threshold extrusion.
Masking tape can be used to achieve a tidy edge to the sealant. Remove the masking tape immediately and allow the
silicon to cure for 24 hours before using the shower.
MAGNETIC
SEAL
(FACTORY
FITTED)
DOOR
(OPEN)
FLUSH
T
O
P
VIEW
DOOR
DOOR
(OPEN)
INSIDE
VIEW


