Pictures illustrated here are for reference purpose only and this Quick Start Guide is subject to change without notice.
Quick Start Guide
Charge Your MaxMe
Power On & Wi-Fi Connection
1
1
1
3
2
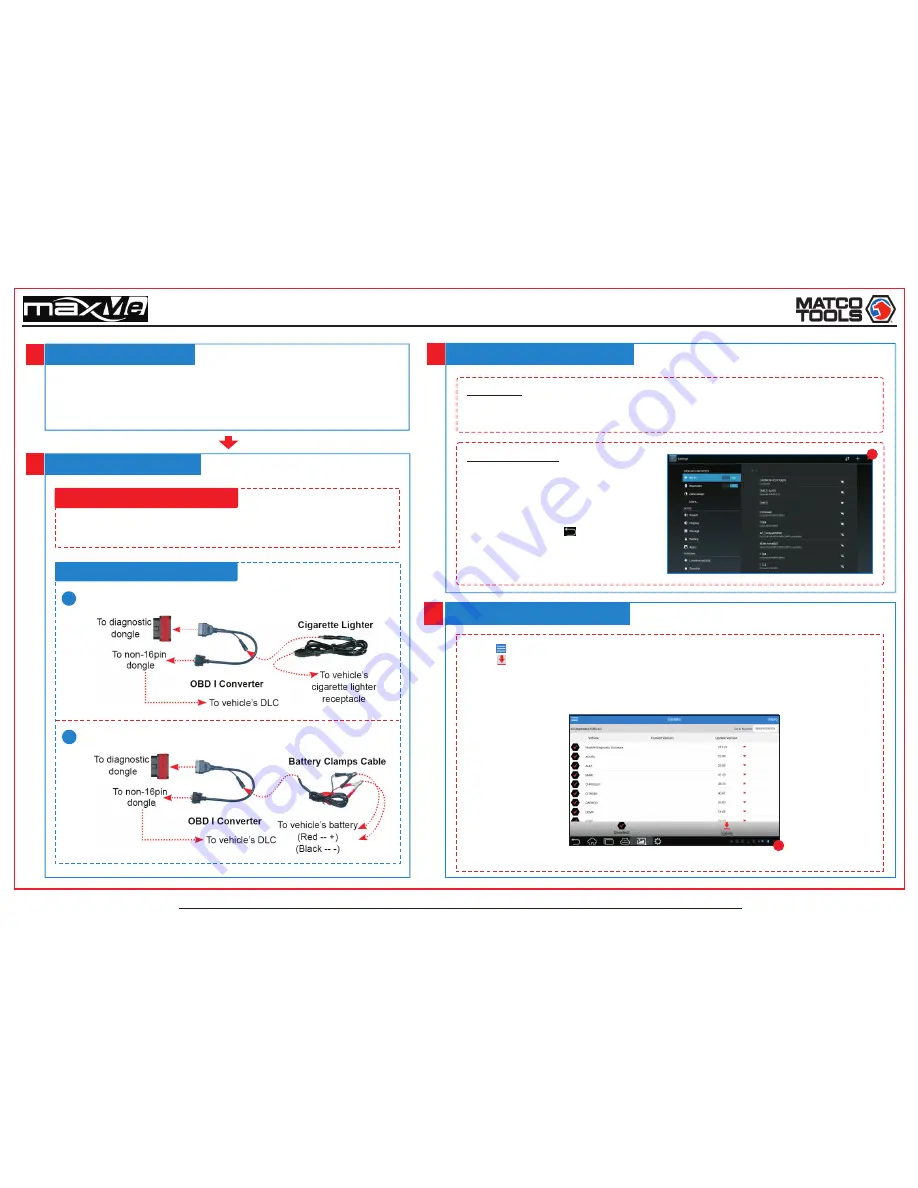
Vehicle Connections
1. Connect USB end of the power adaptor to the Micro USB port of MaxMe;
2. Connect the other end of the power adaptor into the AC outlet.
If MaxMe is being charged, the charging indicator illuminates red;
Once the indicator turns green, it means that the charging is complete.
Non-OBD II Vehicle Connection
OBD II Vehicle Connection
Plug the diagnostic dongle into vehicle’s DLC. It is suggested to use the OBD II
extension cable to connect the diagnostic dongle and DLC.
A
Via Cigarette Lighter
B
Via Battery Clamps Cable
1. Power on
Press
the
[
POWER]
button, the system starts initializing and then enters the desktop.
MaxMe tablet only supports wireless connection.
2. Wi-Fi connection
Tap on [Settings] on the desktop and then
[Wi-Fi] to configure Wi-Fi setting. Refer
to Figure
A
.
Select the desired Wi-Fi connection from
the list. (Password may be required for
secured networks). When “Connected”
appears, tap on the icon to return to
the desktop.
4
Update Diagnostic Software
Tap on and then select “Update” from the pull-down menu to enter.
Tap on to start downloading.
(During the initial setup, you need to purchase and download the
diagnostic software. For details on how to purchase the diagnostic software, please refer to the printing
materials and literature on software purchase.)
Note:
By default, all vehicle software are selected. To deselect all, tap “Select All”; To deselect
certain software, just uncheck the box next to the software version.
Once downloading finished, the software packages will be installed automatically.
A
B