background image

BRK4TB, BRK10TB 

03/18/21

BRK4TB,  BRK10TB  

4 TON AND 10 TON BODY REPAIR KIT

SETUP

1.   Refer to the parts list and drawing in this manual to identify parts mentioned in this setup procedure.
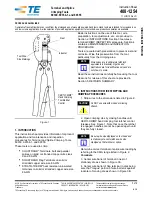
2.   Before installing the force gage (P39) remove the plug A in the hose end of the pump (01). Thread the gage into the gage fitting (P41) and 

connect with the receiver (P42) by turning it clockwise. Make sure the connection is tight to prevent leakage.

3.   Open the release valve (P29) by turning it counterclockwise until it stops, then pump the handle 4 or 5 full incremented pump strokes to 

purge air from the hydraulic system.

4.  Install ram (02) or spreader (03) at the end of hose (P30) and secure the quick disconnect fittings together by hand tightening the threaded 

sleeve  (R06-4T & R15-10T)  on the female coupler (R15-4T & R16-10T) to the male coupler (P31) at the end of the hose (P30).

P39

P40

P41

P42

OPERATION


This is the safety alert symbol used for the 

OPERATING INSTRUCTIONS

 section of this manual to alert you to potential personal  


injury hazards. Obey all instructions to avoid possible injury or death.

1.   Study the work to be done in order to determine the type ram and other attachments you will be using.


Consult the enclosed chart 

titled “Applicable force for component set ups” in order to determine the maximum allowable force to be used in your 
specific setup.


All rams have female hose disconnects attached to them, and the end of the hose has the male quick disconnect 

attached to it. Insert the end of the hose (P30) all the way in to the ram’s female quick disconnect 

(R15). Slide the female connector’s 

threaded sleeve 

(R06-4T & R15-10T)

 on to the threads at the end of the hose 

(P30) and hand tighten. Never use any tools to tighten 

this connection.

2.   Consult this Owner’s Manual section titled APPLICABLE FORCE FOR COMPONENT SET UPS for typical attachment and extension 

tube setups and pay very close attention to the corresponding load ratings of certain attachment connections. The use of extension 
tubes, ram or plunger toes greatly reduces the hydraulic system’s capacity. When using extension tubes, put the shortest tubes on the 
ends of the setup.

3.   The pump (1) may be operated in the horizontal or vertical position but the pump (1) must point down when used in the vertical 

position.

4.   Make sure all hydraulic and attachment connections are fully engaged and tight so ram force is straight in order to avoid off-center 

load conditions.

5.   During setup, make sure the hose routing avoids kinks, twists, curls or bends that will impede hydraulic fluid flow. Do not use the hose 

(P30) as a means to carry the kit components. Do not subject the hose (P30) to any hazards such as fire, extreme heat or cold, sharp 
surfaces, or heavy impact. IF A HOSE (P30) RUPTURES, BURSTS, OR NEEDS TO BE DISCONNECTED, IMMEDIATELY SHUT THE 
PUMP (1) OFF AND OPEN THE RELEASE VALVE (P29) TO RELEASE HYDRAULIC PRESSURE. NEVER GRASP A LEAKING PRESSUR-
IZED HOSE, FITTING OR COMPONENT WITH YOUR HANDS OR SUFFER SERIOUS INJURY.

6.   Always use the pressure gauge (14) to make sure you are within the required force range when operating the system.
7.   In order to pump the ram


(2), it will be necessary to turn the release valve knob (P29) in a clockwise direction until tight. Tighten by 

hand only.

8.   Pumping the handle (P34) up and down transfers the hydraulic fluid from the pump’s reservoir (P6), through the hose 

(P30), in to the 

cylinder and extends the ram with each incremental pump stroke.

9.   To release the pressure and return the ram (2) back in to its cylinder (R13-4T & R14-10T) , turn the release valve knob (P29) in a coun-

terclockwise direction very slowly. Turning the release valve knob (P29) slowly will determine the speed in which the ram (2) will retract 
back into its cylinder (R13-4T & R14-10T).


IMPORTANT: 

The pump includes an overload valve that will activate at the pump’s rated capacity only. If the setup requires a reduced 

rating, the operator is responsible for using the gauge to determine when to stop pumping since the overload valve (P24) is set to a 
higher rating.

10.  Make sure the ram (2) is completely retracted inside its cylinder (R13-4T & R14-10T) before disconnecting the hose from the cylinder.
11.  The the hose (P30) and the ram (2) are repeatedly disconnected and exposed to shop or work place floors that are covered with dirt 

and debris. It is important to use the dust caps (P32) provided to prevent contaminants from entering the air and hydraulic systems.

12.  Based on continuous engagement and disengagement of the hose (P30) from the cylinder (R13-4T & R14-10T), eventually it will 
 

become necessary to add hydraulic fluid to the pump’s reservoir (P6). Completely retract the ram before adding hydraulic fluid. Do 


not overfill in order to avoid personal injury and hydraulic malfunction. Use only hydraulic jack oil, 

Chevron Hydraulic Oil AW ISO 32 or 


its equivalent Unocal Unax AW 150

. Other fluids will cause damage to the hydraulic seals.

Summary of Contents for BRK10TB

Page 1: ...AS TROUSSE DE RÉPARATION DE CARROSSERIE 4TONNE CONJUNTO PARA REPARACIÓN DE CARROCERÍAS 10TONELADAS TROUSSE DE RÉPARATION DE CARROSSERIE 10 TONNE TON BODY REPAIR KIT 10 BRK4TB BRK10TB Maximum Capacity 4 Ton 7 250 psig 10 Ton 7 250 psig Ram Minimum Height 10 5 12 7 Stroke 4 7 5 1 Fluid Capacity 12 8 oz 22 oz Net Weight 43 Lbs 68 3 Lbs Shipping Weight 45 2 Lbs 71 7 Lbs BRK4TB BRK10TB Manufactured to ...

Page 2: ...kes up the kit Refer to the Owner s Manual section titled APPLYING FORCE for typical applications and corresponding load capacities Use a pressure gauge that indicates force applied Spreader Ram is rated at 1 2 ton capacity Rubber Heads are rated at 1 2 ton capacity in the 4 ton kit and 1 ton capacity in the 10 ton kit Do not overextend the rams When using extension tubes position the shortest tub...

Page 3: ...gaged and tight so ram force is straight in order to avoid off center load conditions 5 During setup make sure the hose routing avoids kinks twists curls or bends that will impede hydraulic fluid flow Do not use the hose P30 as a means to carry the kit components Do not subject the hose P30 to any hazards such as fire extreme heat or cold sharp surfaces or heavy impact IF A HOSE P30 RUPTURES BURST...

Page 4: ...but not any moving hydraulic components 4 Do not attempt to make any hydraulic repairs unless you are a qualified hydraulic repair person that is familiar with this equipment Repairs must be performed by an authorized service center TROUBLESHOOTING Important If repairs are necessary they must be performed in a dirt free environment by qualified personnel who are familiar with this equipment PROBLE...

Page 5: ...n Matco or its authorized service centers The foregoing obligation is Matco Tools sole liability under this or any implied warranty and under no circumstances shall we be liable for any incidental or consequential damages NOTE Some states do not allow the exclusion or limitation of incidental or consequential damages so the above limitation or exclusion may not apply to you Return equipment or par...

Page 6: ...0 216mm Extension Burgundy 1 5 4 RS4T02 4BR 16 54 420mm Extension Burgundy 1 5 5 RS4T02 5BR 19 49 495mm Extension Burgundy 1 6 RS4T04ABR Ram Toe Burgundy 1 Item Part Description Qty 7 RS4T05BR Plunger Toe Burgundy 1 8 RS4T06BR Wedge Head Burgundy 1 9 RS4T07BR V Base Burgundy 1 10 RS4T08 Male Connector 1 11 RS4T09BR Serrated Saddle Burgundy 1 12 RS4T10 Rubber Head 1 13 RS4T03BR Flat Base Burgundy 1...

Page 7: ... ring 2 P5 Tie Rod 1 P6 Reservoir 1 P7 Breather Screw 1 P8 Oil Filter 1 P9 Valve Block 1 P10 Ball 3 P11 Ball 1 P12 Spring 1 P13 Washer 1 P14 Plug Screw 1 P15 Copper Ring 1 P16 Piston Seat 1 P17 Anti dust Ring 1 P18 Sealing Ring incl 18 1 18 2 1 P19 Screw 1 P20 Piston 1 P21 Ball 1 Item Part Description Qty P22 Ball Cup 1 P23 Spring 1 P24 Screw 1 P25 O ring 2 P26 Screw 1 P27 Screw Cap 1 P28 O ring 1...

Page 8: ... R11 RS4TR12 Protection Cap 1 R12 Limit Ring 1 R13 Cylinder 1 R14 Screw 1 R15 Female Coupler 1 R16 O ring 1 R17 Dust Cover 1 R18 Sealing Ring 1 N S RSRCPLR Ram Coupler incl R06 R15 R18 1 Items identified by an asterisk are available in Spreader Seal Kit RSSPRASK NOTE Items which are not identified by a part number or with an asterisk are not available separately Item Part Description Qty S1 Pin 1 ...

Page 9: ...T02 3BR 8 50 216mm Extension Burgundy 1 5 4 RS10T02 4BR 16 54 420mm Extension Burgundy 1 06 07 08 09 10 11 05 1 05 2 05 3 05 4 12 13 04 01 02 03 P39 P40 P41 P42 14 Item Part Description Qty 06 RS10T04ABR Ram Toe Burgundy 1 07 RS10T05BR Plunger Toe Burgundy 1 08 RS10T06BR Wedge Head Burgundy 1 09 RS10T07BR V Base Burgundy 1 10 RS10T08 Male Connector 1 11 RS10T09BR Serrated Saddle Burgundy 1 12 RS10...

Page 10: ...eat 1 P17 Anti dust Ring 1 P18 Sealing Ring incl 18 1 18 2 1 P19 Screw 1 P20 Piston 1 P21 Ball 1 Item Part Description Qty P22 Ball Cup 1 P23 Spring 1 P24 Screw 1 P25 O ring 2 P26 Screw 1 P27 Screw Cap 1 P28 O ring 1 P29 RSP15BR Release Valve Burgundy 1 P30 RSHS Hose 1 P31 RSP17 Male Coupler 1 P32 RSP18 Hose Dust Cover 1 P33 Magnet 1 P34 RS10THNDLBR Handle Burgundy 1 P35 Handle Sleeve 1 P36 Pin 1 ...

Page 11: ...tem Part Description Qty R01 RS10TR01 Cover 1 R02 Circlip 1 R03 Piston Rod 1 R04 Circlip 1 R05 Bushing 1 R06 Sealing Ring Set 1 R07 Pin 1 R08 Circlip 1 R09 Nut 1 R10 Spring 1 R11 RS10TR12 Screw 1 R12 Protection Cap 1 R13 Limit Ring 1 R14 Cylinder 1 R15 Nut 1 R16 Female Coupler 1 R17 O ring 1 R18 Dust Cap 1 R19 Sealing Ring 1 N S RSRCPLR Ram Coupler incl R15 R19 1 Item Part Description Qty S1 Pin 1...

Page 12: ... 250 psig Altura mínima del pistón 10 5 12 7 Recorrido 4 7 5 1 Capacidad Fluida 12 8 oz 22 oz Peso de Producto 43 Lbs 68 3 Lbs Peso de embarque 45 2 Lbs 71 7 Lbs BRK4TB BRK10TB Cumple con las Normas de Seguridad ASME PASE 2019 TON BODY REPAIR KIT 4 CONJUNTO PARA REPARACIÓN DE CARROCERÍAS 4TONELADAS TROUSSE DE RÉPARATION DE CARROSSERIE 4TONNE CONJUNTO PARA REPARACIÓN DE CARROCERÍAS 10TONELADAS TROU...

Page 13: ...ad OSHA estatales y locales El usuario y los transeúntes deben usar protección para los ojos que cumpla con ANSI Z87 1 y las normas de OSHA No use más allá de la capacidad nominal Cuando se usan accesorios y adaptadores con el kit la capacidad nominal del kit no debe ser mayor que la capacidad nominal del componente de menor calificación o la combinación de componentes que compone el kit Consulte ...

Page 14: ...NCIA APLICABLE PARA EL ENSAMBLAJE DE LOS COMPONEN TES para el ensamblaje de accesorios y tubos de extensión típicos y preste mucha atención a las clasificaciones de carga cor respondientes de ciertas conexiones de accesorio El uso de tubos de extensión pistones o dedos de émbolo reduce de manera drástica la capacidad del sistema hidráulico Al momento de usar UNOS tubos de extensión coloque los tub...

Page 15: ... polvo abrasivo ni a ningún otro elemento dañino Previo al uso el equipo debe ser limpio de agua nieve arena y arenilla Previo al uso el gato debe estar limpio de agua nieve arena arenilla aceite grasa y otro material foráneo 2 Tomando en cuenta el encaje y desencaje continuo de la manguera del cilindro eventualmente será necesario agregar líquido hidráu lico al depósito de la bomba Retracte el pi...

Page 16: ...ls o a un centro de servicio autorizado con el flete prepagado Asegúrese de incluir su nombre y dirección la comprobación de la fecha de compra y la descripción del defecto sospechado Si usted tiene cualquier duda acerca del servicio de garantía escriba por favor a Matco Tools Stow OH 44224 Esta garantía le brinda derechos legales específicos y usted también podría contar con derechos adicionales ...

Page 17: ...4TONELADAS TROUSSE DE RÉPARATION DE CARROSSERIE 4TONNE CONJUNTO PARA REPARACIÓN DE CARROCERÍAS 10TONELADAS TROUSSE DE RÉPARATION DE CARROSSERIE 10 TONNE TON BODY REPAIR KIT 10 BRK4TB BRK10TB Ram Capacité 4 Ton 7 250 psig 10 Ton 7 250 psig Hauteur minimale du vérin 10 5 12 7 Course 4 7 5 1 Capacité en fluide 12 8 oz 22 oz Poids 43 Lbs 68 3 Lbs Poids d expédition 45 2 Lbs 71 7 Lbs BRK4TB BRK10TB Con...

Page 18: ...rité locales L utilisateur et les personnes présentes doivent porter une protection oculaire conforme aux normes ANSI Z87 1 et OSHA Ne pas utiliser au delà de la capacité nominale Lorsque des accessoires et des adaptateurs sont utilisés avec le kit la capacité nominale du kit ne doit pas être supérieure à la capacité nominale du composant ou de la combinaison de composants dont la valeur nominale ...

Page 19: ... du système hydraulique Lors de l utilisation de rallonges placer les tubes les plus courts aux extrémités de l installation 3 La pompe 1 peut être utilisée en position horizontale ou verticale mais elle doit pointer vers le bas lorsqu elle est utilisée en posi tion verticale 4 S assurer que tous les raccords hydrauliques et d accessoires sont bien installés et serrés de manière à ce que la force ...

Page 20: ...3 Le propriétaire de la trousse doit s assurer que les étiquettes apposées sur le produit demeurent propres et lisibles Utiliser une solution savonneuse douce pour nettoyer les surfaces externes des pièces de la trousse mais pas les composants hydrauliques mobiles 4 Ne pas essayer de réparer des composants hydrauliques à moins d être un technicien qualifié en réparation de composants hydrauliques ...

Page 21: ...o ou ses services de réparations autorisés Cette obligation est la responsabilité exclusive de Matco Tools en vertu de cette garantie ou de toute autre garantie explicite et nous ne pouvons en aucun cas être tenus responsables de dommages indirects ou accessoires AVIS certaines provinces ne permettent pas l exclusion ou la limitation de dommages indirects ou accessoires il est donc possible que l ...

Reviews: