background image

CLEANING AND MAINTENANCE

1. Submerge the front end of the gun in solvent just until the fluid connection is covered.

2. Paint that has built up on the gun should be removed using a bristle brush and solvent.

3. Never submerge all of the spray gun in solvent. This will dissolve the lubricant in the leather packing

and on wear surfaces, causing them to dry out and resulting in difficult operation and faster wear. Air
passages in the gun will become clogged with dirty solvent.

4. Using a rag moistened with solvent, wipe down the outside of the gun.

5. Oil gun daily. Use a drop of lightweight machine oil on:

A. External Needle Pack Adjustment (Packing Nut)

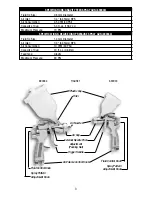
See FIGURE 1 on page 3 for location of above point.

SERVICE

• Tool service must be performed only by qualified repair personnel. Service or maintenance performed

by unqualified personnel could result in a risk of injury.

• When servicing a tool, use only identical replacement parts. Follow instructions in the Maintenance

section of this manual. Use of unauthorized parts or failure to follow Maintenance Instructions may
create a risk of electrical shock or injury.

7

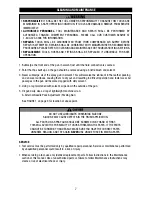
DO NOT USE LUBRICANTS CONTAINING SILICONE.

SILICONE MAY CAUSE DEFECTS IN THE FINISH APPLICATION.

ALL PARTS ON A SPRAY GUN SHOULD BE SCREWED IN BY HAND AT FIRST.

THIS WILL AVOID THE POSSIBILITY OF CROSS THREADING THE PARTS. IF THE PARTS 
CANNOT BE TURNED BY HAND EASILY, MAKE SURE YOU HAVE THE CORRECT PARTS,
UNSCREW, REALIGN, AND TRY AGAIN.

NEVER

USE UNDUE FORCE IN MATING PARTS.

• 

RESPONSIBILITY.

IT SHALL BE THE TOOL OWNER'S RESPONSIBILITY TO ASSURE THAT TOOLS ARE

MAINTAINED IN A SAFE OPERATING CONDITION. IF TOOLS ARE DAMAGED, REMOVE FROM SERVICE
IMMEDIATELY.

• 

AUTHORIZED PERSONNEL.

TOOL MAINTENANCE AND REPAIR SHALL BE PERFORMED BY 

AUTHORIZED, TRAINED, COMPETENT PERSONNEL. PLEASE CALL OUR CUSTOMER SERVICE AT 
1-800-423-3598 FOR INFORMATION.

• 

REPAIRS.

TOOLS SHALL BE DISCONNECTED FROM THEIR COMPRESSED AIR SUPPLY BEFORE

REPAIR IS ATTEMPTED. REPAIRS SHALL BE CONSISTENT WITH MANUFACTURER'S RECOMMENDED 
PROCEDURES. PLEASE REFER TO CLEANING AND MAINTENANCE OR TROUBLESHOOTING SECTIONS.

• 

REPLACEMENT.

TOOLS, HOSES AND FITTINGS SHALL BE REPLACED IF UNSUITABLE FOR SAFE

OPERATION.

Summary of Contents for 690043

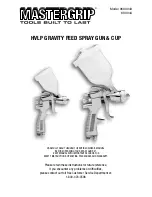
Page 1: ...EFORE OPERATING YOUR SPRAY GUN SET KEEP MANUAL WITH IMPORTANT RECORDS FOR SAFETY INSTRUCTIONS OPERATING PROCEDURES AND WARRANTY Please retain these instructions for future reference If you encounter a...

Page 2: ...ertain that all connections are secure High sound levels can cause permanent hearing loss Protect yourself from noise Noise levels vary with work surface Wear ear protectors When possible secure work...

Page 3: ...E SPRAY GUN 690044 Fluid Tip Size 1 4 mm Diameter Air Inlet 1 4 6 35mm NPS Air Consumption 10 CFM 60 PSI Capacity of Cup 20 fl oz 0 6 liter Feed Type Gravity Maximum Pressure 90 PSI 3 Plastic Cup Filt...

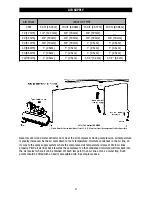
Page 4: ...re it can be drained off Each low point in an air line acts as a water trap Such points should be fitted with an easily accessible drain See diagram above 4 AIR FLOW LENGTH OF PIPE CFM 50 ft 15 24m 10...

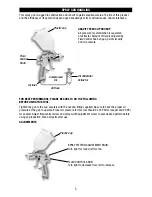
Page 5: ...THE FOLLOWING BEFORE USING THIS TOOL Tighten the gun to the cup securely with the nut and fitting supplied Be sure to have the proper air pressure at the gun to operate Proper air pressure for this to...

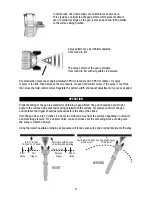
Page 6: ...pray as needed OPERATION Proper handling of the gun is essential for obtaining a good finish The gun should be held at right angle to the surface being covered moving parallel with the surface For pre...

Page 7: ...nual Use of unauthorized parts or failure to follow Maintenance Instructions may create a risk of electrical shock or injury 7 DO NOT USE LUBRICANTS CONTAINING SILICONE SILICONE MAY CAUSE DEFECTS IN T...

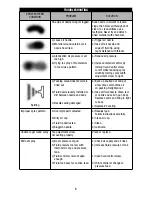
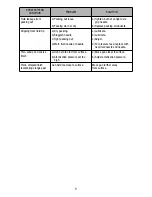
Page 8: ...ried out b Fluid nozzle loosely installed or dirt between nozzle and body c Needle sealing damaged a Back up knurled nut and put a few drops of machine oil on packing Retighten nut b Take off fluid no...

Page 9: ...b Sluggish needle c Tight packing nut d Worn fluid nozzle or needle a Lubricate b Lubricate c Adjust d For pressure feed replace with new fluid nozzle and needle Thin sandy and coarse finish a Gun hel...

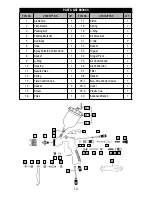
Page 10: ...ontral Knob 1 23 Trigger 1 8 Gasket 1 24 Trigger Pivot 1 9 0 Ring 1 25 Air Control Knob 1 10 Housing 1 26 Air Connection 1 11 Needle Valve 1 27 Filter 1 12 Spring 1 28 Gasket 1 13 Fluid Control Knob 1...

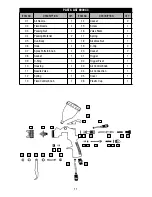
Page 11: ...Gun Body 1 18 Air Valve Nut 1 06 Hook 1 19 C Clip 2 07 Spray Pattern Knob 1 20 Gasket 2 08 Gasket 1 21 Trigger 1 09 0 Ring 1 22 Trigger Pivot 1 10 Housing 1 23 Air Control Knob 1 11 Needle Valve 1 24...

Page 12: ...FOR CUSTOMER SERVICE 1 800 423 3598 WEAR SAFETY GLASSES WARNING 1431 VIA PLATA LONG BEACH CA 90810 1462 Copyright 2004 Alltrade Tools LLC Rev 1 www handtoolonline com...

Reviews: