1
. Remove furniture from the area to
be cleaned. Large pieces can be moved
to opposite end of the room from
where you start cleaning.
2.
Vacuum carpet thoroughly to
remove all loose debris.
3.
Make sure all switches are in the
OFF
position.
4.
Using the bucket shipped with unit,
mix cleaning chemical following the
direction on the label. Make sure The
bucket is
CLEAN
and always clean the
bucket after each use.
5.
If you are using heated water, the
temperature should not exceed 120° F.
This improves the cleaning effective-
ness when removing oil or grease from
the carpet.
6.
Lift up the solution tank cover and fill
solution tank with the cleaning mixture.
Replace cover.
7.
Before plugging power cord into
grounded outlet all switches must be in
the OFF position.
NOTE:
A non-foaming chemical must be
used. Carpet that has been previously
cleaned may have a heavy build-up of old
shampoo residue which may cause
excessive foaming in the recovery tank
and could damage the vacuum motor.
Use a defoaming agent if this occurs.
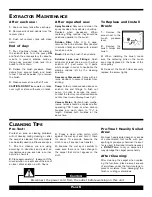
To Operate Extractor
1.
Position the extractor where you are
going to start cleaning.
2.
Turn solution knob to the horizontal
position.
3.
Turn
ON
switches in
the following
order.
(A) Vacuum
(B) Brush
(C) Solution
4.
When the brush is switched
ON
, the
extractor operates in the forward direc-
tion. To operate backwards, squeeze
lever (D) on right side of handle to
reverse brush action.
5.
Clean slowly and evenly in the forward
and backward direction.
6.
Turn
OFF
the solution switch
approximately 12 inches before com-
pleting each pass. This allows dis-
pensed solution to be recovered.
7.
Each pass should overlap the previous
pass by 2
1
/
2
” to 5”. After operating the
extractor for a while, some streaking
may occur. (See Trouble Shooting Guide,
Pg 8)
8.
This extractor
WILL NOT
shut off
automatically when recovery tank is full.
It is important to visually inspect the
tank so it
DOES NOT
over fill or water
may get into the motor.
9.
Work from light areas to shade areas,
i.e from windows towards the door.
10.
Work away from cleaned surface
towards the unclean surface.
Brush
Pressure
When finished
cleaning or stop
using extractor
temporarily, the
brush pressure
should be relieved.
1.
Press the red lever on the right-hand
side of the extractor downward.
This will increase the service life of the
brush.
To Empty Recovery
Tank
1.
Turn
OFF
solution, brush and vacuum
switches.
2
Unhook the drain hose from rear of
extractor.
3.
Position the hose over a bucket or
drain, and remove cap. Rinse tank with
clean water, replace cap.
To Empty Solution Tank
Connect the PVC drain hose shipped
with the extractor to the accessory dis-
connect and turn on the solution switch.
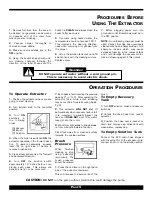
DO NOT operate extractor without a cord ground pin.
This is necessary to avoid electric shock.
W
ARNING
:
P
AGE
5
P
ROCEDURES
B
EFORE
U
SING
T
HE
E
XTRACTOR
O
PERATION
P
ROCEDURES
CAUTION:
DO NOT
run the pump without solution,this could damage the pump.


