


headline bars
continuation tabs
notes
warnings
headline bars
continuation tabs
notes
warnings
headline bars
continuation tabs
notes
warnings
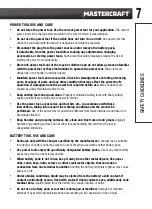
15
OPERA
TING INSTRUCTIONS
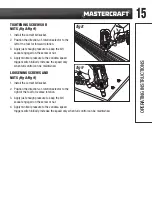
TIGHTENING SCREWS OR
NUTS
(fig 8/fig 9)
1. Install the correct bit/socket.
2. Position the direction-of-rotation selector to the
left of the tool for forward rotation.
3. Apply just enough pressure to keep the bit/
socket engaged on the screw or nut.
4. Apply minimal pressure to the variable-speed
trigger switch initially. Increase the speed only
when full control can be maintained.
LOOSENING SCREWS AND
NUTS
(fig 8/fig 9)
1. Install the correct bit/socket.
2. Position the direction-of-rotation selector to the
right of the tool for reverse rotation.
3. Apply just enough pressure to keep the bit/
socket engaged on the screw or nut.
4. Apply minimal pressure to the variable-speed
trigger switch initially. Increase the speed only when full control can be maintained.
fig 8
fig 9


