background image

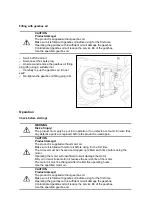
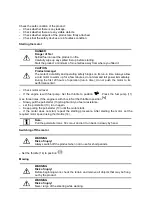
Filling with gearbox oil   


CAUTION 
Product damage!   

The product is supplied without gearbox oil. 
Make sure it is filled with gearbox oil before using for the first time. 
Operating the gearbox with insufficient oil will damage the gearbox. 
Contaminated gearbox oil will reduce the service life of the gearbox. 
Use the specified gearbox oil. 

 
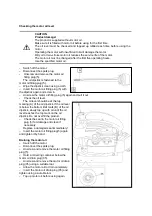
–  Switch off the motor.  
–    Disconnect the spark plug.   
–    Unscrew and remove the gearbox oil filling 
plug (36) using a suitable tool.   
–    Carefully top up the gearbox oil. Do not 
spill!  
–    Re-tighten the gearbox oil filling plug (36).   


Operation 


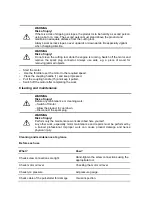
Check before starting!   


WARNING 
Risk of injury!


The product must only be put into operation if no defects are found. Ensure that 
any defective parts are replaced before the product is used again.   


CAUTION 
Product damage!


The product is supplied without motor oil. 
Make sure it is filled with motor oil before using for the first time. 
The oil level must be checked and topped up refilled each time before using the 
motor. 
Operating the motor with insufficient oil will damage the motor. 
Dirty oil or two-stroke motor oil reduces the service life of the motor. 
The motor oil must be changed after the first five operating hours. 
Use the specified motor oil.


CAUTION 
Product damage!


The product is supplied without gearbox oil. 
Make sure it is filled with gearbox oil before using for the first time. 
Operating the gearbox with insufficient oil will damage the gearbox. 
Contaminated gearbox oil will reduce the service life of the gearbox. 
Use the specified gearbox oil. 

Summary of Contents for CJF-1001A

Page 1: ...sickle bar mower OPERATING INSTRUCTIONS ...

Page 2: ...ation signs are clearly marked in the instructions for use The following symbols are used DANGER Type and source of danger Failure to observe the danger sign can put life and limb at risk WARNING Type and source of danger Failure to observe the danger sign can put life and limb at risk CAUTION Type and source of danger This danger sign warns against damage to the product environment or other prop ...

Page 3: ... of fatigue illness alcohol medication and drugs is irresponsible Only the maintenance work and trouble shooting activities described here may be carried out All other work must be carried out by Dealer s Service Use only genuine spare parts Only these spare parts are designed and suitable for the product The use of other spare parts not only invalidates the warranty it also presents a danger to y...

Page 4: ...rs fit for the purpose Only refuel outdoors and do not smoke during the refuelling process Petrol must be topped up before the motor is started Do not open the petrol cap or refill with petrol while the motor is running or the motor is hot Never attempt to start the motor if petrol has been spilt Instead move the product away from the contaminated area Avoid all attempts to start the motor until t...

Page 5: ...e tank never store the product in a building in which petrol vapours may come into contact with naked flames or sparks or can be easily ignited Allow the motor to cool down before storing product in enclosed spaces To avoid the risk of fire keep the motor and exhaust away from vegetable matter and leaking grease oil For safety reasons always replace worn or damaged parts Should the tank need drain...

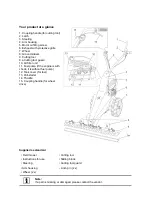
Page 6: ... Cutting tool guard 10 Air filter unit 11 Fuel pump if the engine is with chock it is without fuel pump 12 Tank cover for fuel 13 Pull starter 14 Throttle 15 Coupling handle for wheel drive Supplied as standard Note If a part is missing or damaged please contact the vendor Field mower Cutting tool Instructions for use Sliding block Steering Cutting tool guard Arm housing Linch pin 2 x Wheel 2 x ...

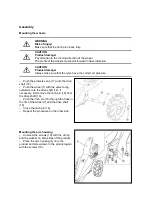
Page 7: ...rotectve cap 17 onto the drve shaft 16 Push the wheel 7 with the valve facng outwards onto the drive shaft 16 If necessary first remove the linch pin 18 from the drive shaft 16 Push the linch pin 18 through the hoes in the rim of the wheel 7 and the drive shaft 16 Close the linch pin 18 Repeat the procedure on the other side Mounting the arm housing Unscrew the screws 19 with the circlip and the w...

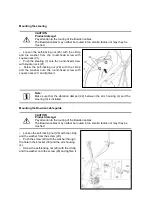
Page 8: ...onto the round head screw with square neck 21 and tighten it Note Make sure that the vibration damper 22 between the arm housing 4 and the steering 3 is installed Mounting the Bowden cable guide CAUTION Product damage Pay attention to the routing of the Bowden cables The Bowden cables may neither be routed in too small a radius not may they be crushed Loosen the self locking nut 28 with the circli...

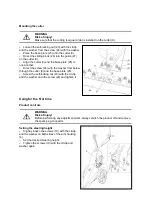
Page 9: ...er Direct the screw 24 with the washer from below through the cutter 9 and the base plate 25 Screw the self locking nut 23 with the circlip and the washer onto the screw 24 and tighten it Using for the first time Product controls WARNING Risk of injury Before performing any adjustment work always switch the product off and remove the spark plug connector Setting the steering height Slightly loosen...

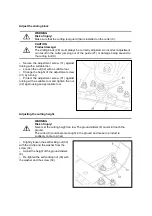
Page 10: ...e tool Change the height of the adjustment screw 31 by turning Protect the adjustment screw 31 against turning with a suitable tool and tighten the nut 32 again using an appropriate tool Adjusting the cutting height WARNING Risk of injury Never set the cutting height too low The ground sliders 8 must still touch the ground The cutter 9 could become caught in the ground and cause to product to sudd...

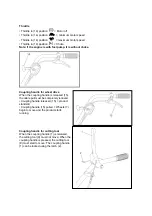
Page 11: ...rive When the coupling handle is released 15 the cable pull must be completely relieved Coupling handle released 15 product standstill Coupling handle 15 pulled Wheels 7 begin to move and the product starts running Coupling handle for cutting tool When the coupling handle 1 is released the cutting tool 9 must not move When the coupling handle is pressed the cutting tool 9 must start to move The co...

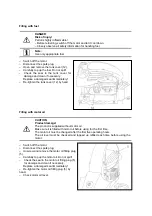
Page 12: ...ank cover 12 by hand Filling with motor oil CAUTION Product damage The product is supplied without motor oil Make sure it is filled with motor oil before using for the first time The motor oil must be changed after the first five operating hours The oil level must be checked and topped up refilled each time before using the motor Switch off the motor Disconnect the spark plug Unscrew and remove th...

Page 13: ...ects are found Ensure that any defective parts are replaced before the product is used again CAUTION Product damage The product is supplied without motor oil Make sure it is filled with motor oil before using for the first time The oil level must be checked and topped up refilled each time before using the motor Operating the motor with insufficient oil will damage the motor Dirty oil or two strok...

Page 14: ...performance limit Check motor oil level If the engine is with fuel pump Set the throttle to position Press the fuel pump 11 max three times If the engine is with chock Set the throttle to position Slowly pull the pull starter 13 straight until you feel a resistance Let the pull starter 13 run in again Keep pulling the pull starter 13 until the motor starts If the motor does not start repeat the st...

Page 15: ...e 1 and keep it pressed Pull the coupling handle 15 and keep it pulled Switch off the motor after completing the work Cleaning and maintenance WARNING Risk of injury Before any maintenance or cleaning work Switch off motor Allow the product to cool down Disconnect the spark plug WARNING Risk of injury Perform only the maintenance work described here yourself Any other work especially motor mainten...

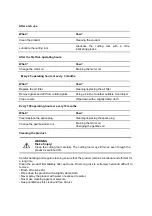
Page 16: ...onths What How Clean replace the spark plug Cleaning replacing the spark plug Change the gearbox motor oil Draining the motor oil Changing the gearbox oil Cleaning the product WARNING Risk of injury Clean the cutting tool carefully The cutting tool may still move even though the product is switched off Careful handling and regular cleaning ensure that the product remains functional and efficient f...

Page 17: ...stick again and screw in Unscrew the motor oil filling plug 5 again and pull it out Check the oil level The oil level should be at the top marking A of the oil dipstick If the oil level is below the bottom limit mark B of the oil dipstick slowly top up with oil until the oil level reaches the top mark on the oil dipstick Do not overfill the product Check the seal in the motor oil filling plug 5 fo...

Page 18: ...Switch off the motor Disconnect the spark plug Remove the bolts and air filter cover Be careful to prevent dirt and debris from falling into the air filter base opening Remove the foam element or paper element Check clean or replace the damaged air cleaner parts Reinstall the air filter parts then bolt and screw down it WARNING Never clean the air filter element with gasoline or low flash point de...

Page 19: ...eplace the spark plug connector 40 firmly on the spark plug Changing the gearbox oil Draining the gearbox oil Filling with gearbox oil Storage and transport WARNING Risk of injury The motor must be switched off during maintenance and cleaning work and when transporting without its own drive Storage Let the product cool before storing Store the product in a dry well ventilated place Longer downtime...

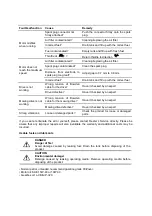
Page 20: ... remedy most of these yourself Please consult the following table before contacting the dealer You will save yourself a lot of trouble and possibly money too Fault malfunction Cause Remedy Tank empty Filling with fuel Excess fuel in the combustion chamber Screw out the spark plug dry off the electrode and start with throttle fully open Incorrect fuel Drain tank and fill up with the correct fuel Th...

Page 21: ...hecked by an expert Drive is not working Drive defective Have it checked by an expert Wrong tension of Bowden cable for the mowing drive Have it checked by an expert Mowing drive is not working Mowing drive defective Have it checked by an expert Strong vibrations Loose or damaged parts Check the product for loose or damaged parts If you cannot eliminate the error yourself please contact Dealer s S...

Reviews: