Master Chef 085-3230-2 Assembly, Use And Care Manual Download Page 17

TF2115701-MC-00 Eng                                                          Page 17 of 19                                                                  20161205-Ver.4 


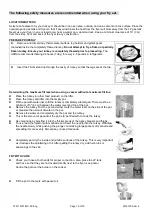
Light the burner unit and heat the oil to 325°F (160°C). Never leave the fryer 
unattended at any time. 


Check the oil using a deep fry temperature gauge. If it has reached 325°F 
(160°C), you are ready to start deep frying. Monitor the temperature 
throughout the frying process to maintain 325°F (160°C) 

– never let the oil 

temperature get hotter than 325°F (160°C). 


If the oil exceeds 400°F (204°C) or if the oil begins to smoke, immediately 
turn the burner off. 


Wear long, insulated, flame-retardant gloves to protect your hands and arms. 
Use the lift handle to slowly lower the turkey into the oil. Pause at several 
points before reaching the bottom of the pot. 


Never drop food or accessories into hot cooking liquid. Lower food and 
accessories slowly into the cooking liquid in order to prevent splashing or 
overflow. When removing food from the appliance, care shall be taken to 
avoid burns from hot cooking liquids. 


Adjust the burner to maintain 325°F (160°C). Monitor the fryer during the 
entire process to assure a safe frying experience. Do not leave fryer 
unattended. 


Cook until a golden brown color is achieved. Normal cooking time is 3 1/2 
minutes per pound. 


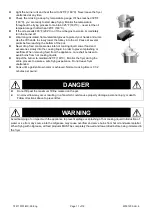
DANGER 


Do not fill past the maximum fill line marked on the pot. 


An oil overflow may occur resulting in a fire which could cause property damage, personal injury or death. 

Follow directions above to prevent this.


WARNING 


Avoid bumping of or impact with the appliance to prevent spillage or splashing of hot cooking liquid. Introduction of 

water or ice from any source into the oil/grease may cause overflow and serve burns from hot oil and water splatter. 

When frying with oil/grease, all food products MUST be completely thawed and towel dried before being immersed in 

the fryer.


Summary of Contents for 085-3230-2

Page 1: ...installer or person assembling this appliance Leave this manual with this appliance for future reference This instruction manual contains important information necessary for the proper assembly and sa...

Page 2: ...ause property damage personal injury or death DANGER 1 Never operate this appliance unattended 2 Never operate this appliance within 10 3 0 m of any structure combustible material or other gas cylinde...

Page 3: ...se may cause overflow and severe burns from hot oil and water splatter When frying with oil grease all food products MUST be completely thawed and towel dried before being immersed in the fryer 14 Do...

Page 4: ...liquid Never drop food or accessories into hot cooking liquid Lower food and accessories slowly into the cooking liquid in order to prevent splashing or overflow When removing food from the appliance...

Page 5: ...n tanks will vary by temperature A frosty regulator indicates gas overfill Immediately close LP tank valve and call LP gas dealer for assistance Do not release liquid propane LP gas into the atmospher...

Page 6: ...death Never attempt to attach this appliance to the self contained LP gas system of a camper trailer or motorhome The pressure regulator and hose assembly supplied with the appliance must be used Repl...

Page 7: ...cooker while lighting Step Procedure Illustration 1 Read all instructions before lighting 2 Turn regulator control valve to OFF position 3 Fully turn timer control knob clockwise 4 Fully open LP tank...

Page 8: ...flame to go out 8 If ignition does not occur in 5 seconds turn the regulator and LP tank valve off wait 5 minutes and repeat the lighting procedure 9 Check the position of thermocouple make sure the f...

Page 9: ...eing put into operation The replacement hose assembly shall be that specified by the manufacturer Clean and inspect the pressure regulator and hose assembly prior to use Cleaning the Burner CAUTION Ch...

Page 10: ...r enclosed free and clear from debris Clean all cooking surfaces of vessels aluminum pots and pan with warm soapy water and a nylon cleaning pad to avoid oxidation corrosion and rusting CAUTION All cl...

Page 11: ...TF2115701 MC 00 Eng Page 11 of 19 20161205 Ver 4 Product Diagram 3A...

Page 12: ...Legs 4 pcs 3 Pot lid 1 pc 4 36 qt 34 L aluminum pot 1 pc 5 Burner 1 pc 6 Timer control box 1 pc 7 Heat shield 1 pc 8 T star stand 1 pc 9 Lifter 1 pc 10 Strainer basket 1 pc 11 15 38 1 cm Thermometer...

Page 13: ...M6x12 bolts A per leg 2 Attach the burner 5 to automatic shut off valve in the timer control box 6 by turning the burner clockwise Do not fully tighten the burner to the valve tighten until 3 threads...

Page 14: ...ith rectangle lip and burner support bar G 5 Align timer control box 6 to the timer box support bar H and fix it with 2 pieces M6x12 screws by going through the support bar H and then to the time box...

Page 15: ...oximately 212 F 20 F 100 C 10 C If it does not function properly obtain a replacement thermometer specified by the manufacturer before using the appliance Prior to lighting position thermometer clip s...

Page 16: ...e turkey or other food product on the lifter Place the turkey and lifter into the empty pot Fill the pot with water just until the turkey is completely submerged There must be a minimum of 3 8 cm betw...

Page 17: ...nto the cooking liquid in order to prevent splashing or overflow When removing food from the appliance care shall be taken to avoid burns from hot cooking liquids Adjust the burner to maintain 325 F 1...

Page 18: ...e is not in direct flame path of burner Ensure the thermocouple is assembled in right position and the nut is tightened on the thermocouple See Assembly Instructions step 3 for detail Make sure the fl...

Page 19: ...nated shipping address 5 This limited warranty is given to and covers the ORIGINAL PURCHASER ONLY and such coverage terminates 1 year from the date of purchase 6 DAMAGE LIMITATION WARNING IN NO EVENT...

Reviews: