background image

Spanish

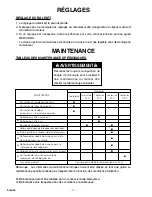
— 6 —

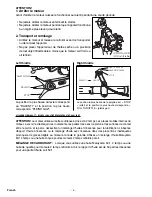
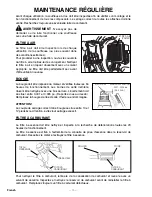
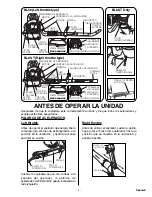
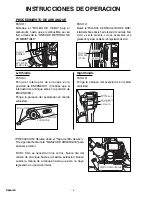
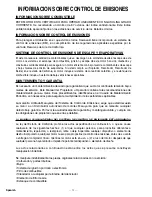
VELOCIDAD EN

VACIO

ALTA VELOCIDAD

PARADA

¡PRECAUCIÓN!

1. Apagado del motor

Antes de apagar el motor, póngalo en marcha al vacío por un corto tiempo.

• Nunca apague el motor cerrando el regulador de aire.
• Nunca apague el motor mientras esté operando a velocidad

mayor de la de marcha al vacío.

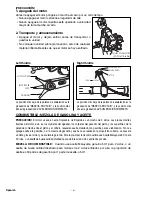
2. Transporte y almacenamiento

• Apague el motor y déjelo enfriar antes de transportar o

guardar la unidad.

• No coloque la unidad sobre grama seca o cerca de cualquier

material inflamable antes de que el motor se haya enfriado.

PALANCA DE ACELERACION

(FOR Left throttle)

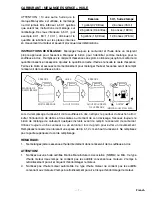
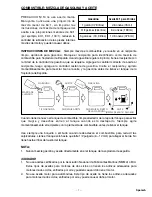
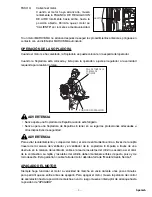
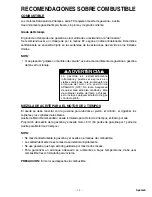
COMBUSTIBLE: MEZCLA DE GASOLINA Y ACEITE

PRECAUCION! 

El motor usado en esta Sopladora de Espalda es un diseño de 2 ciclos. Las piezas móviles

internas del motor, esto es, los cojinetes del cigüeñal, los cojinetes del pasador del pistón y las superficies de la
pared de contacto entre el pistón y el cilindro, requieren aceite mezclado con gasolina para su lubricación. Si no se
agrega aceite a la gasolina, o si la mezcla de gasolina y aceite no se realiza en la proporción correcta, se causará
un daño grave al motor y se anulará la garantía. Para la pre-mezcla de combustible, use Aceite Maruyama 50:1 para
2 Ciclos, o un aceite de buena calidad diseñado para motores de 2 ciclos, enfriados por aire.

MEZCLA DE COMBUSTIBLE:  

Cuando use aceite Maruyama genuino 50:1 para 2 ciclos, o un

aceite de buena calidad diseñado para motores de 2 ciclos enfriados por aire, la proporción de
aceite es 50 partes de gasolina por 1 parte de aceite, o 50:1.

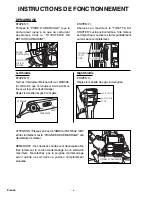
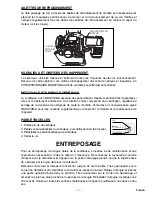
La posición más baja de la palanca de aceleración es la
graduación de "MARCHA EN VACIO", y la posición más
alta es la graduación de "ACELERACIÓN COMPLETA".

Left throttle

La posición más baja de la palanca de aceleración es la
graduación de “MARCHA EN VACIO”, y la posición más
alta es la graduación de “ACELERACIÓN COMPLETA”.

Right throttle

HIGH SPEED
IDLE SPEED

STOP

IDLE HIGH

Summary of Contents for BL56

Page 1: ...e t a s s i m i l e z l a t o t a l i t é d e c e m a n u e l a v a n t d u t i l i s e r c e t a p p a r e i l L e a y e n t i e n d a e s t e m a n u a l a f o n d o a n t e s d e u s a r e s t e a p a r a t o ...

Page 2: ...ceded by symbols or key words The following is an explanation of those symbols and key words and what they mean to you Warning label Always remove dirt or mud to make the indications legible The following alarm labels are attached Alarm label Foreword 1 Before operation 12 Safety symbols 1 Operating instructions 15 Warranty 2 Regular maintenance 17 Safety instructions 10 Storage 18 Specifications ...

Page 3: ...arranted for the period of time up to the first scheduled replacement point for that part Maruyama Mfg Co Inc is liable for damages to other engine components caused by the failure of a warranted part still under warranty The purchaser is responsible for the performance of the required maintenance as defined by Maruyama Mfg Co Inc in the Owner s Operator s Manual EMISSION RELATED PARTS WARRANTY In...

Page 4: ...ate previously manufactured products This warranty provides you with specific legal rights which may vary from state to state It is the Owner s and Dealer s responsibility to make sure the Warranty Registration Card is properly filled out and mailed to Maruyama U S Inc Proof of purchase and registration will be required in order to obtain warranty service To locate an Authorized Maruyama Servicing...

Page 5: ...s to the original retail purchaser and each subsequent purchaser that the small off road engine including all parts of its emission control system is 1 designed built and equipped to conform to the U S EPA and Environment Canada emission standards at the time of sale to the original retail purchaser and 2 free from defects in materials and workmanship that may keep it from meeting the requirements...

Page 6: ...ritten warranty This warranty is applicable only where the California U S EPA or Environment Canada emission control system warranty regulation is in effect Part II CALIFORNIA EMISSIONS CONTROL WARRANTY STATEMENT Your Warranty Rights and Obligations The California Air Resources Board and Maruyama are pleased to explain the emission control system warranty on your model year 2015 2016 small off roa...

Page 7: ...c Maintenance Chart is warranted for the period of time before the first scheduled replacement date for that part If the part fails before the first scheduled replacement the part will be repaired or replaced by Maruyama at no charge to the owner provided the repair or replacement is performed at a warranty station Any such part repaired or replaced under warranty will be warranted for the remaind...

Page 8: ...This warranty is applicable only where the California U S EPA or Environment Canada emission control system warranty regulation is in effect Warranted Parts List The following is the emission warranty parts list for your small off road engine i Fuel Metering System A Carburetor and internal parts and or pressure regulator or fuel injection system B Cold start enrichment system C Intake valve s ii ...

Page 9: ...ons of the engine manufacturer b As the small off road engine owner you should be aware however that Maruyama Manufacturing Company may deny you warranty coverage if your small off road engine or a part has failed due to abuse neglect improper maintenance or unapproved modifications c You are responsible for presenting your small off road engine to a Maruyama Manufacturing Company Inc service cent...

Page 10: ... be hoses belts and connectors and other emission related assemblies Where a warrantable condition exists Maruyama Manufacturing Company Inc will repair your small off road engine at no cost to you including diagnosis parts and labor MANUFACTURER S WARRANTY COVERAGE The 1995 and later small off road engines are warranted for two years If any emission related part on your engine is defective the pa...

Page 11: ... times 15 If the power blower should start to vibrate abnormally stop the engine immediately and check for the cause Vibration is generally a warning of trouble 16 Avoid using the power blower near rocks gravel stones and similar matter in order to avoid dangerous flying debris 17 Use the power blower only in daylight or good artificial light 18 Do not allow bystanders in work area 19 Do not opera...

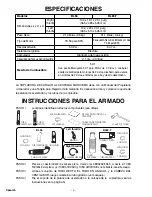
Page 12: ... 11 English SPECIFICATIONS Models Dimensions L x W x H Right throttle Left throttle Dry Weight Engine Type Displacement Ignition System Carburetor Fuel Tank Capacity Fuel Mixture BL56 14 4 x 19 1 x 20 1 in 365 x 485 x 535 mm 14 4 x 20 x 20 1 in 365 x 510 x 535 mm 21 0 lbs 9 5 kg TK53 for EPA 53 2 cc BL85 T 21 1 lbs 9 6 kg Kawasaki 2 Stroke Air cooled TK65 for EPA 64 7 cc Electric All position diap...

Page 13: ...ce When the power blower is strapped to the back of the operator the throttle lever of the Standard is located on the left side THROTTLE LEVER THROTTLE ARM KNOB STOP SWITCH Right throttle Before operating the power blower release the knob knove the throttle grip to the position in the illustration and tighten knob to secure in place When the power blower is strapped to the back of the operator the...

Page 14: ...nkshaft bearings piston pin bearings and piston to cylinder wall contact surfaces require oil mixed with the gasoline for lubrication Failure to add oil to the gasoline or failure to mix oil with the gasoline at the appropriate ratio will cause major engine damage which will void your warranty For your fuel premix only use Maruyama 50 1 2 Stroke Oil or a quality oil designed for 2 stroke air coole...

Page 15: ... refilling the Backpack Blower fuel tank clean around the fuel tank cap to prevent dirt and debris for entering the tank during cap removal Always shake the premix fuel container momentarily before filling the fuel tank Always use a spout or funnel when fueling to reduce fuel spillage Only fill the tank to within 1 2 inch from the top of the tank Avoid filing to the top of the tank filler neck NOT...

Page 16: ...rm only a partial or open no choke choke setting may be required STEP 3 Turn the stop switch ON Confirm that the stop switch is at the starting position Set the throttle lever at 1 2 speed STEP 3 Set the throttle lever at 1 2 speed Left throttle Right throttle HIGH SPEED IDLE SPEED STOP CAUTION Press down the AIR FILTER COVER and Pull the STARTER GRIP briskly to start the engine NOTE Only short pu...

Page 17: ...ver operate a power blower without proper guards or other protective safety devices in place WARNING To prevent overheating and engine seizure cooling air comes from the intake grille of the fan housing and is pushed by the blower fan through an opening in the fan housing over the cylinder fin area taking away combustion heat The grille and cylinder fins must be kept clean of grass dust and any de...

Page 18: ...G The spark plug should be removed from the engine and checked after each fifty 50 hours of use The tips can be cleaned with a stiff brush Adjust the gap to 0 031 0 035 inches see sketch Replace the spark plug if it is oil fouled or damaged CAUTION The correct torque for the spark plug is 10 12 ft lbs Do not over tighten FUEL FILTER The fuel filter should be cleaned and inspected for damage after ...

Page 19: ...or additional maintenance suggestions SPARK ARRESTER 1 Remove the screw from the muffler 2 Take the spark arrester out off the muffler and then clean by brushing it 3 Return the spark arrester to the muffler 4 Tighten the screw securely STORAGE For long term storage of the power blower first perform all regular maintenance procedures and needed repairs Empty the fuel tank Disconnect the fuel suppl...

Page 20: ...ure compliance with the applicable standards As the owner of the Blower Trimmer Hedge Trimmer you have the responsibility to make sure that the recommended maintenance is carried out according to the instructions in this Owner s Operator s Manual at your own expense The Maruyama Limited Emission Control System Warranty requires that you return your Blower Trimmer Hedge Trimmer to an authorized Mar...

Page 21: ...ston cylinder crankshaft bearings and connecting rod bearings Recommended Engine Oil 2 stroke air cooled brand oil Gasoline and engine oil mixing ratio 50 1 gasoline 50 2 stroke Engine Oil 1 NOTE Do not mix gasoline and oil directly in the fuel tank The lubricative quality of this mixture deteriorates rapidly Do not use gasoline that has been stored longer than two months To ensure proper starting...

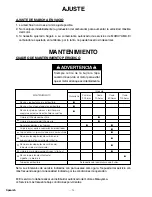
Page 22: ...Maruyama engine dealer Service more frequently under dusty conditions Always remove the spark plug cap from spark plug when servicing the engine to prevent accidental starting WARNING MAINTENANCE Interval Daily First Every Every Every 20 hours 20 hours 50 hours 100 hours Check and replenish fuel Check for fuel leakage Check bolts nuts and screws for looseness and loss Clean fuel filter Clean air f...

Page 23: ...cation Étiquettes d avertissement Veiller à toujours nettoyer la poussière ou la boue afin que les étiquettes soient toujours visibles Les étiquettes d alarme suivantes apparaissent également Étiquettes de mise en garde Avant propos 1 Avant l utilisation 5 Symboles de sécurité 1 Instructions de fonctionnement 8 Garantie 2 Maintenance Réguliére 10 Instructions de sécurité 3 Entreposage 11 Caractéri...

Page 24: ...la date de livraison par le détaillant d origine Les pièces liées aux émissions couvertes par la garantie sont le carburateur le système d allumage le rotor de distributeur la bougie le pot catalytique et le réservoir de carburant Toute pièce de rechange qui est de prestations et de durabilité équivalentes peut être utilisée dans des interventions de maintenance ou de réparations hors garantie et ...

Page 25: ... moteur et recherchez la cause Les vibrations doivent être généralement considérées comme un avertissement avant difficultés 16 Évitez l utilisation de la souffleuse à proximité de rochers graviers pierres et autres matériaux qui pourraient se transformer en objets volants dangereux 17 N utilisez la souffleuse à dos qu à la lumière du jour ou sous un éclairage artificiel adéquat 18 Éloignez d éven...

Page 26: ...IQUES TECHNIQUES Modèles Dimensions L x l x H Right throttle Left throttle Poids à sec Type de moteur Cylindrée Système d allumage Carburateur Contenance du réservoir à carburant Mélange d essence BL56 14 4 x 19 1 x 20 1 po 365 x 485 x 535 mm 14 4 x 20 x 20 1 po 365 x 510 x 535 mm 21 0 livres 9 5 kg TK53 pour l EPA 53 2 cm3 BL85 T 21 1 livres 9 6 kg Kawasaki 2 temps refroidi par air TK65 pour l EP...

Page 27: ...stration et serrez le bouton Quand le souffleur de feuilles se trouve attaché sur le dos de l utilisateur la poignée de commande des gaz se trouve sur le tube LEVIERDE COMMANDEDESGAZ BOUTON RESSORT DE RAPPEL DU DÉMARREUR MOTEUR CARTER DE LA SOUFFLEUSE BAGUES FILTRE À AIR POIRE D AMORÇAGE TUYAU DE RETOUR RÉSERVOIRDE CARBURANT TUYAU FLEXIBLE TUYAU ARTICULÉ POIGNÉE BANDOULIÈRES NUMÉRODESÉRIE CARTERDE...

Page 28: ...nts les paliers des axes de piston et les surfaces de contact entre le piston et la paroi nécessitent un mélange d huile et d essence pour la lubrification L absence d apport d huile à l essence ou le mélange d huile avec l essence dans des proportions inadéquates provoquera de graves dégâts au moteur et annule la garantie Utilisez un mélange d huile Maruyama 50 1 2 temps ou une huile conçue pour ...

Page 29: ...on de débris et de saletés au moment de son dévissage Secouez toujours le bidon de mélange de carburant quelques instants avant de remplir le réservoir de carburant Utilisez toujours un bec verseur ou un entonnoir lors du plein pour éviter un déversement Remplissez le réservoir en laissant un espace de 0 6 à 1 2 cm en haut du réservoir Ne remplissez pas la partie supérieure du col de remplissage R...

Page 30: ... fermez le complètement ÉTAPEN 3 Tournez l interrupteur Marche Arrêt sur MARCHE Confirmation que l interrupteur marche arrêt se trouve sur la position de démarrage Réglez la manette des gaz à mi régime ÉTAPEN 3 Réglez la manette des gaz à mi régime Left throttle Right throttle HAUTE VITESSE RALENTI VITESSE STOP ATTENTION Pressez en bas de ABRI du FILTRE de l AIR et tirez fermement sur la POIGNÉE D...

Page 31: ...itifs de sécurité appropriés en place AVERTISSEMENT Afin d éviter une surchauffe et le blocage du moteur l air de refroidissement provenant de la grille arrière du boîtier du ventilateur est poussé par le ventilateur de la souffleuse à travers une ouverture de ce boîtier en direction des ailettes du cylindre afin d éloigner la chaleur de combustion La grille et les ailettes du cylindre doivent res...

Page 32: ...nement Les bornes de cette dernière doivent être nettoyée avec une brosse dure L écartement doit se situer entre 0 031 et 0 035 po Reportez vous au dessin Remplacez la bougie si elle est salie d huile ou endommagée ATTENTION Le couple de serrage correct d une bougie se situe entre 10 et 12 pieds livre Attention évitez tout serrage excessif FILTRE À CARBURANT Le filtre à essence doit être nettoyé e...

Page 33: ...conseils supplémentaires concernant l entretien et la maintenance de l appareil PARE ÉTINCELLES 1 Enlevez la vis du silencieux 2 Retirez le pare étincelles du silencieux puis nettoyez le en le brossant 3 Réinstallez le pare étincelles sur le silencieux 4 Serrer la vis ENTREPOSAGE Pour un entreposage de longue durée de la souffleuse procédez à une maintenance et aux réparations nécessaires Videz le...

Page 34: ...uel du propriétaire contient ces recommandations de maintenance du moteur Les articles identifiés sur le Tableau de maintenance périodique sont nécessaires afin d assurer la conformité avec les normes en vigueur La garantie du système de contrôle antipollution Maruyama impose expressément de retourner le moteur à un concessionnaire Maruyama afin de procéder aux réparations sous garantie Veuillez l...

Page 35: ...gée avec de l essence afin de lubrifier le piston le cylindre le vilebrequin les roulements et l embiellage Huile moteur préconisée Marque d huile 2 temps refroidissement par air Rapport de mélange huile essence 50 1 essence 50 huile moteur 2 temps 1 REMARQUE Ne mélangez pas l essence et l huile directement dans le réservoir La qualité du graissage de ce mélange se détériore rapidement N utilisez ...

Page 36: ...s poussiéreuses Déconnectez toujours le capuchon de bougie de la bougie pour procéder à une maintenance du moteur afin d éviter tout démarrage accidentel AVERTISSEMENT MAINTENANCE Intervalles Quotidienne Les premières Toutes les Toutes les Toutes les 20 h 20 h 50 h 100 h Vérification et complément du plein Recherche de fuites de carburant Vérification des boulons écrous et vis si desserrés ou perd...

Page 37: ... significan para usted Etiqueta de advertencia Limpie la suciedad o el barro de la unidad para que las indicaciones siempre estén legibles Encontrará las siguientes etiquetas de alarma fijadas en la unidad Etiquetas de alarma Prefacio 1 Antes de la Operación 5 Iconos de Seguridad 1 Instrucciones de Operación 8 Garantía 2 Mantenimiento Corriente 10 Instrucciones de Seguridad 3 Almacenamiento 11 Esp...

Page 38: ...a durante dos 2 años a partir de la fecha de la entrega original al detal Las partes relacionadas con la emisión son el conjunto del carburador el conjunto de la bobina de ignición el rotor de ignición la bujía el convertidor catalítico y el estanque de combustible Se puede usar cualquier repuesto equivalente en desempeño y durabilidad en reparaciones o mantenimientos no de garantía y ello no redu...

Page 39: ...ra a vibrar en forma anormal detenga el motor inmediatamente y revise la unidad para descubrir la causa Generalmente la vibración es la señal de un problema 16 Evite el uso de la sopladora cerca de rocas gravilla piedras y material similar con el objeto de evitar el peligro de desechos lanzados 17 Use la sopladora únicamente a la luz del día o bajo una buena luz artificial 18 No permita la presenc...

Page 40: ... L x A x A Right throttle Left throttle Peso Seco Tipo de Motor Desplazamiento Sistema de Ignición Carburador Capacidad del Tanque de Combustible Mezcla de Combustible BL56 14 4 x 19 1 x 20 1 pulg 365 x 485 x 535 mm 14 4 x 20 x 20 1 pulg 365 x 510 x 535 mm 21 0 libras 9 5 kg TK 53 para EPA 53 2 cc BL85 T 21 1 libras 9 6 kg Kawasaki 2 Recorrido Enfriado por Aire TK 65 para EPA 64 7 cc Eléctrico Dia...

Page 41: ...a la posición que se muestra en la ilustración y apriete la perilla PALANCA DE ACELERACIÓN PERILLA MECANISMO DE ARRANQUE MOTOR CARCASA DE LA SOPLADORA ABRAZADERAS FILTRO DE AIRE BULBO DE CEBA TUBO DE RETORNO TANQUE DE COMBUSTIBLE TUBO FLEXIBLE TUBO GIRATORIO MANIJA CORREAS DE LOS HOMBROS NUMERODESERIE CARCARADELASOPLADORA ALMOHADIL LA TRASERA BL56 Left throttle type BL85 T Right throttle type CORR...

Page 42: ...tacto entre el pistón y el cilindro requieren aceite mezclado con gasolina para su lubricación Si no se agrega aceite a la gasolina o si la mezcla de gasolina y aceite no se realiza en la proporción correcta se causará un daño grave al motor y se anulará la garantía Para la pre mezcla de combustible use Aceite Maruyama 50 1 para 2 Ciclos o un aceite de buena calidad diseñado para motores de 2 cicl...

Page 43: ...e para evitar que mugre y desechos entren al tanque cuando está destapado Siempre agite momentáneamente el recipiente con la premezcla de combustible antes de llenar el tanque Use siempre una boquilla o embudo cuando reabastezca el combustible para reducir las salpicaduras Llene el tanque sólo hasta que falte 1 2 pulgada 6 12 mm para llegar al borde No llene hasta el final del cuello del tanque NO...

Page 44: ...una graduación parcial o abierta sin regulación de aire PASO 3 Ponga el interruptor de arranque en la posición de ENCENDIDO Confirme que el interruptor de arranque esté en la posición de ENCENDIDO Ponga la palanca del acelerador en media velocidad PASO 3 Ponga la palanca del acelerador en media velocidad Left throttle Right throttle ALTA VELOCIDAD VELOCIDAD DE VACÍO APAGADO PRECAUCION Abrume down ...

Page 45: ... protecciones adecuadas u otros dispositivos de seguridad ADVERTENCIA Para evitar recalentamiento y colapso del motor el aire de enfriamiento entra a través de la rejilla trasera de la carcasa del ventilador y el ventilador de la sopladora lo impulsa a través de una abertura en la carcasa del ventilador sobre el área de las aletas del cilindro sacando así el calor de la combustión La rejilla y las...

Page 46: ...ebe retirarse del motor y revisarse después de cada cincuenta 50 horas de uso Los electrodos se pueden limpiar con un cepillo metálico Ajuste la tolerancia en 0 031 0 035 pulgadas ver dibujo Reemplace la bujía si se ha ensuciado con aceite PRECAUCION La torsión correcta de la bujía es 10 12 pies libra No la apriete demasiado FILTRO DE COMBUSTIBLE El filtro de combustible se debe limpiar e inspecci...

Page 47: ... para recibir sugerencias sobre mantenimiento adicional PARACHISPAS 1 Quite el tornillo del silenciador 2 Saque el parachispas del silenciador y a continuación límpielo cepillándolo 3 Instale de nuevo el parachispas en el silenciador 4 Apretar el tornillo ALMACENAMIENTO Para almacenar la sopladora durante un tiempo largo primero realice todos los procedimientos del mantenimiento corriente y las re...

Page 48: ...tiene tales recomendaciones de mantenimiento para su motor Esos procedimientos identificados en el Cuadro de Mantenimiento Periódico son necesarios para asegurar el cumplimiento de los estándares aplicables La Garantía Limitada Maruyama del Sistema de Control de Emisiones exige que usted devuelva su motor a un Distribuidor autorizado de motores Maruyama para que se remedie cualquier defecto bajo g...

Page 49: ...los cojinetes y los cojinetes de las bielas Aceite de Motor Recomendado aceite formulado para motor de 2 tiempos enfriado por aire Proporción de mezcla de la gasolina y el aceite motor 50 1 50 partes de gasolina por 1 parte de Aceite para Motor de 2 tiempos NOTA No mezcle directamente la gasolina y el aceite en el tanque de combustible La calidad lubricante de esta mezcla se deteriora rápidamente ...

Page 50: ...re retire de la bujía la tapa cuando dé servicio al motor para evitar que el motor arranque accidentalmente ADVERTENCIA MANTENIMIENTO Intervalo Diariamente Primeras Cada Cada Cada 20 horas 20 horas 50 horas 100 horas Revise y reabastezca el combustible Revise si hay alguna fuga de combustible Revise los pernos tuercas y tornillos para asegurarse de que no estén flojos o sueltos Limpie el filtro de...

Page 51: ......
Page 52: ...Maruyama U S Inc 4770 Mercantile Drive suite100 Fort Worth TX 76137 U S A Phone 940 383 7400 Fax 940 383 7466 www maruyama us com P N 274537 01 15 05 TAP F ...

Reviews: