background image

MAINTENANCE

5

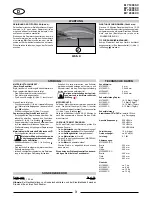
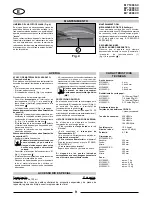
CLEANING THE PHOTOCELLS (Fig. 4):
If paper particles should come to rest in the inlet
guide (for example after a paper jam) it is possible
that the machine will not turn off, due to the broken
light barrier.
To remove these paper strips and also to clean
the photocell, pass another sheet of paper through
the feed slot, or switch the machine to reverse and
wipe both „eyes“ of the photocell with a brush.

TECHNICAL DATA

MALFUNCTIONS

ACCESSORIES

Description

Order-No.

Lubricant, 125 ml bottle

99943

Note: For orders of special accessories and spare parts, please contact your dealer.

GB

MY 1000 SC

MY 1000 CC

MY 2000 SC

MY 2000 CC

fig. 4

2

MAINTENANCE
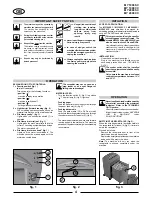
CUTTING BLOCK (3.8x48 mm):
After approximately 15 minutes of continuous
operation, switch to reverse running for about 15-
20 seconds and during this time spray some of the
special oil on to the cutting mechanism (refer to
“ACCESSORIES“ for the order number).

TIP FOR ENERGY SAVING:
Please make sure that the shredder is switched
off over night (Turn the function switch (1) (fig. 1) in
position „ “).

Cutting width:
MY1000SC:

4 mm

MY1000CC:

3.8x48 mm

MY1000SC:

4 mm

MY1000CC:

3.8x48 mm

Cutting capacity paper:
MY1000SC:

10-12 sheets (70g/m

2

)

MY1000CC:

7-9 sheets (70g/m

2

)

MY2000SC:

14-16 sheets (70g/m

2

)

MY2000CC:

9-12 sheets (70g/m

2

)

Cutting capacity
Credit cards/CD’s/DVD’s:

feed one at a time

Supply voltage:

230V/50Hz
240V/50Hz
120V/60Hz
100V/50/60Hz

Pre-fusing:

10 amps (slow-blow)

Noise level:

approx. 65 dB(A)

Power:

0.7 kW

Dimensions:
MY1000SC/CC:
Width:

350 mm

Depth:

350 mm

Height:

560 mm

MY2000SC/CC:
Width:

400 mm

Depth:

300 mm

Height:

602 mm

Weight:
MY1000SC:

ca. 7 kg

MY1000CC:

ca. 8 kg

MY2000SC:

ca. 10 kg

MY2000CC:

ca. 12 kg

MATERIAL JAM IN MACHINE:
(Auto-stop-function)
If too much material is fed in, causing a jam, the
machine will respond as follows:
- The cutting system blocks and stops.

Cutting mechanism halts, then runs one step in
reverse (material will be released) and stops.

- The motor shuts down automatically.
- The pilot lamp (4) (fig. 1) lights up.

Proceed as follows:
- Turn the function switch (1) (fig. 1) briefly to

position „ “ (material will be released), then in
position „ “.

- The pilot lamp (4) (fig. 1) goes out.

Paper jam in the paper feed slot (6)
- Tear off the excess paper over the feed slot and

then turn the function switch (1) (fig. 1) to
position „ “.

- The cutting system then runs forward and shreds

the paper remaining in the cutter.

- Continue shredding, feeding smaller quantities

of paper.

Material jam in the security feed slot (7)
- Remove the returned material.

Take care when removing material
as sharp edges may cause injury.

- Turn the function switch (1) (fig. 1) in position

„ “.

- The remaining material to be shredded is then

fed to the cutting system again.

- Once the remaining material has been shredded,

continue shredding, feeding the correct
quantities.

- If required, switch the cutting system alternately

to forward and reverse until all of the material
has been run through the cutting system and
shredded.

Wait each time until the motor stops
before switching direction (position
„ “).

MOTOR PROTECTION:
The motor shuts down automatically, should it
become overloaded. The pilot lamp (5) (fig. 1)
lights up. Turn the machine off with the function
switch (1) (fig. 1) (position „ “).
Allow the motor to cool down for 20 to 25 minutes
(depending upon room temperature) and then
continue shredding.

CHECKLIST IN CASE OF MALFUNCTIONS:
If the device does not function, check the following:
- Is the plug connected to the mains?
- Is the function switch (1) on?
- is the receptacle placed properly under the

machine?

- is there a material jam in the machine?

Follow the instructions under ”MATERIAL JAM”

- has the motor been overloaded?

Wait until the motor has cooled, and then restart.

If none of the above applies, please contact
your dealer.

Summary of Contents for MY 1000 CC

Page 1: ...nia należy przeczytać instrukcję obsługi Před uvedením do provozu si přečtěte návod k obsluze Пеpед вводом в эксплyатацию непpеменно пpочтите инстpyкцию по обслyживанию Schaltplan Wiring Diagram Plan de montage Diagrama eléctrico Schema Elettrico Schemat połączeń Schéma zapojení E E E E Eæe pocxe a æe pocxe a æe pocxe a æe pocxe a æe pocxe a Seite page página pagina strona strana c pa åıa 18 D Sei...

Page 2: ... wendet werden Sturzgefahr durch Materialbruch MATERIALZUFÜHRUNG Funktionsschalter 1 Abb 1 in Stellung schalten Die Kontroll Anzeige 3 Abb 1 leuchtet auf Zuführung von Papier PapierdurchdenPapierzuführschacht 6 Abb 2 dem Schneidwerk zuführen Zuführung von Datenträgern Datenträger CD DVD oder Kreditkarte ein zeln durch den separat angeordneten Sicherheits Zuführschacht 7 Abb 2 dem Schneidwerk zufüh...

Page 3: ...nsschalter 1 eingeschaltet ist der Auffangbehälter untergeschoben ist ein Materialstau im Gerät Folgen Sie den Instruktionen bei MATERIAL STAU IM GERÄT ist der Motor überlastet worden Warten Sie bis er abgekühlt ist und starten dann erneut Wenn keine der Prüfpunkte zutreffen benach richtigen Sie bitte Ihren Fachhändler MATERIALSTAU IM GERÄT Auto Stop Funktion Ergibt sich durch zuviel zugeführtes M...

Page 4: ...PPLICATION The MY1000SC MY1000CC MY2000SC MY2000CC data shredder is designed for shreddinggeneralprintedmaterialanddatamedia such as CDs DVDs and credit cards This machine should only be used for shredding paper and credit cards The modelsMY2000SCandMY2000CCcan also be used to shred CDs and DVDs Any attempt to shred other types of data medium may result in damage to the machine e g destruction of ...

Page 5: ...am the machine will respond as follows The cutting system blocks and stops Cutting mechanism halts then runs one step in reverse material will be released and stops The motor shuts down automatically The pilot lamp 4 fig 1 lights up Proceed as follows Turn the function switch 1 fig 1 briefly to position material will be released then in position The pilot lamp 4 fig 1 goes out Paper jam in the pap...

Page 6: ...t être mise en place obligatoirement dans un local fermé et tempéré 10 25 C ÉLÉMENTS DE COMMANDE 1 Sélecteur de fonction fig 1 automatique arrêt marche arrière Ce commutateur a les fonctions suivantes position la machine est prête pour mise en marche position la machine est hors circuit position le système de coupe se trouve en marche arrière 2 Barrière photoélectrique marche avant figure 2 Démarr...

Page 7: ...e moteur s arrête automatiquement Le voyant de contrôle 4 fig 1 s allume Procéder comme suit Amener brièvementlesélecteurdefonction 1 figure1 enposition lematériauestdégagé et le ensuite en position Le voyant de contrôle 4 figure 1 s éteint Bourrage de papier dans la bouche d entrée du papier 6 Déchirer le papier ramené en arrière juste au dessus de la fente d introduction puis remettre le sélecte...

Page 8: ...nciones siguientes Posición el aparato está dispuesto Posición el aparato está desconectado Posición elmecanismodecortefuncionaenelsentido inverso 2 Barrera fotoeléctrica marcha hacia delante fig 2 Inicia el proceso de desmenuzamiento tan pronto como se introduzca material por una de las dos bocas de entrada 3 Indicación de control Disponibilidad de servicio fig 1 Se ilumina cuando queda conectado...

Page 9: ...ontrol 4 fig 1 se enciende Proceder ahora de la manera siguiente Conmutar brevemente el interruptor de funcionamiento 1 Fig 1 a la posición para liberar el material y seguidamente a la posición de La indicación de control 4 fig 1 se apaga Atasco de material en la boca de alimentación de papel 6 Desgarrar el papel expulsado justamente por encima de la rendija de entrada y conmutar a continuación el...

Page 10: ...nte in luoghi chiusi temperati 10 25 C ELEMENTI DI COMANDO 1 Interruttore funzione fig 1 automatico spento marcia indietro Questo in e ruttore comanda le funzioni principali Posizione La macchina è pronta per l uso Posizione La macchina è spenta Posizione Il meccanismo tagliente gira all indietro 2 Fotocellula Fig 2 scorrimento in avanti Avvia il processo di trinciatura non appena viene immesso ma...

Page 11: ...OTEZIONE MOTORE Sollecitandoilmotoreoltreilimitiavvieneilblocco La spia di controllo 5 Fig 1 si accende Commutare l interruttore 1 fig 1 funzione in posizione Dopo un periodo di raffreddamento di circa 20 25 minuti dipendente dalla tempertura ambiente saràpossibileinnestarenuovamentelamacchina CHECK LIST IN CASO DI ANOMALIE Se l apparecchiatura non dovesse funzionare eseguire un controllo in base ...

Page 12: ...iętych pomieszczeniach o temperaturze w zakresie 10 25 C ELEMENTY OBSŁUGI 1 Przełącznik funkcyjny rys 1 automatyka WYŁ bieg do tyłu Przełącznik ten ma następujące funkcje Ustawienie Urządzenie jest gotowe do pracy Ustawienie Urządzenie jest wyłączone Ustawienie Mechanizm tnący pracuje do tyłu 2 Fotokomórka bieg do przodu rys 2 Włączaprocesrozdrabnianiabezpośrednio po wprowadzeniu materiału do jedn...

Page 13: ...ię Podczas przełączania kierunku pracy odczekać aż silnik się zatrzyma STYCZNIK OCHRONNY SILNIKA W razie przeciążenia silnika nastąpi jego wyłączenie Lampkakontrolna 5 rys 1 zapala się Ustawić przełącznik funkcyjny 1 rys 1 w położenie Po czasie schłodzenia ok 20 25 minut zależnie od temperatury w pomieszczeniu można ponownie włączyć urządzenie LISTA KONTROLNA W RAZIE ZAKŁÓCENIA Wraziewystąpieniaza...

Page 14: ...pouze v uzavřených a temperovaných místnostech 10 25 C OVLÁDACÍ PRVKY 1 Spínač funkcí obr 1 Automatika VYP Zpětný chod Tento spínač má následující funkce Poloha Skartovač je připraven k provozu Poloha Skartovač je vypnutý Poloha Řezací ústrojí běží pozpátku 2 Světelná závora chod dopředu obr 2 Spouští operaci řezání jakmile je materiál zavedendojednéz oboupřívodníchšachet 3 Kontrolní indikace Přip...

Page 15: ...ojde li vlivem velkého množství přiváděného materiálukjehonahromadění reagujeskartovač následovně Řezný mechanismus se zablokuje a zastaví Motor se vypne Rozsvítí se kontrolní indikace 4 obr 1 Postupujte následovně Zapněte spínač funkcí 1 obr 1 krátce do polohy materiál se uvolní potom do polohy Kontrolní indikace 4 obr 1 zhasne Nahromadění papíru v přívodní šachtě papíru 6 Nazpět přiváděný papír ...

Page 16: ...H PABÆEHÅØ 1 íy ıåo aæ Ω ÿepe æ ña eæ íy ıåo aæ Ω ÿepe æ ña eæ íy ıåo aæ Ω ÿepe æ ña eæ íy ıåo aæ Ω ÿepe æ ña eæ íy ıåo aæ Ω ÿepe æ ña eæ påc 1 aŒ o a åñec åΩ pe å aŒ o a åñec åΩ pe å aŒ o a åñec åΩ pe å aŒ o a åñec åΩ pe å aŒ o a åñec åΩ pe å æ o pa Ω xoª Õ o æ ña eæ o o ºc a a æå a cæeªº óåe ÿoæo e åø ÿoæo e åe ÿpå op o o pa o e ÿoæo e åe ÿpå op æ ñe ÿoæo e åe exa åµ peµ å pa o ae o pa o aÿpa æe...

Page 17: ...a å e paóae cø Œå a eæ yc poΩc Œa Œ æ ñae cø 3a opae cø o poæ aø å ªå a op aø æa ÿoñ a 4 påc 1 eΩc ºΩ e cæeªº óå o paµo C añaæa ÿepeŒeªå e íy ıåo aæ Ω ÿepe æ ña eæ 1 påc 1 Œ ÿoæo e åe õa py e Ω a epåaæŒ xoªå aõaª åõa e cpaõy cpaõy cpaõy cpaõy cpaõy Œ ÿoæo e åe Контрольная индикация 4 рис 1 погаснет Бумажная пробка в приемном отверстии подачи бумаги 6 B òeªòy aõaª y a y o opŒå e e o o Œ òe õa pyõoñ...

Page 18: ...SCHALTBILD WIRING DIAGRAM PLAN DE MONTAGE SCHAKELSCHEMA DIAGRAMA ELÉCTRICO ESQUEMA ELECTRICO SCHEMA ELETTRICO 18 MY 1000 SC MY 1000 CC MY 2000 SC MY 2000 CC ...

Page 19: ...19 MY 1000 SC MY 1000 CC MY 2000 SC MY 2000 CC ...

Page 20: ... Papier ist aus 100 Altpapier ohne optische Aufheller hergestellt This paper made from 100 unbleached recycled paper Papier recyclable à 100 www martinyale de Data Shredders Cutting Machines Folding Machines Letter Openers ...

Reviews: