background image

7

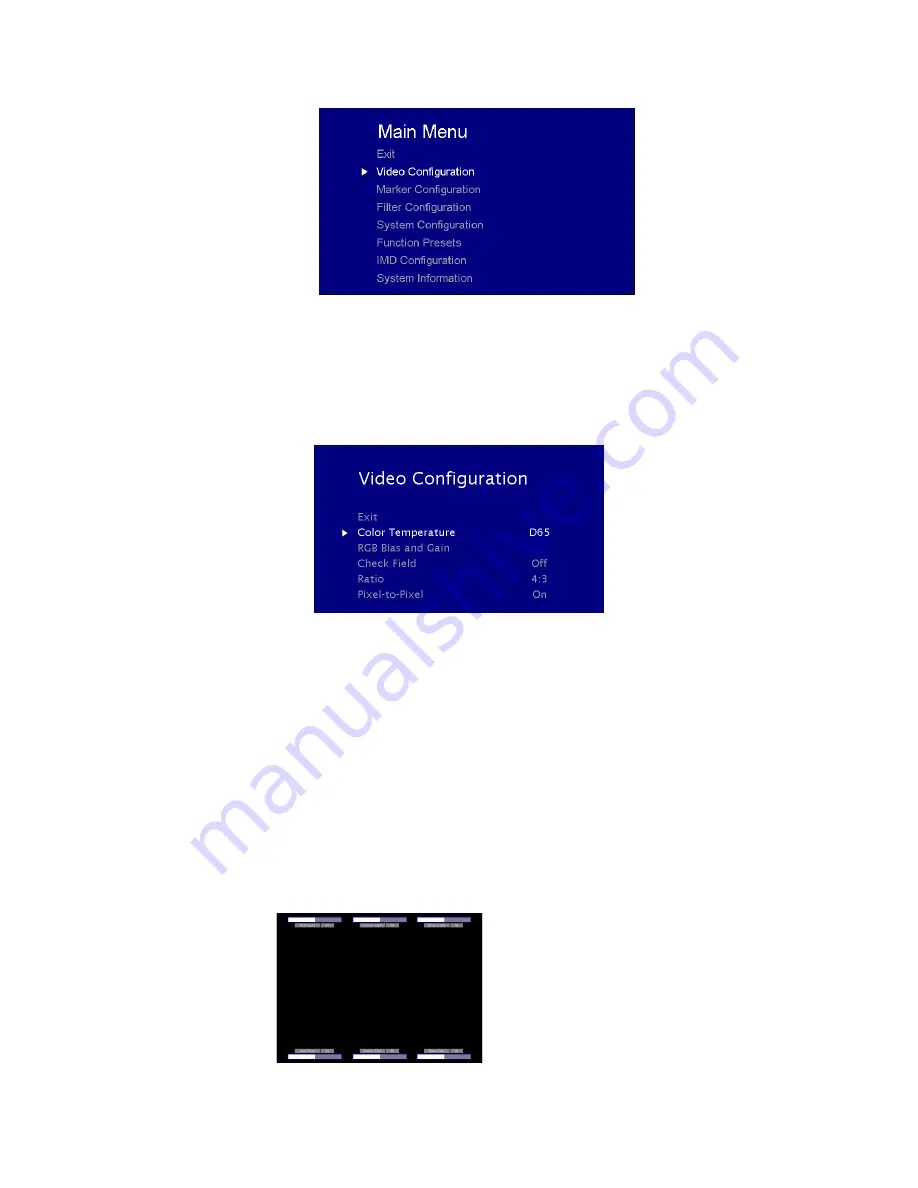
MAIN MENU AND NAVIGATION

Access the main menu by pushing and holding the

MENU

button on the front panel of the monitor.

•Step through menu items using the

and

buttons.

•Choose a submenu or select a menu item by pressing

SELECT

.

•Return to the previous menu by pressing

MENU

.

•Exit the main menu by pressing

MENU

. The menu will automatically time out after 15 seconds.

VIDEO CONFIGURATION SUBMENU

.

Color Temperature

Use this setting to choose one of three color temperature presets:

• D55 (5500K)
• D65 (6500K)
• 9300K

• USER (Adjustable Color Bias and Gain)
• Linear (No processing is applied to the panel)

Use this setting to enable monochrome mode. Only the luminance of the image will be displayed as a grayscale picture.

RGB Bias and Gain

Select this submenu to fine-tune the monitor’s color balance (R, G, B). This should only be done by someone experienced with video engineering, as this will alter the

overall color shading of the screen. The purpose is to allow color matching to other types of monitors and/or displays. Note: The Color Temperature preset will
automatically switch to USER when Color Bias settings are adjusted. It is normal for color bias adjustments to be very subtle.

When selecting the RGB Bias and Gain submenu, gain adjustment indicators will appear at the top of the screen, and bias adjustment indicators will appear at the bottom
of the screen:

Use the

and

buttons to select each individual bias or gain control. Press SELECT to begin adjusting the control. Use the

and

buttons to increase or decrease the

value.

RGB Bias and Gain

Summary of Contents for V-LCD17HR

Page 1: ...Marshall Electronics Model No V LCD17HR Rack Mountable High Definition LCD Monitor Operating Instructions Edition 2 Revision 1W...

Page 2: ...2 This page intentionally left blank...

Page 3: ...tible Input Formats 6 MAIN MENU AND NAVIGATION 7 VIDEO CONFIGURATION SUBMENU 7 MARKER CONFIGURATION SUBMENU 8 FILTER CONFIGURATION SUBMENU 11 SYSTEM CONFIGURATION SUBMENU 12 FUNCTION PRESETS SUBMENU 1...

Page 4: ...Adequate ventilation is required when installed to prevent possible damage to the monitor s internal components Please see the Dimensions section for more information A VESA standard 75mm hole pattern...

Page 5: ...various settings Functions are assigned using the on screen menu Menu Navigation Buttons Use the Menu and Select buttons to display and navigate the on screen menu See Main Menu and Navigation Image...

Page 6: ...andard 75 mm hole patterns is provided to accommodate a variety of custom mounting options See Dimensions for further details Input Connection The V MD monitor comes preconfigured with 3G SDI and a Lo...

Page 7: ...be displayed as a grayscale picture RGB Bias and Gain Select this submenu to fine tune the monitor s color balance R G B This should only be done by someone experienced with video engineering as this...

Page 8: ...o match in brightness 8 Composite NTSC only Adjust the Tint button until the third bar from the left cyan and the third bar from the right magenta appear to match in brightness 9 Disable Blue Check Fi...

Page 9: ...1 2 35 1 95 Safe 93 Safe 90 Safe 88 Safe 85 Safe 80 Safe 16 9 Marker Examples Full Screen Markers Use these settings to superimpose one of 6 markers on the screen when in Full Screen mode 95 Safe 93 S...

Page 10: ...osed on the complete image 25 Image area beyond the marker is shown at 25 intensity 50 Image area beyond the marker is shown at 50 intensity 75 Image area beyond the marker is shown at 75 intensity 10...

Page 11: ...t is common practice to set exposure of faces to the equivalent of approximately 56 IRE The false color filter will show this area as the color PINK on the monitor Therefore as you increase exposure o...

Page 12: ...this menu item again Unfreeze to return to the real time video input Contrast Backlight Use this feature to choose between controlling the Contrast of the image or the intensity of the panel s Backlig...

Page 13: ...this field to change the color of the text in the Text String field Text Background Use this field to change the opacity of the background behind the text in the Text String field A value of 0 will c...

Page 14: ...14 Input Slot 1 This shows your module type and the firmware version of your module If no module is present the word EMPTY will appear in parentheses...

Page 15: ...Twist Lock Connector Tally Hardware Interface HD 15 Female CN 1 Programming Port Factory Upgrade Use Only TALLY Hardware Interface HD 15 Activation requires contact closure of pin to ground on the HD...

Page 16: ...16...

Page 17: ...17...

Page 18: ...18 This page intentionally left blank...

Page 19: ...19 This page intentionally left blank...

Page 20: ...tainer for a period of one year from the purchase date This warranty is extended to the first consumer only and proof of purchase is necessary to honor the warranty If there is no proof of purchase pr...

Reviews: