background image


27 

Appendix   

Model 

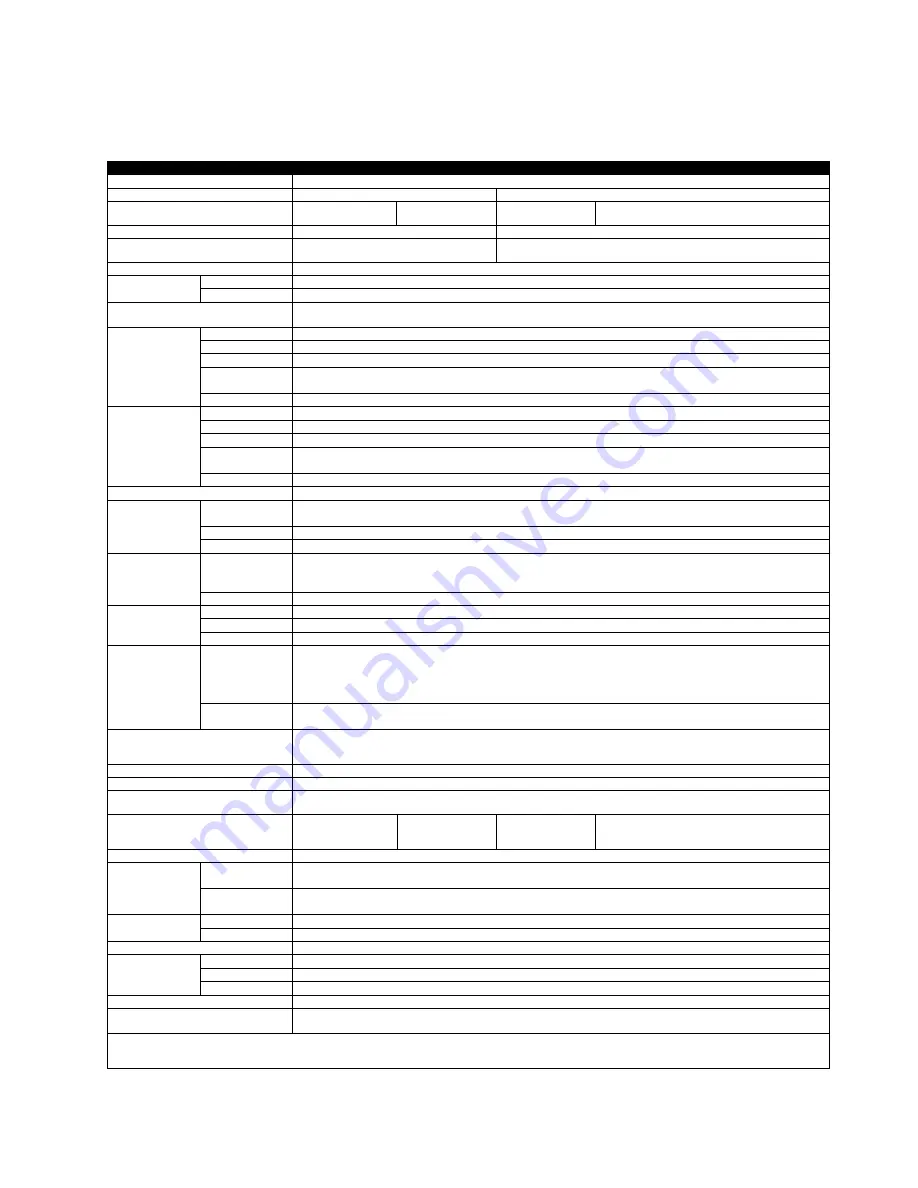
ME120 

MD120 

ME130 

MD130 

Print Method 

Thermal Transfer / Direct Thermal 

Resolution 

203 dpi (8 dots/mm)


300 dpi (12 dots/mm)


Print Speed 

Up to 5IPS (127 
mm/s)**   

Up to 4 IPS (102 
mm/s)**   

4 IPS (102 
mm/s)** 

3 IPS (76 mm/s)** 

Print Width 

4.25” (108 mm) 

4.16” (105.7 mm) 

Print Length 

Min. 0.16” (4 mm)** 
Max. 68” (1727 mm) 

Min. 0.16” (4 mm)** 
Max. 30” (762 mm) 

Processor 

32 Bit RISC CPU 

Memory 

Flash 

8MB Flash (4MB for user storage) 

SDRAM 

16MB  

Sensor Type 

Adjustable reflective sensor 
2 fixed transmissive sensors, central aligned 

Media 

Types 

Continuous form, gap labels, black mark sensing, and punched hole; label length set by auto sensing or programming 

Width 

1” (25.4 mm) Min. - 4.64” (118 mm) Max. 

Thickness 

0.003” (0.06 mm) Min. - 0.01” (0.25 mm) Max.** 

Label 

Roll 

Diameter 

Max. 5” (127 mm) 

Core Diameter 

1” (25.4 mm), 1.5” (38.1mm), 3” (76.2mm) 

Ribbon 

Types 

Wax, wax/resin, resin 

Length 

981’ (300 m) 

Width 

1.18” Min. - 4.33” (30 mm - 110 mm) Max. 

Ribbon 

Roll 

Diameter 

2.67“ (68 mm) 

Core Diameter 

Core diameter: 1” (25.4 mm) 

Printer Language 

EZPL, GEPL, GZPL auto switch 

Software 

Label 

Design 

Software 

LabelPro 

Driver 

Compatible with Windows 2000 / XP / VISTA / Windows 7 / Windows 8.1 

DLL/SKD 

Support Win CE, .NET, Andriod, Windows Mobile, Windows 2000 / XP / VISTA / Windows 7 / Windows 8.1 

Resident Fonts 

Bitmap Fonts 

6, 8, 10, 12, 14, 18, 24, 30, 16X26 and OCR A & B   
90°, 180°, 270° rotatable, single characters 90°, 180°, 270° rotatable 
8 times expandable in horizontal and vertical directions 

TTF Fonts 

Scalable fonts 90°, 180°, 270° rotatable 

Download Fonts 

Bitmap Fonts 

90°, 180°, 270° rotatable, single characters 90°, 180°, 270° rotatable  

Asian Fonts 

90°, 180°, 270° rotatable and 8 times expandable in horizontal and vertical directions 

TTF Fonts 

Scalable fonts 90°, 180°, 270° rotatable 

Barcodes 

1-D Bar codes 

Code 39, Code 93, EAN-8, EAN-13, EAN 8/13 (with 2 & 5 digits extension), UPC-A, UPC-E, UPC-A and UPC-E with 
EAN 2 or 5 digit extension, Interleaved 2-of-5 (I 2 of 5),  Interleaved 2- o-f 5 with Shipping Bearer Bars, Codabar, Code 
128 (subset A, B, C), EAN 128, RPS 128, UCC 128, UCC/EAN-128 K-Mart, Random Weight, Postnet, ITF 14, China 
Postal Code, HIBC, MSI, Plessey, Telepen, FIM, GS1 DataBar, German Post Code, Planet 11 & 13 digit, Japanese 
Postnet, Standard 2 of 5, Industrial 2 of 5 , Logmars, Code 11, ISBT – 128 , Code 32 

2-D Bar codes 

PDF417, Datamatrix code, MaxiCode, QR code, Micro PDF417, Micro QR code and Aztec code, Code 49, Codablock 
F , TLC 39 

Code Pages 

CODEPAGE 437, 850, 851, 852, 855, 857, 860, 861, 862, 863, 865, 866, 869, 737 
WINDOWS 1250, 1251, 1252, 1253, 1254, 1255, 1257 
Unicode (UTF8, UTF16) 

Graphics 

Resident graphic file types are BMP and PCX, other graphic formats are downloadable from the software 

Interfaces 

USB Device (B-Type) 

Control Panel 

One Tri-color LED: Power (Green, Orange and Red) 
Function Key: FEED 

Power 

Auto Switching 100-
240VAC, 50-60Hz. 

Wall Mount Auto 
Switching 100-
240VAC, 50-60Hz 

Auto Switching 
100-240VAC, 50-
60Hz. 

Wall Mount Auto Switching 100-240VAC, 50-60Hz 

Real Time Clock 

N/A 

Environment 

Operation 
Temperature 

41°F to 104°F (5°C to 40°C) 

Storage 
Temperature 

-

4°F to 122°F (-20°C to 50°C) 

Humidity 

Operation 

30-85%, non-condensing. 

Storage 

10-90%, non-condensing. 

Agency Approvals 

CE(EMC), FCC Class A, CB, CCC, UL, cUL,BIS,KC 

Dimension 

Length 

11.2” (285 mm) 

Height 

6.93” (176 mm) 

Width 

9.17” (233 mm) 

Weight 

6.33 lbs (2.87Kg) ,excluding consumables 

Options & Accessories 

External label roll holder for 10”(250 mm) O.D. label rolls 
External label rewinder T10 

* Specifications are subject to change without notice. All company and/or product names are trademarks and/or registered trademarks of their respective owners. 
** Minimum print height and maximum print speed specification compliance can be dependent on non-standard material variables such as label type, thickness, 
spacing, liner construction, etc. GoDEX is pleased to test non-standard materials for minimum print height, and maximum print speed capability. 

Summary of Contents for MD Series

Page 1: ...MD ME Series USER MANUAL User Manual MD ME series Version A Issue Date 2016 01 P N 920 016511 00 ...

Page 2: ...10 2 6 Preparing For Tag Printing 11 2 7 Connecting The Printer To The Host Computer 12 2 8 Wizard CD Standard Installation 13 2 10 Wizard CD Other Choice Installation 16 3 Operation Panel 19 3 1 LED Operation Panel 19 3 2 Error Alerts 20 3 3 Label size calibration and Self Test Page 21 3 4 Operation Panel 22 4 Maintenance And Adjustment 23 4 1 Cleaning The Print Head 23 4 2 Adjusting The Print He...

Page 3: ...tested and passed with the requirements relating to electromagnetic compatibility based on the standards EN 55022 2006 A1 2007 Class A EN61000 3 2 2006 EN 61000 3 3 2008 and EN55024 1998 A1 2001 A2 2003 IEC 61000 4 2 2008 series The equipment also tested and passed in accordance with the European Standard EN55022 for the both Radiated and Conducted emissions limits TO WHICH THIS DECLARATION RELATE...

Page 4: ...ul not to get liquid on the equipment to avoid electrical shock 6 For safety and warranty reasons ONLY qualified service personnel should open the equipment 7 Do not repair or adjust energized equipment under any circumstances CAUTION Danger of explosion if battery is incorrectly replaced Replace only with the equivalent type recommended by the manufacturer Dispose of used batteries according to t...

Page 5: ...k that all of the following items are included with your printer Barcode Printer Ribbon Hubs set of 2 Power Adapter AC Adapter Label Supply Hub USB Cable Label Guide Plates set of 2 Quick Guide Empty Ribbon Core CD with LabelPro software user manual ...

Page 6: ...2 1 2 Getting To Know Your Printer Front View Rear View TOP COVER LED INDICATOR FEED BUTTON FRONT COVER COVER OPEN BUTTONS POWER SWITCH FAN FOLD LABEL INSERT USB PORT POWER JACK ...

Page 7: ...HUB LABEL GUIDE PLATES SET of 2 ADJUSTMENT SCREW RIGHT Screw for adjusting the print head pressure RIBBON MODULE RIBBON FEED MECHANISM RIBBON HUB EMPTY RIBBON CORE LABEL GUIDE LEFT ADJUSTMENT SCREW Screw for adjusting the print line LABEL GUIDE RIGHT PLATEN LABEL SENSOR Movable RIBBON SUPPLY HUB PRINTING MECHANISM RELEASE CATCH RIGHT RELEASE CATCH LEFT ...

Page 8: ...ace the printer on a flat surface Open the printer cover by pressing the release buttons on both sides of the printer housing and lift the cover COVER OPEN BUTTONS Release buttons for opening the printer cover Pressing the button Pressing the button Lift the printer cover backward ...

Page 9: ...5 2 2 Open The Printing Mechanism Pressing The Release Catches Release and lift the printing mechanism Pressing Pressing Lift the printing mechanism RELEASE CATCHES ...

Page 10: ...lace the empty ribbon core on the hub which forms a ribbon rewind hub Stick the ribbon supply hub on the ribbon rewind hub and wind the rewind hub 2 3 circles NEW RIBBON RIBBON HUB Place on the hub RIBBON SUPPLY HUB EMPTY RIBBON CORE RIBBON HUB Place on the hub RIBBON FEED MODULE Wind the ribbon around the core 2 3 circles ...

Page 11: ...ng mechanism Pass the ribbon supply hub under the print head Insert the ribbon rewind hub on the ribbon feed mechanism Close the printing mechanism making sure that it clicks into place Insert into the printing mechanism Place on the printing mechanism RIBBON FEED MECHANISM Wind to the back ...

Page 12: ...e the label stock on the label supply hub attach the guide plates to the label stock holder Install The Label Roll Module On The Printer Now load the label stock into the printer LABEL STOCK Place on the ribbon hub Place on the printer LABEL SUPPLY HUB LABEL GUIDE PLATES ...

Page 13: ...e printing mechanism and lift it Pass the labels through the label guides up to the tear off plate Adjust the label guides to the label width Close the printing mechanism Through the label guides LABEL GUIDES Close ...

Page 14: ...alling The Label Supply Hub Base On Internal Diameter 1 Cores Installing the label supply hub for 1 cores 1 5 Cores Installing the label supply hub for 1 5 cores 3 Cores Installing the label supply hub for 3 cores ...

Page 15: ...ring For Tag Printing In tag printing the tag hole indicates the height of a label During adjustment the sensor must therefore be positioned directly below the tag hole as shown in the illustration SENSOR POSITION ...

Page 16: ... and connect the adapter to the printer Connect the USB parallel cable to the printer and host computer USB parallel cable s type depends on the printer which you purchase Switch on the printer The LED indicator should now lights up B1 USB PORT B1 USB PORT A1 POWER SLOT A1 POWER JACK A2 PLUG A2 THE SOCKET OF THE WALL B2 USB PORT B2 USB PORT ...

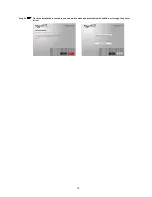
Page 17: ...ALLATION Step 02 The wizard will then ask you to make sure your USB and power cables are connected and that the power is turned on Then click NEXT Step 03 The next screen you will see is Install the LabelPro Software and Windows driver Click NEXT to continue Note If the Super Wizard program did not run automatically you can either turn on the Auto run setting for your CD DVD driver or double click...

Page 18: ... you will see Installation completed Click NEXT to continue Step 05 You can also print a test label If don t print a test label the screen display as step 6 Note If you need more resources tools or reference documents you can also find them on Super Wizard CD Just click Other Choices on the Welcome Screen to access the files ...

Page 19: ...15 Step 06 Once the installation is complete you can start to make and print labels with LabelPro or through the printer driver ...

Page 20: ...1 Click OTHER CHOICES to next screen and select PRINTER DRIVERS Step 02 Click INSTALL SEAGULL SCIENTIFIC WINDOWS DRIVER to next screen and click NEXT Step 03 Select I accept the terms in the license agreement and click Next then click Finish to step 4 ...

Page 21: ... printer drivers and click Next Step 05 With a USB connection search models such as the right diagram printer device Specify your printer model and click Next Step 06 Enter the printer name you can use default then click Next to display as right diagram Click Finish button to start installation ...

Page 22: ...18 Step 07 Driver installation completed ...

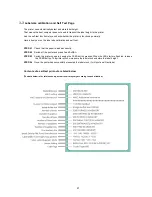
Page 23: ...re using individual labels pressing the FEED button will move only one label If the label does not stop at the correct position please run the auto calibration See Section 3 2 for the label size calibration function on the label stock LED Indicators LED indicator Status Description Green Standby mode The printer is ready for operation Red Orange Error mode The printer has detected an error See Sec...

Page 24: ...printing mode 1 To work in thermal transfer mode load a ribbon 2 Alternatively select the direct thermal printing mode First 2 beeps than 3 beeps Memory Error The memory is full The printer prints the message File System full Delete unnecessary data from memory Unable to find file The printer prints the message File Name Not found Use the X4 command to print all files Then check whether the files ...

Page 25: ...test STEP 01 Check that the paper is loaded correctly STEP 02 Switch off the printer and press Feed button STEP 03 Switch the printer on again keeping the FEED button pressed When the LED starts to flash red release the FEED button The printer will now measure the label stock and store the label height STEP 04 Once the printer has successfully measured the label stock it will print a self test lab...

Page 26: ...ingle beep Release FEED key when heard the 3 rd beep STEP 2 Make sure Printer ready for print a label STEP 3 Send a label or commands which met problem to the printer STEP 4 Printer will print out a label with letters and numbers please take a picture on them and send us by email To cancel get out of the Dump Mode please press the FEED key and then the printer will automatically print OUT OF DUMP ...

Page 27: ...lifespan of the print head Cleaning Steps Here is how you clean the print head 1 Switch off the printer 2 Open the printer cover 3 Release the printing mechanism and lift it 4 Remove the ribbon 5 To remove any label residue or other dirt from the print head see blue arrow please use a soft lint free cloth dipped in alcohol NOTE The print head should be cleaned once a week Please make sure that the...

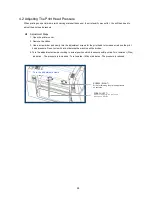
Page 28: ...tment screws for the print head to increase or reduce the print head pressure Do not screw it hard otherwise the machine will be broken 4 Turn the adjustment screws according to actual position which is unsuccessful printed Turn towards Plus indicates The pressure is increased Turn towards Minus indicates The pressure is reduced Turn the adjustment screws SCREW RIGHT Screw for adjusting the print ...

Page 29: ...positioned parallel to the paper feed roller Adjustment Methods 1 To move the print head in direction A as indicated by the blue arrow turn the adjustment wheel anticlockwise see arrow 1 2 To move the print head in direction B as indicated by the blue arrow turn the adjustment wheel clockwise see arrow 2 Direction A Direction B Turn the adjustment wheel ADJUSTMENT WHEEL PRINT HEAD ...

Page 30: ...bon residue Check for errors in the application software Check the ribbon for wrinkles Check the power supply Run a self test Section 3 2 and check the test print pattern to see whether the print head prints over the entire width of the medium Check the quality of the print medium The printed image is positioned incorrectly or a label is missed out during printing Run the Label size calibration fu...

Page 31: ...PC E with EAN 2 or 5 digit extension Interleaved 2 of 5 I 2 of 5 Interleaved 2 o f 5 with Shipping Bearer Bars Codabar Code 128 subset A B C EAN 128 RPS 128 UCC 128 UCC EAN 128 K Mart Random Weight Postnet ITF 14 China Postal Code HIBC MSI Plessey Telepen FIM GS1 DataBar German Post Code Planet 11 13 digit Japanese Postnet Standard 2 of 5 Industrial 2 of 5 Logmars Code 11 ISBT 128 Code 32 2 D Bar ...

Reviews: