


9
Menu
Operation
NOTE:
When
you
initially
use
the
TV,
you
will
see
the
“
First
Time
Installation
”
menu
as
below:
You
can
select
“Country”
and
“Language”(OSD
display
language),
When
you
have
selected,
press
ɼɽ
buttons
to
select
“O
K
”,
and
press
O
K
button
to
start
auto
search.
The
TV
will
start
searching
from
the
lowest
frequency(You
can
press
MENU
to
cancel
the
auto
search.).
When
it
finds
a
station,
it
will
automatically
store
this
in
the
first
location
and
move
to
the
next.
When
Autosearch
is
complete,
the
TV
will
display
the
first
station
found.
If
you
want
to
change
the
order
of
the
programs,
you
could
use
the
"Program
Edit"
function
to
change(see
page
15).
1.
Press
VOL
+
/-
to
adjust
the
volume.
2.
If
you
want
to
switch
the
sound
OFF,
press
the
MUTE
3. You
can
cancel
this
function
by
pressing
MUTE
or
VOL
+
button.
B
asic
TV
operation
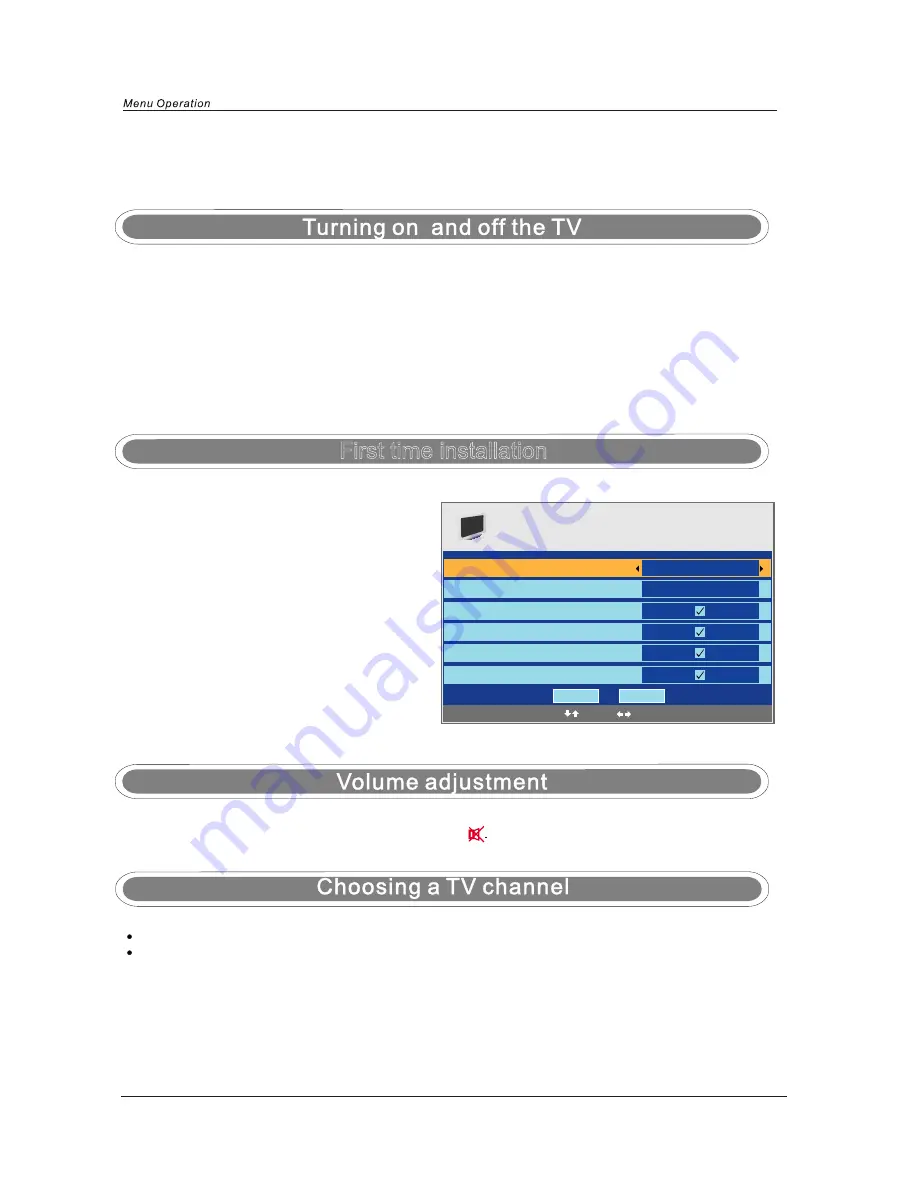
First
time
installation
First
Time
Installation
Country
Language
Delete Analog
Program
Analog
Program
Search
Delete
Digital
Program
Digital
Program
Search
U
K
English
O
K
Cancel
Select
Adjust
1.
Using
the
CH
+
/-
on
the
front
panel
or
PROG
+
/-
on
the
remote
control.
Press
CH
+
/PROG
+
to
increase
channel
number.
Press
CH-/PROG-
to
decrease
channel
number.
2
.
Using
0-9
digital
buttons
and
-/--
button
Press
-/--
button,
then
the
screen
will
display
“-”,
press
again
it
will
become
“-
-”.
When
it
displays
“-”,
you
should
then
press
a
unmber
of
0-9
to
play
the
channel
you
desired
;
When
it
displays
“-
-”,
you
should
then
press
two
unmbers
to
play
the
channel
you
desired.
TURN
ON
LCD
TV
TURN
OFF
LCD
TV
2.Press
the
POWER
OFF
button
on
the
handset
to
switch
off
the
from
the
Power
Supply.
1.Connect
power
cable
to
mains
supply
and
turn
on
the
power
by
using
the
“ Toggle
Switch”
at
the
back
of
the TV
on
the
right
hand
side. The
standby
indicator
on
the
front
of
the
TV
will
light
up
in
Blue.
2.Use
the
POWER
button
on
the
front
of
the TV
or
the
STAND
BY
button
on
the
handset
to
turn
on
the TV
,
the
blue
light
will
extinguish.
1.Press
the
POWER
button
on
the
front
of
the TV
or
the
STAND
BY
button
on
the
handset
to
turn
the TV
off
into
standby
mode,
the
standby
indicator
will
light
blue.


