


ENGLISH
9
2. LISTENING TO SOURCES OVER THE PLC (CD,
TAPE, CDR, DVD, TV, VCR1, DSS OR AUX1)
To listen to these sources, the ZR6001 must be
connected to the unit and set accordingly. For
details, see the ZR6001 User’s Guide.
1.
Press the button of the desired source.
2.
Operate the source with the PLAY, STOP,
PAUSE, , ,
and
buttons.
3. LISTENING TO SOURCES CONNECTED TO EXT
INPUT
1.
Press the
EXT.
button.
2.
Operate the unit connected to the EXT INPUT
jack on the rear panel.
LISTENING OVER THE PLC
Check the settings of the ZR6001.
Using the OSD menu system of the ZR6001, set
“MULTI PLC SERVER” to “ON”.
For details, see the ZR6001 User’s Guide.
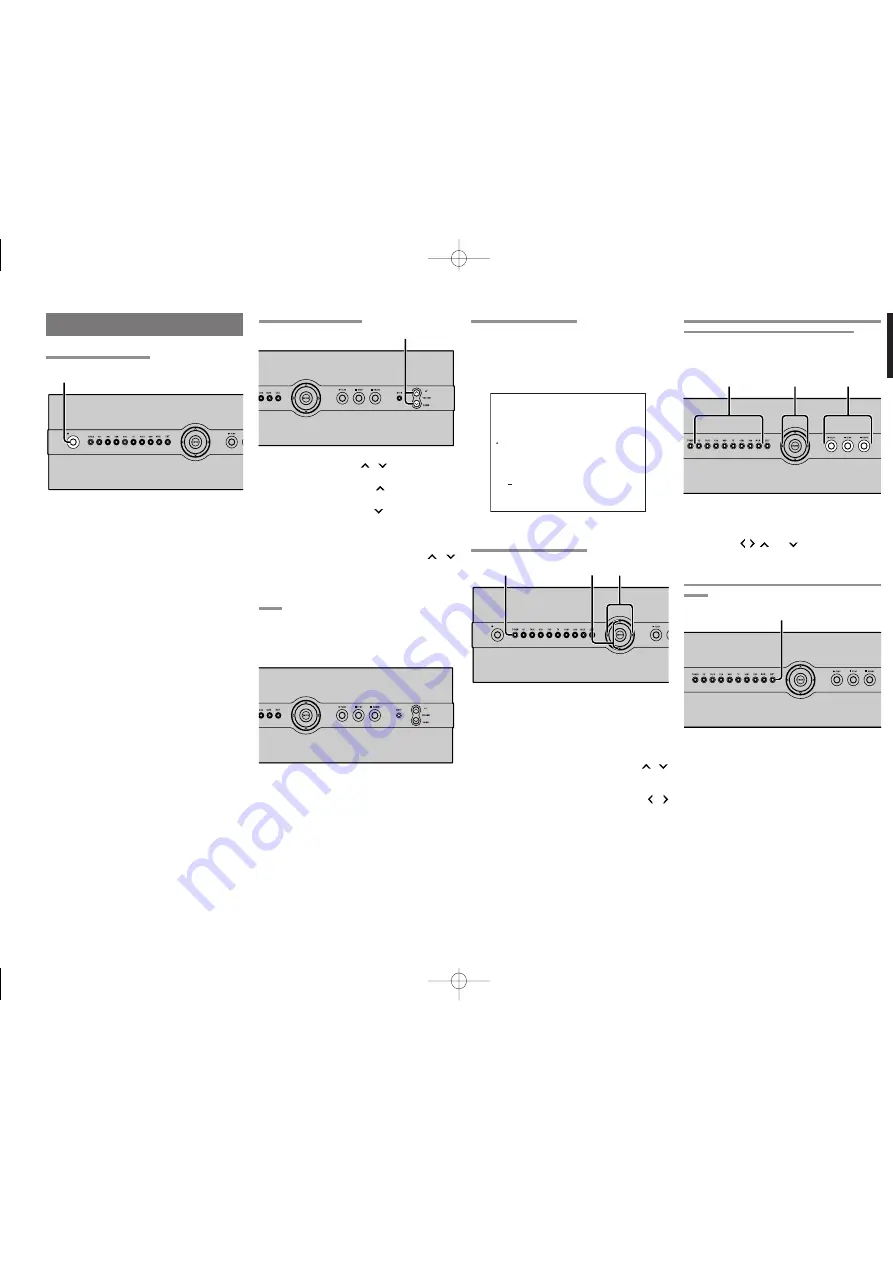
ZR6001 ON SCREEN DISPLAY MENU SYSTEM
1. LISTENING TO THE TUNER
1.
Press the
TUNER
button.
2.
To switch between FM and AM, press the
TUNER
button again.
3.
To select a station frequency, use the
/
buttons.
4.
To select a preset station, use the /
buttons. (With the ZR6001, this works only
when stations have been preset.)
BASIC OPERATION
TURNING THE POWER ON
1.
Press the
POWER
button to turn the power
ON.
When the power turns ON, the ZC4001
resumes the same status that existed when
power was turned OFF the last time.
2.
Press the
POWER
button again to set the
ZC4001 on standby.
Caution:
Power to the ZC4001 is always ON (standby
state) while the AC power cable is connected to a
wall electrical outlet.
To completely shut OFF the power, unplug the
AC power cable from the wall electrical outlet.
However, if the AC power cable is left unplugged
for an extended period of time, the clock resets
and the time must be set again.
1. 2.
STANDBY
POWER ON/STANDBY
ON/STANDBY
1
.
ADJUSTING THE VOLUME
1.
Press the VOLUME
/
buttons to adjust
the volume.
Pressing the VOLUME
button increases
the volume.
Pressing the VOLUME
button decreases
the volume.
Volume can be adjusted in the (Min.) 01 -
(Max.) 79 range.
Pressing and holding the VOLUME
/
buttons increases or decreases the volume
rapidly.
MUTE
Pressing the
MUTE
button temporarily mutes the
sound from the speakers.
Pressing the
MUTE
button again cancels the mute
and restores the original volume level.
1
.
STANDBY
STANDBY
POWER
POWER ON/STANDBY
ON/STANDBY
1. 2.
4.
3.
1
.
1
.
1.
9 MU L T I
P L C
MU L T I
CONN E C T I ON MOD E :
AU T O
H I GH AUD I O QUA L I T Y
H I GH R E L I AB I L I T Y
GP
I D S E T T I NG : S T AR T
MA I N
E X I T
P L C S E R V E R : ON
1
.
2.
1.
2.
1.
1
.
ZC4001U DFU̲01̲ENG
06.3.30, 9:10 AM
Page 9
Adobe PageMaker 6.5J/PPC
All manuals and user guides at all-guides.com


