background image

ENGLISH

8

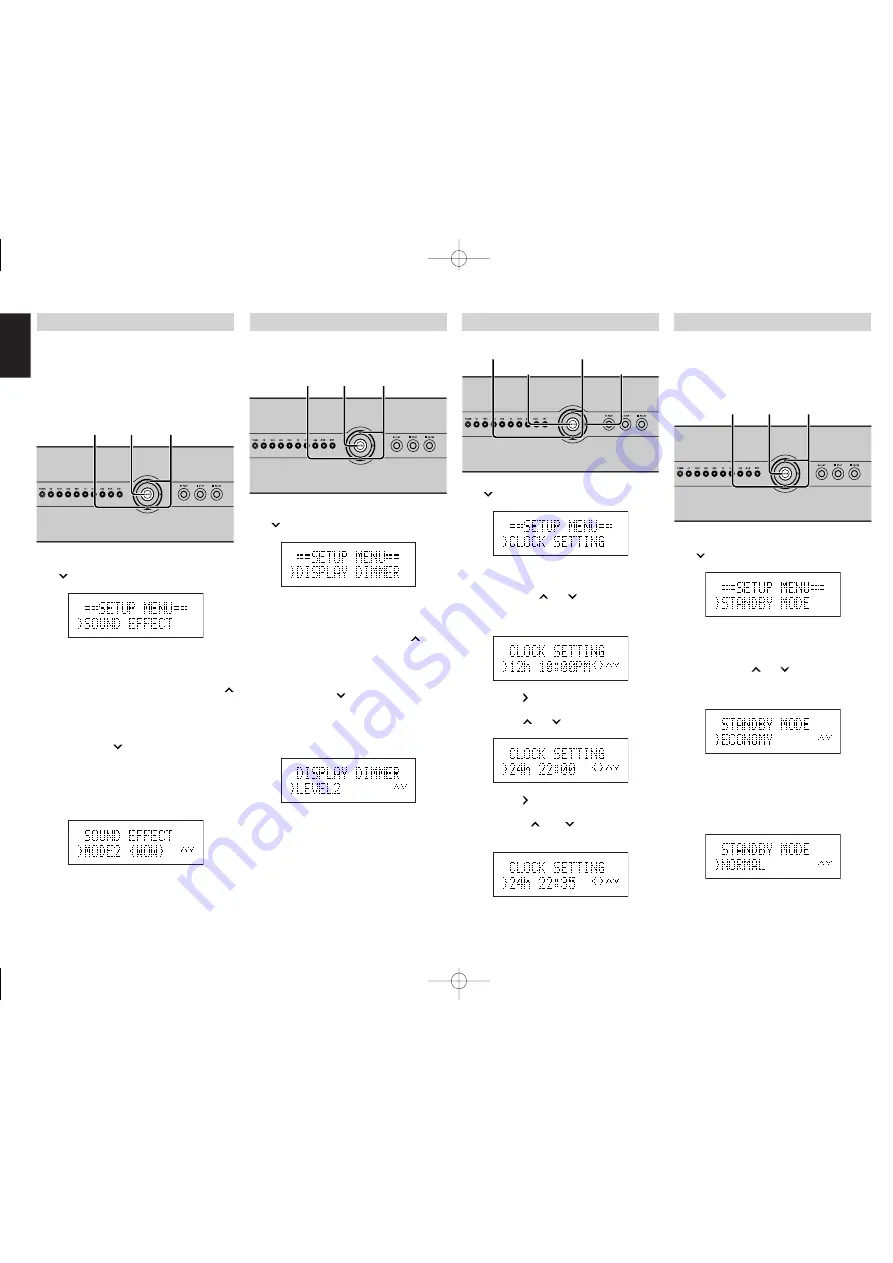
STANDBY MODE SETTING

The ZC4001 has two Standby Modes. The
Standby Mode is set as follows.
ECONOMY: This is a low power consumption
mode. The clock is not displayed.
NORMAL: This is the normal standby mode. The
clock is displayed.

1.

Press the 

ENTER

 button once, then press the

 button six times.

2.

Press the 

ENTER

 button again.

3.

Each time the 

 and 

 buttons are pressed,

the Standby Mode switches between

ECONOMY

” and “

NORMAL

”.

When  “

ECONOMY

” is set as the Standby

Mode, the time is not displayed when the unit
is on standby.
Also, the Wake Up Timer cannot be set in the
Economy mode.

4.

Press the 

ENTER

 button to return to the

normal display.

1. 2. 4. 3.

1.

1

.

CLOCK SETTING

The time is set as follows.

1.

Press the 

ENTER

 button once, then press the

 button five times.

2.

Press the 

ENTER

 button again.

3.

Each time the 

 and 

 buttons are pressed,

the clock switches between the 12-hour and
24-hour display.

4.

Press the   button to get the hour setting.

5.

Press the 

 and 

 buttons to set the hour.

6.

Press the   button to get the minutes setting.

7.

Press the 

 and 

 buttons to set the

minutes.

8.

Press the 

ENTER

 button to start the clock and

return to the normal display.

1. 2. 8.

4. 6.

3. 5. 7.

1.

1

.

DISPLAY DIMMER SETTING

The brightness of the FL display can be adjusted.
The display darkens in the order of OFF 

LEVEL1 

 LEVEL2 

 LEVEL3.

1.

Press the 

ENTER

 button once, then press the

 button four times.

2.

Press the 

ENTER

 button again.

3.

Select a dimmer level. Each time the 

 button

is pressed, the brightness of the FL display
changes in the order of
OFF 

 LEVEL1 

 LEVEL2 

 LEVEL3 

OFF.
Each time the 

 button is pressed, the

brightness of the FL display changes in the
order of
OFF 

 LEVEL3 

 LEVEL2 

 LEVEL1 

OFF.

4.

Press the 

ENTER

 button to return to the

normal display.

1. 2. 4. 3.

1.

1

.

SOUND EFFECT SETTING

The Sound Effect mode is set as follows: Sound
dynamics increase in the order of MODE1 

MODE 2 

 MODE3.

Setting the NIGHT MODE compresses the
dynamic range .
This softens loud passages such as sudden
explosions, to help prevent disturbing others late
at night.

1.

Press the 

ENTER

 button once, then press the

 button three times.

2.

Press the 

ENTER

 button again.

3.

Select a Sound Effect mode. Each time the 
button is pressed, the Sound Effect mode
changes in the order of
OFF 

 MODE1 

 MODE2 

 MODE3 

NIGHT MODE 

 OFF.

Each time the 

 button is pressed, the Sound

Effect mode changes in the order of
OFF 

 NIGHT MODE 

 MODE3 

 MODE2

 MODE1 

 OFF.

WOW is activated in all three Sound Effect
modes: 1, 2 and 3.

4.

Press the 

ENTER

 button to return to the

normal display.

1. 2. 4. 3.

1.

1

.

ZC4001U DFU̲01̲ENG

06.3.30, 9:10 AM

Page 8

Adobe PageMaker 6.5J/PPC

All manuals and user guides at all-guides.com

all-guides.com

Summary of Contents for ZC4001U

Page 1: ...Model ZC4001 User Guide Audio Client ZC4001U DFU 00 cover 06 3 30 9 09 AM Page 5 Adobe PageMaker 6 5J PPC All manuals and user guides at all guides com a l l g u i d e s c o m...

Page 2: ...le for compliance could void the user s authority to operate the equipment IMPORTANT SAFETY INSTRUCTIONS READ BEFORE OPERATING EQUIPMENT This product was designed and manufactured to meet strict quali...

Page 3: ...nvenience receptacles as this can result in a risk of fire or electric shock 19 Object and Liquid Entry Never push objects of any kind into this product through openings as they may touch dangerous vo...

Page 4: ...ON 4 CONNECTIONS 5 PRECAUTIONS CAUTIONS ON INSTALLATION For heat dispersal leave at least 20 cm 8 inch of space between the top back and sides of this unit and the wall or other components Do not obst...

Page 5: ...ines The ZC4001 demodulates the sent signals and converts them back to analog signals If the condition of the power line degenerates because of the effects of noise from other devices or for other rea...

Page 6: ...SOURCE buttons These buttons are used to switch the source of ZR6001 When the EXT button is pressed the source switches to the EXT INPUT jack on the rear panel c Cursor ENTER buttons These buttons are...

Page 7: ...ons as a remote control signal receptor and therefore it can be operated with the system remote controller RC5500SR etc of other Marantz products Remote controllable range The distance between the tra...

Page 8: ...distance of the power line between the ZC4001 and ZR6001 is very long audio data may not be received or may skip At the time of purchase all ZC4001 and ZR6001 are set to the same Group ID If used wit...

Page 9: ...TEM ZR6001 ON SCREEN DISPLAY MENU SYSTEM ZR6001 ON SCREEN DISPLAY MENU SYSTEM 1 Select 9 MULTI PLC in the SETUP MAIN MENU with the or cursor buttons and press the ENTER button 2 Select GP ID SETTING w...

Page 10: ...n to the normal display 1 2 4 1 3 1 WAKE UP TIMER The Wake Up Timer outputs an audio alarm at the set time The volume level of the alarm can be user set 1 Press the ENTER button once then press the bu...

Page 11: ...ay can be adjusted The display darkens in the order of OFF LEVEL1 LEVEL2 LEVEL3 1 Press the ENTER button once then press the button four times 2 Press the ENTER button again 3 Select a dimmer level Ea...

Page 12: ...s turned OFF the last time 2 Press the POWER button again to set the ZC4001 on standby Caution Power to the ZC4001 is always ON standby state while the AC power cable is connected to a wall electrical...

Page 13: ...ove it farther away from the ZC4001 and ZR6001 Using the OSD menu system set MULTI PLC SERVER of one of the ZR6001 unit to OFF See page 6 Replace all the batteries with new ones Press the AMP button o...

Page 14: ...143 U S A EUROPE Marantz Europe B V P O Box 8744 5605 LS Eindhoven The Netherlands Manufactured under license from Dolby Laboratories Dolby Pro Logic and the double D symbol are trademarks of Dolby La...

Reviews: