


T
roubleshooting
Information
HDMI Control F
unction
Playback
Connections
Getting Started
Specications
31
ENGLISH
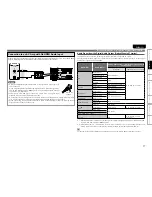
Setting items
Setting contents
Password
Sets the password for changing
the parental control level and
parental control country code
of BD and DVD.
Change :
Change the password.Use
0
~
9
button to enter a password
and then press
ENTER
button to nalize it.
The default setting is “0000”.
BD Rating Level
Set the parental level for
playing BD.
Level 0 ~ 254 :
Set the age allowed to play back media. Restricts playback
of discs with relevant parental control.
No Limit :
Do not restrict playing of BDs.
DVD Rating Level
Set the parental level for
playing DVD.
Level1 ~ 8 :
Set the parental level for playing DVD.
Lock All :
Restrict playing of all DVDs.
No Limit :
Do not restrict playing of DVDs.
Rating Country Code
Sets the standard country
parental control.
Apply the parental level of
the set country.
Argentina / Australia / Austria / Belgium / Brazil / Canada / Chile /
China/ Denmark / Finland / France / Germany / Hong Kong / India
/ Indonesia / Italy / Japan / Korea, Republic of / Malaysia / Mexico
/ Netherlands /New Zealand / Norway / Pakistan / Philippines /
Portugal / Russian Federation / Singapore / Spain / Switzerland
/ Sweden / Taiwan / Thailand / United Kingdom / United States /
Colombia / Greece / Ireland / Luxembourg / Poland
Others :
Inputs the country code. Refer to “Country Code List” (
v
page
52) and, with the virtual keyboard, use
d
,
f
,
0
,
1
and
ENTER
buttons to
input the country code.
DivX Registration
Display the DivX
®
registration
code.
Show Code :
Display the DivX
®
registration code
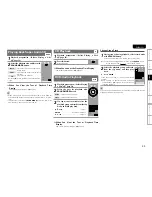
Set BD or DVD parental lock or display DivX
®
registration codes.
Ratings
Default settings are underlined.
Setting items
Setting contents
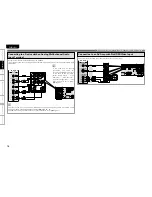
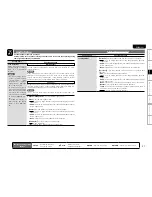
DHCP
Set how to perform network
conguration, automatically
or manually.
Since the factory default
setting is “On”, you do not
need to set items such as
the IP address if the DHCP
server of the broadband
router is set to “Enable”.
Congure a proxy server if
necessary.
G
On
H
:
Automatically congure the network by the DHCP function.
G
Off
H
:
When connecting to a network, which does not have the DHCP
function, manually congure the following network settings. For the
details of the settings, conrm with the provider or network administrator.
Use
0
~
9
button to enter a value and then press
ENTER
button to nalize
it.
IP Address
•
: Manually set the IP address of the UD9004.
Subnet Mask
•
: If the xDSL modem or terminal adaptor is directly
connected to the UD9004, enter the subnet mask notied by the
provider usually in a document. Usually, “255.255.255.0” is set.
•
Default Gateway
: If the device is connected to a gateway (router),
enter its IP address.
Primary DNS
•
: Enter the primary DNS.
Secondary DNS
•
: Enter the secondary DNS.
Proxy
Set to connect to the Internet
via a proxy server.
G
Off
H
Do not use a proxy server.
G
On (Address)
H
Set to connect to the Internet via a proxy server. Use the
address to specify the proxy server. Use
0
~
9
button to enter the address
and then press
ENTER
button to nalize it.
Port :
•
Use
0
~
9
button to enter a port number and then press
ENTER
button to nalize it.
G
On (Name)
H
Set to connect to the Internet via a proxy server. Specify the
proxy server using the domain name. Input the domain name with the
virtual keyboard, using
d
,
f
,
0
,
1
and
ENTER
buttons.
Port :
•
Use
0
~
9
button to enter a port number and then press
ENTER
button to nalize it.
IP Address
UD9004’s IP address is displayed. If the IP address cannot be obtained or
is not set, “···” is displayed. In that case, check that the connection and
network conguration is correct.
MAC Address
Displays the MAC address of the UD9004.
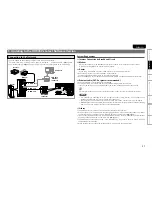
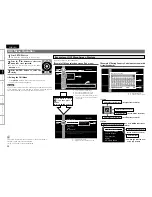
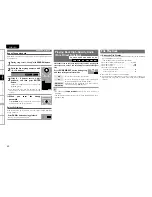
Set to connect to the Internet.
To obtain update support for your UD9004, you can download the latest rmware from
our website.
Make a network connect beforehand according to “Connecting to the Network” (
v
page
21).
Network Setup
Default settings are underlined.
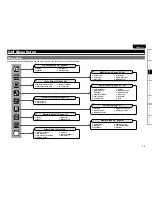
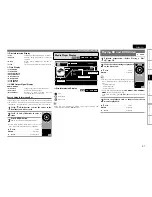
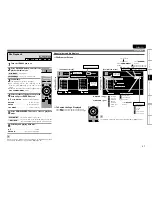
Setup
Remote control operation
buttons
SET UP
:
Displaying the menu
Cancel the menu
d f 0 1
:
Moves the cursor
(Up/Down/Left/Right)
ENTER
:Decision the setting
RETURN
:Return to previous menu