


70
Download Firmware for CPU (Mode 2)
1. Put the "CPU upgrade" folder into anywhere on your PC’s hard disc.
2. Connect PC and the unit with the RS-232C cable.
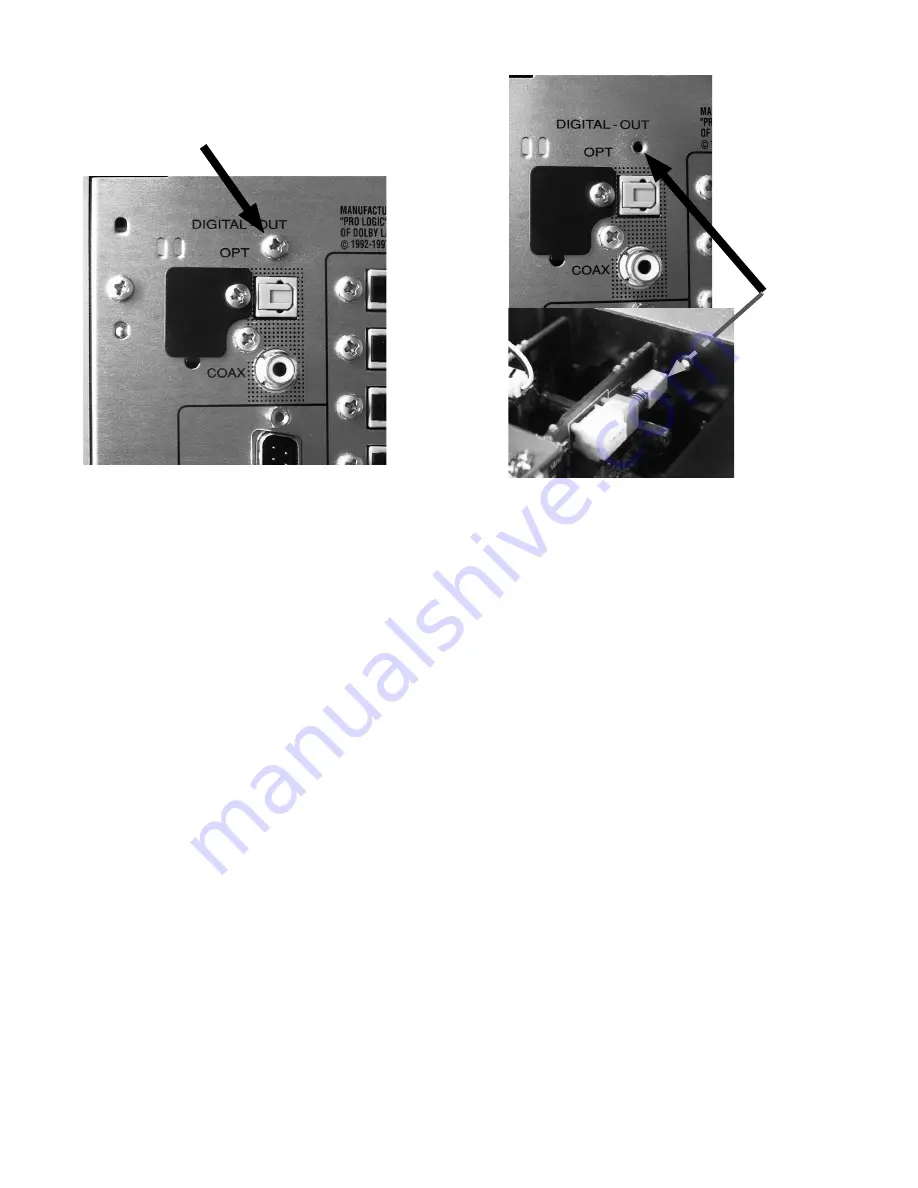
3. Remove the screw on the backside of the unit.(Fig.1)
(Fig.1)
(Fig.2)
4. Insert a thin rot to the screw hole and push the switch (SU02) inside to turn on the switch.(Fig.2)
5. Turn on the power of the unit. (Confirm that the stand-by LED lights in green so the unit is in the boot mode.)
6. Launch "H8Download.exe" on PC.
7.
Click
other files… button in the dialog box to specify the file (XXXX.mot) to be upload.
8.
Click
Connect button. If the connection with the H8 µ-com is successfully made, a dialogue box saying "Success to
the H8
micro processor connection" appears. If the connection fails, error message will appear.
9.
Click
Send button to start update.
10.
If the firmware is updated successfully, a dialog box saying "Finished the firmware program sending" appears.
11.
Click CLOSE button to close the application.
12.
Disconnect Mains power cord.
13.
Turn off the internal switch that has been turned on at step 3. Put on the screw.
14.
Turn on the unit.
Firmware Version Check
To check the versions of the firmware, see "Microprocessor (CPU), DSP Version and FLD Segment Check Mode" in
"SERVICE PROGRAM" section.
Summary of Contents for SR-12N1G
Page 25: ...39 40 PC04 QC08 QC04 QC02 QC01 QC03 QC07 QC06 QC05...
Page 29: ...45 QL08 QL09 QL12 QL10 QL13 QL15 QF04 QL04 QL18 QL20 QL16 QL11 QL07 QL17 PL04...
Page 30: ...46 QS02 QS01 PS04 DN07 QN04 QN06 DN05 P124 PP94 P824...
Page 32: ...48 QQ09 QQ04 QQ05 QQ06 QQ07 QQ08 QQ01 QQ03 QQ02 PQ04 PC64 QC60 QC61 P654...
Page 33: ...49 DF51 QF51 DF52 QF52 DF53 QF53 QF54 DF54 PF14 PP04 QP01...
Page 34: ...50 QX07 QX04 QX02 QX05 QX01 QX03 QX06 PX04 QS02 QS01 PS04...
Page 35: ...51 QS70 QS71 QS72 QQ71 QQ72 PS54 P814 Q802 Q801 Q811 Q803 Q812...
Page 36: ...52 DN09 DN06 DN08 P164 PY54...


